PF-1000
16
9.
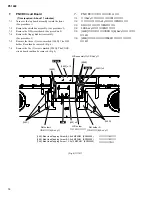
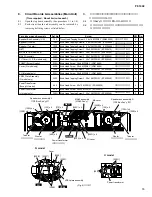
MA60 Circuit Board
(Time required : About 9 minutes)
9-1
Open the top board assembly. (See procedure 1-1 to 1-4)
9-2
Remove the MA60 assembly. (See procedure 8)
9-3
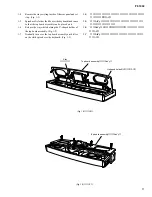
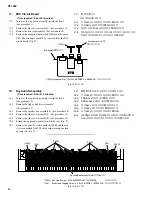
Remove the five (5) screws marked [1], the four (4) screws
marked [2] and the screw marked [3]. The MA60 circuit
board can then be removed. (Fig. 6)
MA60
[2]
[2]
[3]
[1]
[1]
[1]
(Fig. 6)
[1]:
Bind Head Tapping Screw-B 4.0x8 MFZN2Y (EP640410)
[2]:
Bind Head Tapping Screw-B 3.0x10 MFZN2Y (EP600220)
[3]:
Bind Head Tapping Screw-B 3.0x16 MFZN2Y (EP600390)
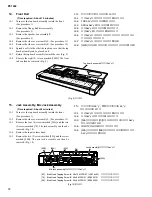
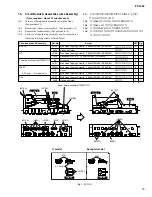
(Fig. 7)
[500c]
[500d]
VSEL
[500c]: Bind Head Screw 3.0x10 MFZN2BL (EG330380)
[500d]: Hexagonal Nut 3.0 MFZN2Y (VA211900)
10.
VSEL Circuit Board
(N model only)
(Time required : About 5 minutes)
10-1
Open the top board assembly. (See procedure 1-1 to 1-4)
10-2
Remove the VSEL plate assembly. (See procedure 8)
10-3
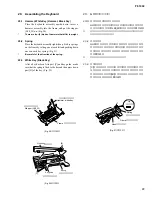
Remove the two (2) screws marked [500c] and the two
(2) nuts marked [500d]. The VSEL plate can then be
removed from the VSEL circuit board. (Fig. 7)
VSEL plate
9.
MA60シート
(所要時間:約9分)
9-1
屋根Ass yを開けます。
(1-1〜1-4項参照)
9-2
MA60 Ass yを外します。
(8項参照)
9-3
[1]のネジ5本、
[2]のネジ4本、
[3]のネジ1本を外し、
MA60
シートを外します。
(図6)
(図6)
+バインドBタイト
+バインドBタイト
+バインドBタイト
(図7)
Содержание PF-1000
Страница 37: ...PF 1000 37 Pattern side DM Circuit Board R330 DM 2NA V716590 2 4 パターン側 ...
Страница 38: ...PF 1000 38 Component side Pattern side SWX 2NA V716050 2 to DM CN10 SWX Circuit Board 部品側 パターン側 ...
Страница 41: ...PF 1000 41 Pattern side PNR Circuit Board PNR 2NA V91530 2 0 C C C C パターン側 ...

