TOOLS for P-250 Installation Guide 13
English
Setting up OMS
(For USB connection)
The OMS studio setup file for the P-250 is contained in the included
CD-ROM. This studio setup file is used for setting up OMS.
n
Before performing the following procedure, the OMS and USB MIDI
Driver should be installed.
1
Use a USB cable to connect the USB terminal of the computer (or
the USB hub) to the USB terminal of the P-250 and turn the P-250’s
power on.
2
Start the computer.
3
Insert the included CD-ROM into the CD-ROM drive of your Mac-
intosh computer.
The CD-ROM icon appears on the desktop.
4
Double-click on the CD-ROM icon, “OMS_”, and “OMS Setup for
YAMAHA.”
The file “P-250-USB” appear. Copy these to the hard disk on your
computer.
n
If you want to use a serial connection instead of using USB, please
copy and use the following files.
• “P-250-Printer”
Use this for serial connection via the printer port.
• “P-250-Modem”
Use this for serial connection via the modem port.
n
When using the serial connection for the File Utility, set the MIDI
Out:/ MIDI In: setting in the OMS Port Setup to MIDI Time Piece-
Printer, or MIDI Time Piece-Modem.
5
Double-click on the “P-250-USB” file to start the OMS Setup.
6
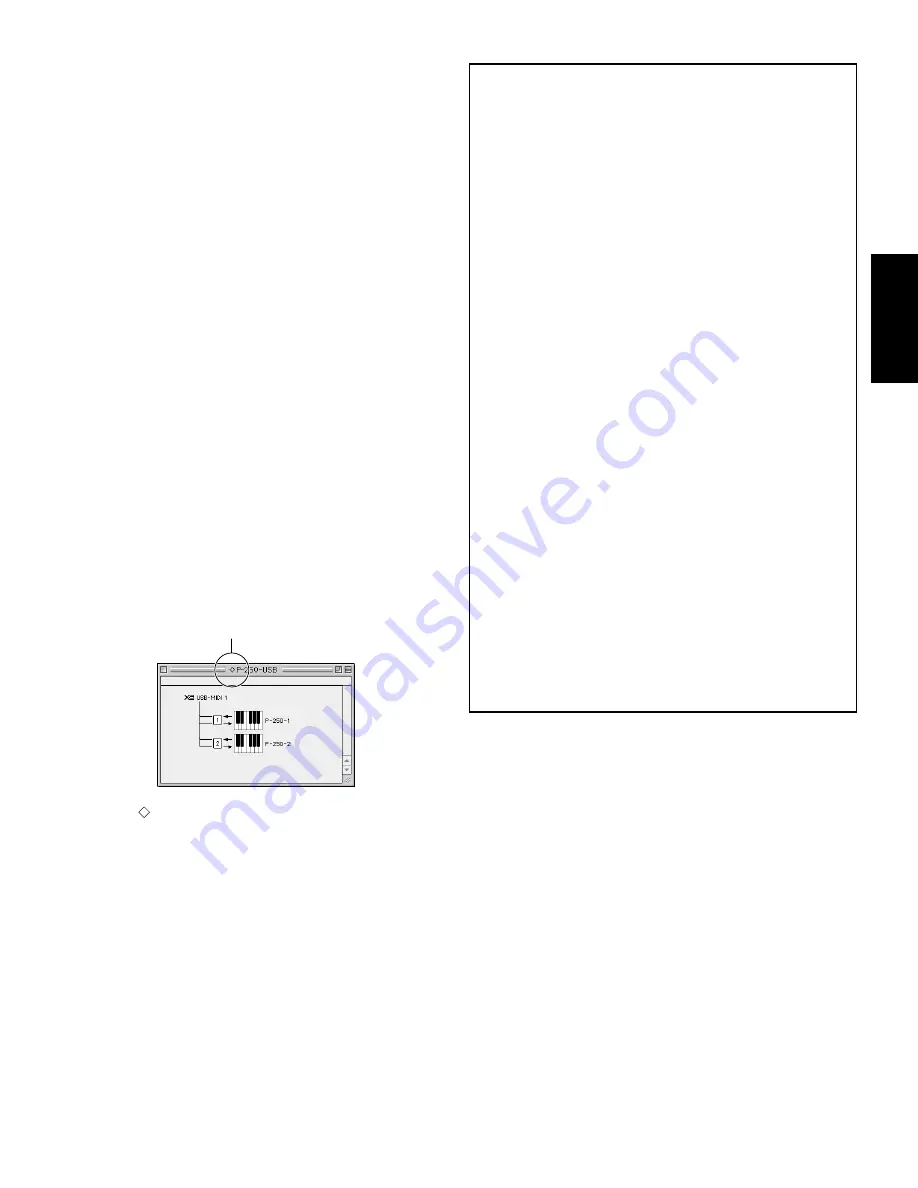
After starting the OMS Setup, the Studio setup file double-clicked in
step #5 opens.
n
If “
” is not indicated at the right of the setup file name, select
“Make Current” from the “File” menu and execute the save opera-
tion.
The OMS studio setup has been completed.
n
After the OMS studio setup above has been completed, your compu-
ter will recognize only the P-250 as a MIDI instrument. If you use an-
other MIDI instrument in addition to the P-250 or you add a second
P-250 to the existing system, you should create an original Studio
Setup file. For details, refer to the on-line manual supplied with the
OMS.
Indicates this setup is available
Depending on the Macintosh and operating system version that you
are using, the included studio setup file for the P-250 still may not
work even after you have performed the above steps. (MIDI trans-
mission and reception will not be possible even if the setup is valid.)
In this case, use the following procedure to re-create the setup file.
1
Connect the P-250 and Macintosh via USB or serial cable, and
turn on the power of the P-250.
2
Start up OMS Setup, and from the “File” menu, choose “New
setup.”
3
The OMS driver search dialog box will appear. Check [Modem]
or [Printer] if you are using a serial connection. Uncheck both of
these if you are using a USB connection.
4
Click the [Find] button to search for the device.
When the search has succeeded, the OMS Driver Setting dialog
box will display the following.
For a USB connection: USB-MIDI 1
For a serial connection: MIDI Time Piece-Modem (Printe_)
• If the device was found correctly, click the [OK] button to pro-
ceed.
• If the device was not found, re-check that the cable connec-
tions are correct, and repeat the procedure from step 1.
5
Make sure that the port is shown below the device that was found.
(In the case of the P-250, this will be a name such as USB-MIDI,
Modem, or Printer.) Check the check box for the port, and then
click the [OK] button.
6
A dialog box will appear, allowing you to name the file that will
be saved. Input the desired filename, and click [Save].
This completes OMS setup.
7
From the “Studio” menu, choose “Test,” and click the port icon.
If a channel sounds on the P-250, the system is operating cor-
rectly.
For details on using OMS, refer to OMS_2.3_Mac.pdf, included with
OMS.
Содержание P-250
Страница 15: ...TOOLS for P 250 Installation Guide 15 English MEMO ...
Страница 20: ...20 TOOLS for P 250 Installation Guide MEMO ...
Страница 21: ...TOOLS for P 250 Installation Guide 21 MEMO ...


