


En
72
SETUP
Setting sound program parameters (Sound Program menu)
CINEMA DSP parameters
DSP Level
Change the effect level (level of the sound field effect to be added).
You can adjust the level of the sound field effect while checking the
sound effect.
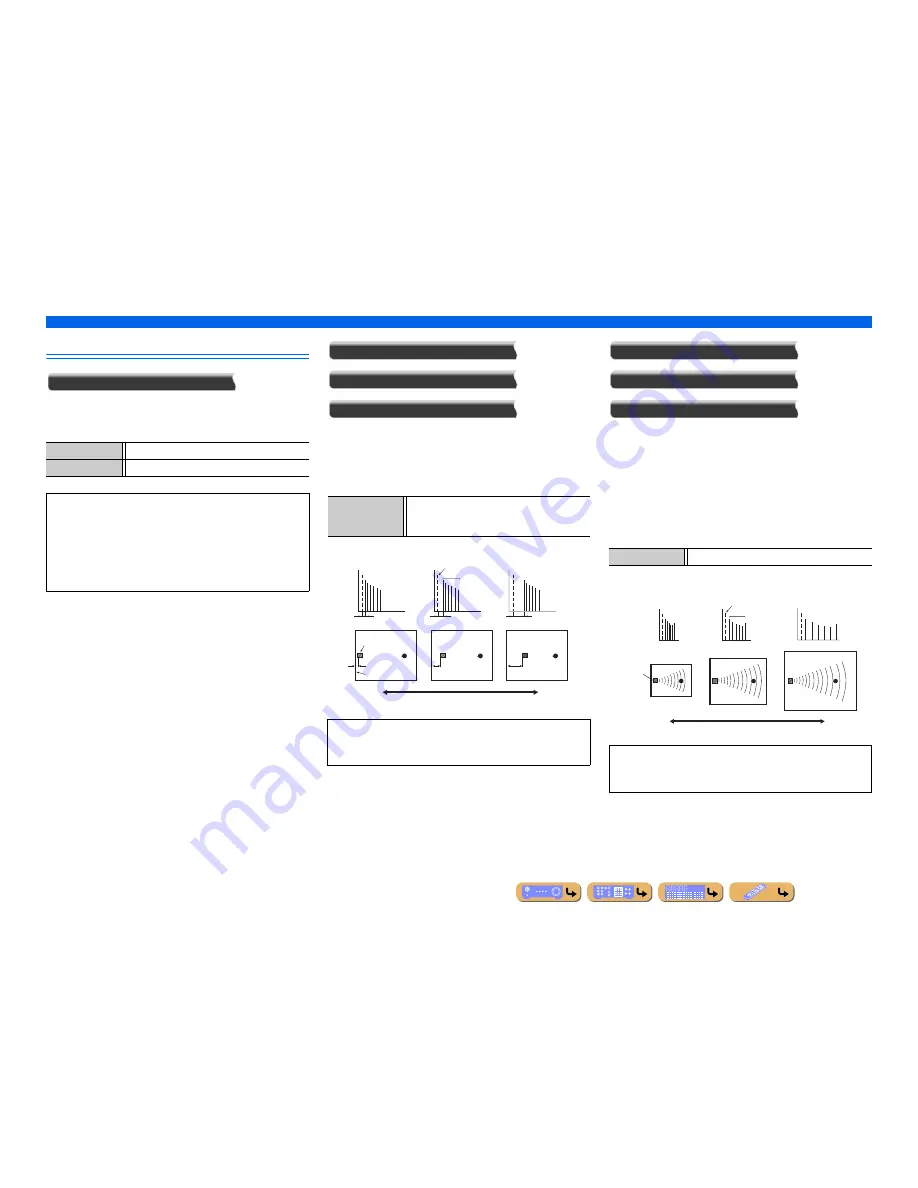
Initial Delay
Surround Initial Delay
Surround Back Initial Delay
Initial delay. Presence, surround, and surround back sound field
initial delay. Changes the apparent size of the sound field by
adjusting the delay between the direct sound and the first reflection
heard by the listener. The smaller the value, the smaller the sound
field seems to the listener.
Room Size
Surround Room Size
Surround Back Room Size
Room size. Presence, surround, and surround back room size.
Adjusts the apparent size of the sound field. The larger the value,
the larger the surround sound field becomes. As the sound is
repeatedly reflected around a room, the larger the hall is, the longer
the time between the original reflected sound and the subsequent
reflections. By controlling the time between the reflected sounds,
you can change the apparent size of the virtual venue. Changing
this parameter from one to two doubles the apparent length of the
room.
Adjustable range
-6 dB to 0 dB to +3 dB
Default setting
0 dB
Adjust “DSP Level” as follows:
•
The effect sound is too soft.
•
There are no differences between effects of the sound programs.
→
Increase the effect level.
•
The sound is dull.
•
The sound field effect is added too much.
→
Reduce the effect level.
Adjustable range
1 to 99 ms (Initial Delay)
1 to 49 ms (Surround Initial Delay and Surround Back
Initial Delay)
When you adjust the initial delay parameters, we also
recommend that you adjust the corresponding room size
parameters likewise.
Source sound
Delay
Audio source
Le
v
el
Early
reflections
Time
Large value = 99 ms
Reflection face
Time
Delay
Le
v
el
Time
Delay
Small value = 1 ms
Le
v
el
Adjustable range
0.1 to 2.0
When you adjust the room size parameters, we also recommend
that you adjust the corresponding initial delay parameters
likewise.
Le
v
e
l
Time
Le
v
e
l
Time
Le
v
e
l
Time
Audio source
Early
reflections
Large value = 2.0
Small value = 0.1
Source sound
Содержание HTR-6063
Страница 1: ...Owner s Manual AV Receiver English for Oceania ...
Страница 114: ... 2010 Yamaha Corporation YC514A0 OMEN2 ...


