background image


 PLEASE READ CAREFULLY BEFORE PROCEEDING 


* Please keep these precautions in a safe place for future reference.


 WARNING


Always follow the basic precautions listed below to avoid the possibility of serious injury or even death from electrical shock, short-
circuiting, damages, fire or other hazards. These precautions include, but are not limited to, the following:


• Do not open the instrument or attempt to disassemble the internal parts or 

modify them in any way. The instrument contains no user-serviceable 
parts. If it should appear to be malfunctioning, discontinue use 
immediately and have it inspected by qualified Yamaha service personnel. 

• Do not expose the instrument to rain, use it near water or in damp or wet 

conditions, or place containers on it containing liquids which might spill 
into any openings.

• If the AC adaptor cord or plug becomes frayed or damaged, or if there is a 

sudden loss of sound during use of the instrument, or if any unusual 
smells or smoke should appear to be caused by it,  immediately turn off the 

power switch, disconnect the adaptor plug from the outlet, and have the 
instrument inspected by qualified Yamaha service personnel. 

• Use the specified adaptor (PA-5C, PA-D12 or an equivalent recommended 

by Yamaha) only. Using the wrong adaptor can result in damage to the 
instrument or overheating. 

• Before cleaning the instrument, always remove the electric plug from the 

outlet. Never insert or remove an electric plug with wet hands.

• Check the electric plug periodically and remove any dirt or dust which may 

have accumulated on it. 


PRECAUTIONS


 CAUTION


Always follow the basic precautions listed below to avoid the possibility of physical injury to you or others, or damage to the instrument 
or other property. These precautions include, but are not limited to, the following:


• Do not place the AC adaptor cord near heat sources such as heaters or 

radiators, and do not excessively bend or otherwise damage the cord, 
place heavy objects on it, or place it in a position where anyone could walk 
on, trip over, or roll anything over it. 

• When removing the electric plug from the instrument or an outlet, always 

hold the plug itself and not the cord.

• Do not connect the instrument to an electrical outlet using a multiple-

connector. Doing so can result in lower sound quality, or possibly cause 
overheating in the outlet. 

• Unplug the AC power adaptor when not using the instrument, or during 

electrical storms. 

• Before connecting the instrument to other electronic components, turn off 

the power for all components. Before turning the power on or off for all 
components, set all volume levels to minimum. Also, be sure to set the 
volumes of all components at their minimum levels and gradually raise the 
volume controls while playing the instrument to set the desired listening 
level.

• Do not expose the instrument to excessive dust or vibrations, or extreme 

cold or heat (such as in direct sunlight, near a heater, or in a car during the 
day) to prevent the possibility of panel disfiguration or damage to the 
internal components.

• Do not use the instrument near other electrical products such as 

televisions, radios, or speakers, since this might cause interference which 
can affect proper operation of the other products. 

• Do not place the instrument in an unstable position where it might 

accidentally fall over. 

• Before moving the instrument, remove all connected adaptor and other 

cables.

• When cleaning the instrument, use a soft, dry cloth. Do not use paint 

thinners, solvents, cleaning fluids, or chemical-impregnated wiping 
cloths. Also, do not place vinyl, plastic or rubber objects on the 
instrument, since this might discolor the panel or keyboard. 

• Do not rest your weight on, or place heavy objects on the instrument, and 

do not use excessive force on the buttons, switches or connectors. 

• Use only the stand/rack specified for the instrument. When attaching the 

stand or rack, use the provided screws only. Failure to do so could cause 
damage to the internal components or result in the instrument falling over. 

• Do not operate the instrument for a long period of time at a high or 

uncomfortable volume level, since this can cause permanent hearing loss. 
If you experience any hearing loss or ringing in the ears, consult a 
physician.


■ 


REPLACING THE BACKUP BATTERY


• This instrument contains a non rechargeable internal backup battery which 

permits internal data to remain stored even when the power is off. When 
the backup battery needs replacing, the message “Battery voltage is low” 
will display in the LCD. When this happens, immediately back up your data 
(using an external device such as the floppy disk-based Yamaha MIDI Data 
Filer MDF3), then have qualified Yamaha service personnel replace the 
backup battery. 

• Do not attempt to replace the backup battery yourself, in order to prevent 

the possible serious hazards. Always have qualified Yamaha service 
personnel replace the backup battery. 

• Never place the backup battery in a location that a child can reach, since a 

child might accidentally swallow the battery. If this should happen, consult 
a physician immediately.


■ 


SAVING USER DATA


• Always save data to a Memory Card (SmartMedia) frequently, in order to 

help prevent the loss of important data due to a malfunction or user 
operating error. 

• Save all data to an external device such as the Yamaha MIDI Data Filer 

MDF3, in order to help prevent the loss of important data due to a 
malfunction or user operating error. 

Yamaha cannot be held responsible for damage caused by improper use or 
modifications to the instrument, or data that is lost or destroyed. 

Always turn the power off when the instrument is not in use. 


(3)-6

Содержание DTXTREME

Страница 1: ...DRUM TRIGGER MODULE Owner s Manual Basic Section Owner s Manual Basic Section...

Страница 2: ......

Страница 3: ...e unit is operating as designed are not covered by the manufacturer s warranty and are therefore the owners responsibility Please study this manual carefully and consult your dealer before requesting...

Страница 4: ...ANT When connecting this product to accessories and or another product use only high quality shielded cables Cable s supplied with this product MUST be used Follow all installation instructions Failur...

Страница 5: ...he volume controls while playing the instrument to set the desired listening level Do not expose the instrument to excessive dust or vibrations or extreme cold or heat such as in direct sunlight near...

Страница 6: ...REME and its basic operations as well as how to use the main features of the instrument Reference Section Gives detailed explanations of how the DTXTREME is configured as a system and how to operate e...

Страница 7: ...stores up to 40 drum kits internally and up to 99 externally on Memory Card Also the DTXTREME comes with 60 preset drum kits Each trigger input can be set to play several MIDI note numbers simultaneo...

Страница 8: ...ol knobs on the DTXTREME front panel ensure accessibility to parameters shown in the LCD display Stereo outputs and 6 individual outputs that are convenient for sending a specific sound snare drum bas...

Страница 9: ...15 Attaching a Drum Trigger Pickup 19 Detaching a Drum Trigger Pickup 20 Connecting to Audio Equipment 20 Connecting to MIDI Equipment 22 Connecting to a Personal Computer 24 Power 26 DTXTREME Basics...

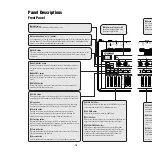
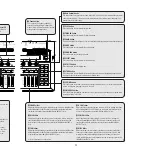
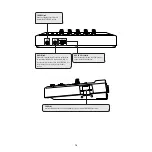
Страница 10: ...or point 8 BASS DEL button During song playback pressing this button activates or inactivates playback of the bass part During step recording it is used to delete data at the cursor point 9 OTHERS but...

Страница 11: ...bals or the output level to the INDIVIDUAL OUTPUT 5 jack MISC slider Adjust the volume for miscellaneous rhythm or percussion sounds other than snare and bass drums toms hi hats and ride crash cymbals...

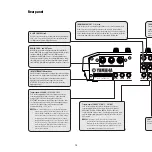
Страница 12: ...MIDI THRU can output redirect the same MIDI messages received at MIDI IN MIDI OUT can output MIDI messages generated in the DTXTREME such as a drum kit performance or operations using panel controls t...

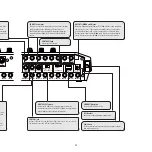
Страница 13: ...nd R jacks Outputs mixed audio signals from the DTXTREME to other audio equipment amp mixer or so on These outputs are unbalanced so you may need a pair of shielded cables with a 1 4 inch phone plug o...

Страница 14: ...ne output jacks on an external audio device to monitor CD MD or tape sounds from that device on the DTXTREME It is useful when you want to play with such audio sources AUX IN VOL control Adjusts the o...

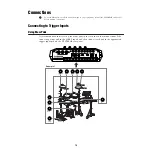
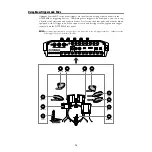
Страница 15: ...n connect each pad to the appropriate trigger input jack on the DTXTREME rear panel SNARE TOM1 TOM2 TOM3 TOM4 RIDE CRASH HI HAT KICK 1 2 3 4 5 6 7 10 11 12 13 14 15 16 9 8 IN OUT THRU MIDI OUTPUT L MO...

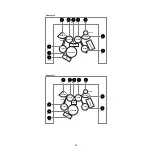
Страница 16: ...0 RHP80 TOM1 2 TOM2 3 RIDE 6 CRASH 7 TOM3 4 11 12 KICK 10 9 SNARE 1 HI HAT 8 HI HAT CONTROL Example 2 PCY80S PCY80S RS80 KP60 TP80S TP80S TP80S TP80S D T X T R E M E RHP120SD PCY10 HH60 TOM3 4 11 12 K...

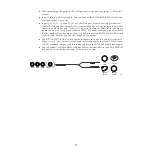
Страница 17: ...d Even if you connect a TP80S PCY80S or other pad with a rim switch the rim sound will not be output However if you connect an RHP80 100 120 SD using a stereo cable both the pad and rim sounds will be...

Страница 18: ...trigger input jack on the DTXTREME rear panel n Regarding trigger sensitivity a trigger input jack connected to the DT trigger should be configured for the drum trigger page 26 Reference Section SNARE...

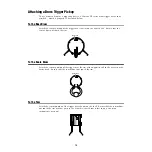
Страница 19: ...head Ensure that the sensor does not touch the rim To the Snare Drum Attach the sensor portion of the trigger near the rim at the opposite end to the player on the batter head Ensure that the sensor d...

Страница 20: ...ing mute When sticking the sensor back on remove old remnants of tape completely and then re attach it using new tape Such remnants may cause problems regarding trigger sensitivity no or bad triggerin...

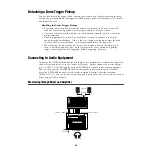
Страница 21: ...ddition connecting headphones to the PHONES jack does not mute sounds from the OUTPUT L MONO and R jacks n All audio output jacks are mono except the stereo PHONES jack Use a standard 1 4 phone plug f...

Страница 22: ...ernal MIDI devices using MIDI cables Through MIDI connections the DTXTREME can control external MIDI devices or conversely external MIDI devices such as a keyboard or sequencer can control play the DT...

Страница 23: ...do not connect more than 3 MIDI devices in series To connect more devices together consider using a MIDI THRU box to connect the devices in parallel Note that too long MIDI cables or too many THRU co...

Страница 24: ...er s serial port 2 DTXTREME s MIDI IN and OUT connected to an external MIDI interface that is connected to the computer s serial port Actual connection methods are different depending on the computer...

Страница 25: ...o the computer A USB to MIDI interface such as the Yamaha UX256 will let you connect the DTXTREME s MIDI IN and OUT Refer to the manual that comes with the interface for details about connections Comp...

Страница 26: ...riod Power On Sequence When all necessary connections trigger audio MIDI are complete turn down all volume controls for the DTXTREME and other audio equipment Turn on your system in the order MIDI mas...

Страница 27: ...EME 2 The DTXTREME displays the splash screen and then enters Drum Kit Play mode 3 Turn up the volume control on the audio equipment if it is connected to the DTXTREME 4 Adjust the volume balance in t...

Страница 28: ...ature CLICK TAP 4 Metronome Start Stop If you press this while holding down the SHIFT button you can use the Tap Tempo feature SHIFT Press this to access different functions assigned to buttons and sl...

Страница 29: ...um Kit Trigger Edit mode Set the pad sensitivity and output settings Enter Utility mode Set system MIDI and sequencer related settings Enter Song Job mode You can perform various song related tasks su...

Страница 30: ...sing a User Kit you need to define each pad type in the Type parameter in the TrgSens1 page of Drum Kit Trigger Edit mode Alternatively copy the trigger parameters to another User Kit using TrgCopy1 2...

Страница 31: ...selection page n This page always appears when you power up the DTXTREME 2 Select a Drum Kit number 3 Play the drums KIT P1 SONG P1 TEMPO BEAT CLICK MAPLE Horizon 107 4 4 PLAY KIT P1 SONG P1 TEMPO BE...

Страница 32: ...e your new Drum Kit as one of up to 40 User Drum Kits Position Sensing Some of the preset drum kits e g P2 are capable of position sensing Position sensing is a feature that simulates tonal difference...

Страница 33: ...a Song number n If you insert a memory card to the CARD slot which has a standard MIDI file mid saved in format 0 in the root directory you can select that MIDI file shown as C in the above display 3...

Страница 34: ...ody volume 6 Select a Drum Kit number n When you select a Preset Song the Drum Kit for that Song is selected automatically However you can then select a different Drum Kit if necessary 7 Play the drum...

Страница 35: ...po will automatically switch to the default tempo for the Song n The LED display is also used to indicate a tempo page 72 Reference Section 10 Stop Song playback In Song Record mode you can create you...

Страница 36: ...chnique 1 Start the click 2 Adjust the volume level of the click 3 Change the tempo of the click The Drum Kit Song page is displayed when PLAY button is pressed n The click can be used at any time but...

Страница 37: ...he click Setting and Changing the Click Sound You can change the voice used for the click in Utility mode pages UT13 to UT16 page 77 Reference Section You can also change the accent settings KIT P1 SO...

Страница 38: ...sound in solo 1 Mute each part of the Song Press the button for the part you wish to mute The LED will turn off 1 Rhythm part 2 Bass part 3 Other parts n If you press the same key again the muting for...

Страница 39: ...h hit of the pad from the start of the Song giving the result as a running average This is useful when checking the groove of all instruments in the drum kit 1 Enter Groove Check mode 2 Set the note l...

Страница 40: ...ing a new drum kit similar to existing one it s useful to select it for fast creation 2 Enter Drum Kit Voice Edit mode and use the Page and buttons to go to the Voice1 page 3 Select the pad for the dr...

Страница 41: ...or is GM compatible so it is also possible to assign GM sounds as explained below First enter Drum Kit Trigger Edit mode and go to the TrigMIDI2 page Select a channel other than 10 and assign a MIDI n...

Страница 42: ...63 far right 9 Adjust the volume balance of a 2 layer voice If the selected voice consists of two or more layers i e two or more different sounds you can adjust the relative volume levels of each laye...

Страница 43: ...ttons to go to the Voice4 page 12 Adjust the attack the time for the volume to rise from zero and the decay the time for the volume to fade to zero 1 Attack 2 Decay By adjusting the attack value you c...

Страница 44: ...ects In this case you need to set the type of insertion effect and its parameters in Drum Kit Effect Edit mode page 55 Reference Section 15 Adjust the effect level 1 Reverb send 2 Chorus send The reve...

Страница 45: ...put such as the input pad type sensitivity velocity settings Key On mode and so on 17 Save the new drum kit 18 Select the destination to which you wish to save the voice U1 to U40 or C1 to C99 then pr...

Страница 46: ...you can store up to 32 Chains in internal memory or 99 Chains on the Memory Card 2 Enter Chain Play mode n Each time you press the CHAIN button you will enter Chain Play mode or Chain Edit mode 3 Sele...

Страница 47: ...Jobs to help you create your own Songs This section gives simple explanations on how to record your real time performance 1 Go to the Drum Kit Song selection page n This page always appears when you...

Страница 48: ...specified measures until you stop it This mode is useful if you want to record a complicated rhythm dividedly n You can use the Step entry method that lets you record data in the specified divisions...

Страница 49: ...uantization is switched off your performance will be recorded without any timing corrections In this case you can also apply quantization to your recording later in Song Job mode 9 Start recording 10...

Страница 50: ...mode page 27 You can set the limit of the input level when you hit a pad and the velocity of the sound relative to that level TrgSens2 in Drum Kit Trigger Edit mode page 28 You can prevent notes from...

Страница 51: ...Edit mode page 39 You can set the DTXTREME to temporarily ignore trigger signals from the connected pads and controllers UT6 TrgByps in Utility mode page 73 The above features can also be switched on...

Страница 52: ...ff page 53 and InsFX page 55 in Drum Kit Effect Edit mode To use the reverb effect Reverb in Drum Kit Effect Edit mode page 54 To use the chorus effect Effect Localizer to off page 53 and Chorus page...

Страница 53: ...for that pad UT5 Learn in Utility mode page 73 When entering Drum Kit Trigger Edit or Voice Edit mode the last page you were editing can be recalled UT5 JumpRecnt in Utility mode page 73 Using MIDI De...

Страница 54: ...Transmission and Reception of MIDI Data The DTXTREME s tone generator can play back sounds when receiving performance or song data from an external MIDI device or keyboard and you can also record this...

Страница 55: ...N Yamaha Scandinavia AB J A Wettergrens Gata 1 Box 30053 S 400 43 G teborg Sweden Tel 031 89 34 00 DENMARK YS Copenhagen Liaison Office Generatorvej 8B DK 2730 Herlev Denmark Tel 44 92 49 00 FINLAND F...

Страница 56: ...String Guitar Percussion Division Yamaha Corporation 2000 Yamaha Corporation Printed in Taiwan...

Отзывы: