background image

UTILITY

DTX700  Reference Manual

38

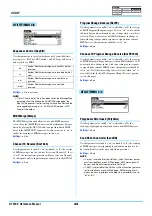
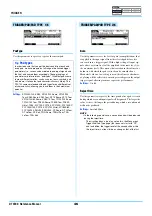
Auxiliary Output Selection (AuxOutSel)

Use this parameter to indicate where audio input via the [AUX 
IN] jack will be output.

Settings:

L&R+ph, phones

PlayCount

Use this parameter to activate (on) or deactivate (off) a two-mea-
sure lead in before a song starts playing.

Settings:

off, on

AutoPowerOff

Use this parameter to set the amount of time for which the 
DTX700 must be idle before it will turn off automatically. In 
addition to settings of 5, 10, 15, 30, 60, and 120 minutes, you can 
disable this function by selecting “off”.

Settings:

off, 5, 10, 15, 30, 60, 120

LCD Mode

Use this parameter to switch the screen display mode between 
normal (i.e., dark letters on a bright background) and reverse (i.e., 
the opposite).

Settings:

normal, reverse

UTILITY/MASTER E

Q

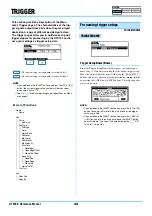
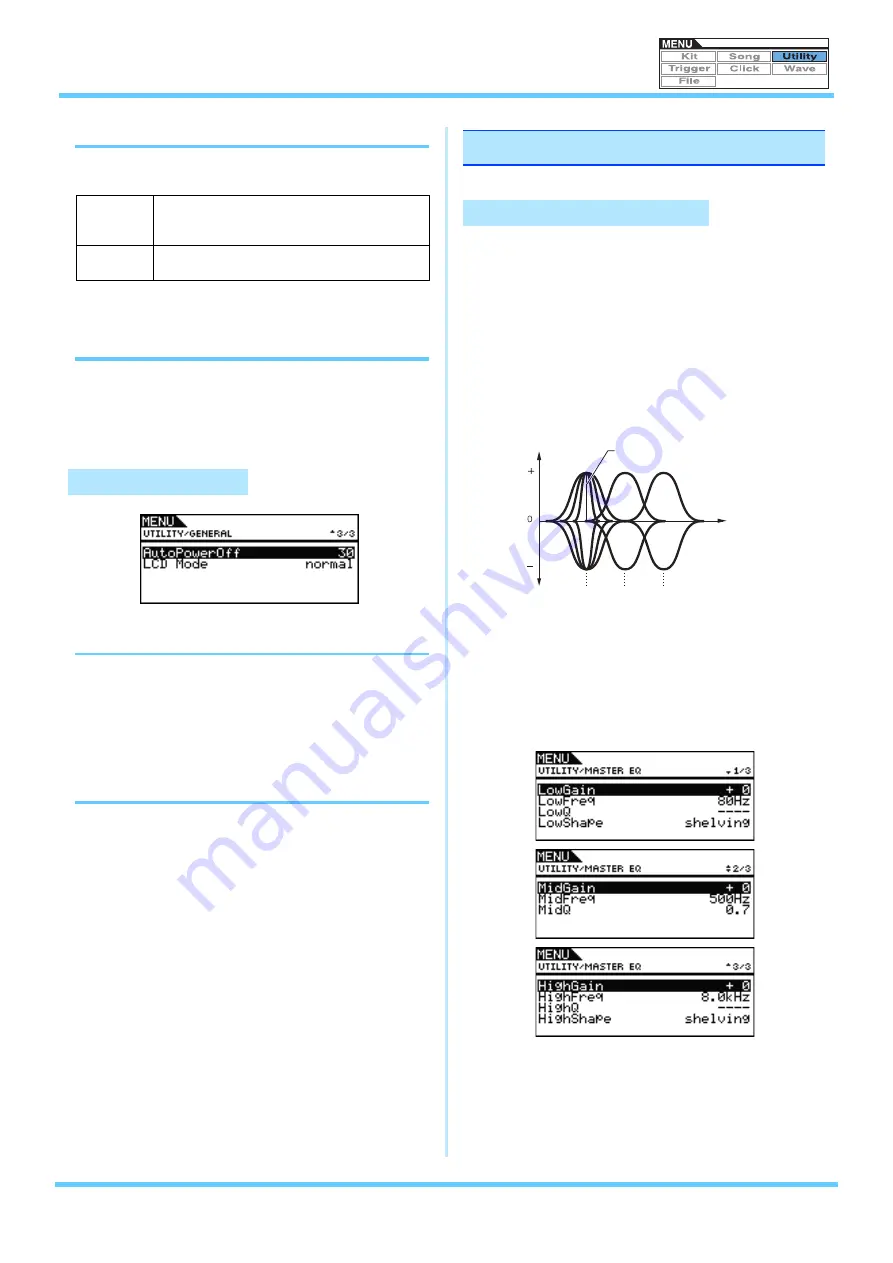
Setting the Master Equalizer

The parameters from the Menu area’s Utility/Master 
EQ page can be used to adjust the master equalizer 
that shapes the tone of voices, songs, and other 
audio output. In specific terms, this three-band mas-
ter equalizer allows the signal level to be freely 
boosted or cut around a center frequency specified 
for each of the bands. In addition, the “low” and 
“high” frequency bands can be set to either shelv-
ing or peaking type equalization.

NOTE

The settings on this page will change if you adjust the master 
equalizer from the Kit area (accessed by pressing the [KIT] 
and [F1] buttons).

Master equalization has no effect on audio input via the [AUX 
IN] jack 

(see page 7)

.

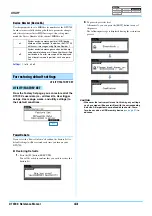
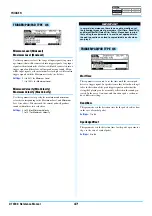
L&R+ph

The auxiliary-input audio will be output via the 
OUTPUT jacks ([L/MONO] and [R]) and the 
[PHONES] jack.

phones

The auxiliary-input audio will be output via the 
[PHONES] jack only.

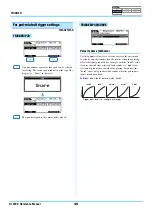
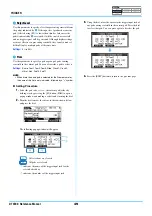
UTILITY/GENERAL  3/3

For master equalizer settings

UTILITY/MASTER EQ  1/5 to 5/5

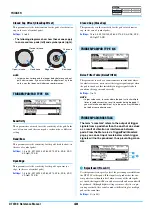
Gain

Low

High

Frequency (Hz)

Q

Three EQ bands

Mid

Содержание DTX700

Страница 1: ...nual enter a specific word in the search box then press the Enter key of your computer key board to call up the relevant section in this manual NOTE Make sure to check and download the latest version of the Adobe Reader from the following site http www adobe com products reader When using Adobe Reader click to return to the previous page view go to the next page view via the buttons in the toolbar...

Страница 2: ...uce a different trigger sig nal for each As their name suggests one zone pads produce only one signal irrespective of where they are struck Trigger input source Trigger input sources are named in accordance with the way in which the corresponding pad or pedal is struck or operated One zone pads producing a single trigger sig nal A mono pad such as the TP65 Single Zone Drum Pad or PCY65 Single Zone...

Страница 3: ...ignals It is the role of the DTX700 to collect and process these signals but the types of trigger signal handled will depend on which of the trigger input jacks is used for connection For the most up to date infor mation on the correspondence between pad types and DTX700 trigger input jacks please refer to the following web page http dtxdrums yamaha com Drum Kits Voices Upon the receipt of a trigg...

Страница 4: ...d for pads in the same way it is important to remember that each type plays in a different way and is configured using different parameters Voices The DTX700 comes preloaded with a vast library of drum sounds such as snares bass drums and cymbals together with a broad spectrum of percussion instrument sounds Also included are many pitched instruments such as piano xylo phone and guitar The term vo...

Страница 5: ...ve data is used within this manual in the same way as voice data or song data In contrast the term wave file is used to refer to data that has not yet been imported and is handled in the form of a file on a computer sampler or USB memory device Kit Makeup In terms of the DTX700 the term kit is used to refer to a collec tion of voices songs and waves assigned to the trigger input jacks q to 2 and t...

Страница 6: ...e DTX700 can apply effects to the tone generator s output using the following four effect units Variation Effect Variation effects allow you to sculpt your sound in a variety of different ways A specific type of variation effect can be selected for each kit and you can also specify the degree to which this effect is applied to each layer using the VarSend Dry Variation Send Level parameter from th...

Страница 7: ...g pages Compressor EQ The compressor is an effect commonly used to limit and compress the dynamics i e softness or loudness of an audio signal In the case of vocals guitar parts and other signals that have widely varying dynamics this effect essen tially squeezes the dynamic range making soft sounds louder and loud sounds softer Furthermore a compressor s attack and decay characteristics can be ad...

Страница 8: ...in response to the volume of the input signal Reverb Reverb effects model the complex reverberation produced by sounds within enclosed spaces In this way they add a natural sounding sustain which produces a feeling of depth and space Furthermore different types of reverb such as hall room plate and stage can be used to simulate the sound of acoustic environments of varying sizes and con structions...

Страница 9: ...tains effect types not included in the other categories Effect Type Var Cho Description G Chorus Rich deep chorus with complex mod ulation 2 Modulator Chorus effect allowing pitch and amplitude modulation to be adjusted for a more natural spacious tone SPX Chorus Enhances modulation and spacious ness using a 3 phase LFO Symphonic Multi stage modulation for a wider sounding chorus Ensemble Modulati...

Страница 10: ... the reverb density Early Ref This parameter is used to set the density of early reflections Depth This parameter is used to set the amplitude of the LFO wave that controls cyclic changes in phase modulation Detune This parameter is used to set the degree to which pitches are detuned Device This parameter is used to select one of a number of devices that distort the sound in different ways Diffuse...

Страница 11: ...h the high frequency EQ band is boosted or cut Height This parameter is used to set the height of the simu lated room Parameter name Descriptions HiAtk This parameter is used to set the amount of time that elapses before compression is fully applied in the high frequency band HiGain This parameter is used to set the output level of the high frequency band HiLvl This parameter is used to set the hi...

Страница 12: ...ter name Descriptions MidTh This parameter is used to set the input signal level at which the compressor starts to process the sound in the mid frequency band MixLvl This parameter is used to set how much of the effect sound is mixed back into the dry sound Mode This parameter is used to adjust the mode of oper ation of the phaser MoveSpeed This parameter is used to specify the amount of time that...

Страница 13: ...he drum trigger module from the storage device For details see the description of the File pages from the Menu area see page 57 S FTmHorn This parameter is used to set how long it takes for the high frequency horn to switch between fast and slow rotation speeds S FTmRotor This parameter is used to set how long it takes for the low frequency rotor to switch between fast and slow rotation speeds Spe...

Страница 14: ... pressing the dial you can move one level further into the Menu area To move back one step towards the top page press the EXIT button Parameter pages When you turn the dial on parameter type pages the cursor i e the inverted text moves up and down within the displayed list When you press the dial the cursor will zoom in on the value on the right In this condition you can turn the dial to change th...

Страница 15: ... s pads the tempo or speed at which they are played will not be affected by the kit s tempo setting Trigger Setup Link TrgSetupLink Use this parameter to specify the trigger setup to be used when the current kit is selected A trigger setup can be assigned to each different drum kit Select off if the currently selected drum kit does not need a special trigger setup Settings off 1 to 20 Name Use thi...

Страница 16: ...x Effect R B H HOP PadSong off KIT VOICE List of Functions The makeup of the Kit Voice page depends on the currently selected voice among other settings If a voice i e not a song or MIDI note number has been selected for the current pad see page 17 If a song has been selected for the current pad see page 17 If a MIDI note number has been selected directly see page 18 For voice related settings KIT...

Страница 17: ...p to four layers each of which can be used to play a different voice NOTE On this page layers can be selected for a pad only when a MIDI note number has been assigned to more than one of them using the Note parameter from the Menu area s Kit MIDI Assign page AUDITION This button can be pressed to hear the set voice without having to play the pad VoiceCategory Use this parameter to specify the cate...

Страница 18: ...anorama Pan Use this parameter to set the stereo pan of the voice Settings L63 to C to R63 The following parameters are used to adjust the tone of the voice Attack Time Attack Use this parameter to set the amount of time it takes from when the pad is struck until the assigned voice reaches its peak volume Settings 64 to 0 to 63 Decay Time Decay Use this parameter to set the amount of time it takes...

Страница 19: ... the sound produced by the voice will be sent to the chorus effect Settings 0 to 127 NOTE The chorus send level for the entire kit can be adjusted using the ChoSend Chorus Send Level parameter from the Menu area s Kit Effect Mixer page If layers have been set for the current voice you can set a send level for each one Reverb Send Level RevSend Use this parameter to specify how much of the sound pr...

Страница 20: ...r example hhOpen followed by hhOpen hhClose followed by hhOpen or hhClose followed by hhClose SliderSelect Use this parameter to select the slider for controlling the volume of the current pad s voices Settings kick snare tom cymbal hihat no asg selected when no assignment is required KIT MIDI List of Functions MessageType Use this parameter to set the type of MIDI message that will be sent whenev...

Страница 21: ...assigned to any of the pad s lay ers see page 4 this setting will be displayed as and modification will not be possible KIT MIDI ASSIGN 2 5 stack When Stack mode is selected all notes assigned to the pad are triggered simultaneously For example you can use this mode to produce chords or to trig ger multiple voices and waves with a single strike To produce just a single sound select this mode and a...

Страница 22: ...he Menu area s Kit MIDI Assign page to adjust the amount of time that passes between striking of the pad and sending MIDI Note Off messages Settings off on NOTE Sending of MIDI Note Off messages occurs automatically whenever a MIDI Channel other than 10 has been selected for the pad or layer In such a case therefore this setting will be displayed as and modification will not be possible Trigger Li...

Страница 23: ... alternate group can be producing a sound at any time If a pad is struck while another pad from the same alternate group is already producing a sound a MIDI Note Off message will be sent for the first pad together with the MIDI Note On message for the second In order to use trigger alternate groups with voices played on MIDI channel 10 the sending of MIDI Note Off messages must be enabled by selec...

Страница 24: ...m the Menu area s Kit MIDI Other page has been set to off or PC this setting will be displayed as and modification will not be possible q MIDI Channel Ch Use this parameter to select the current MIDI channel number Settings 1 to 16 MSB Use this parameter to set a Bank Select MSB value to be sent whenever the current kit is selected Settings 000 to 127 LSB Use this parameter to set a Bank Select LS...

Страница 25: ...e current kit is selected Settings 0 to 127 q MIDI Channel Ch Use this parameter to select the current MIDI channel number Settings 1 to 16 Control Change Number CC No Use this parameter to set the type of MIDI Control Change mes sage to be sent whenever the current kit is selected No Control Change messages are sent when off is set Settings off 1 to 95 Control Change Valve CC Val Use this paramet...

Страница 26: ... is sent to the chorus effect Settings 0 to 127 Chorus Send Level ChoSend Use this parameter to set the chorus send level for the current kit Settings 0 to 127 Chorus Return Level ChoReturn Use this parameter to set the level of the return signal from the chorus effect Settings 0 to 127 Chorus Panorama ChoPan Use this parameter to set the stereo panning of the chorus effect s return signal Setting...

Страница 27: ...st document Variation Type Type Use this parameter to select a variation effect type Settings Refer to the Data List document NOTE If the Type parameter is set to No Effect no other panels will be displayed for this page Chorus Type Type Use this parameter to select a chorus effect type Settings Refer to the Data List document NOTE If the Type parameter is set to No Effect no other panels will be ...

Страница 28: ...wMidGain HighMidGain and HighGain Use these parameters to boost or cut the center frequency levels of the low low mid high mid and high frequency bands respec tively Settings 12 to 0 to 12 LowFreq LowMidFreq HighMidFreq and HighFreq Use these parameters to set the center frequencies of the low low mid high mid and high frequency bands respectively Settings LowFreq 32Hz to 2 0kHz when LowShape is s...

Страница 29: ...enter frequency Frequency Hz For pad related settings KIT PAD 1 3 off No function is assigned to the pad controller snares By turning the pad controller you can change the set tings of the SnaresOn Off Snare Wire On Off and SnaresAdjust Snare Wire Adjustment parameters also from the Menu area s Kit Pad page thus adjusting the tightness of the snare wire For example turning the pad controller count...

Страница 30: ...DI Type HH MIDI Type If MIDI has been set for the HH Func Hi hat Function param eter also from the Menu area s Kit Pad page use this parameter to set the type of MIDI messages generated by the hi hat control ler Settings CC01 to CC95 Control Change AT Aftertouch PBup Pitch Bend up PBdwn Pitch Bend down NOTE If hi hat has been set for the HH Func Hi hat Function parameter also from the Menu area s ...

Страница 31: ... HHEgOp HHBwCl HHEgCl HHFtCl HHSplsh Kick Pad10 Pad11Hd Pad11Rm1 Pad11Rm2 HHKick all available for Pad2 only From the Copy Kit page you can copy all the set tings of any kit and replace those of the current kit which can be selected by pressing the KIT button Use Bank and Number to select the kit whose set tings are to be copied and the press the F3 button EXECUTE to copy those settings Bank Use t...

Страница 32: ...nge their settings Kit1 Kit2 Use these parameters to select the two kits whose settings are to be swapped Settings 01 to 60 From the Clear Pad page you can initialize individ ual pads from the current drum kit i e restore their default settings Use the Pad parameter to select the pad whose settings are to be initialized and then press the F3 button EXECUTE Pad Use this parameter to select the pad ...

Страница 33: ...empo see page 15 will take priority over this setting Song Name Name Use this parameter to set a name for the current song A name of up to 10 characters in length can be assigned Setting a Song Name 1 Press the dial to call up the song naming page 2 Move the cursor within the name field using the F1 and F3 buttons and select a character for that position by turning the dial or pressing the DEC and...

Страница 34: ...the current song on the selected MIDI channel In terms of the internal tone generator this value affects all voices on that channel Settings L64 to C to R63 NOTE If off or PC has been selected for the Transmit parameter above this setting will be displayed as and modification will not be possible q MIDI Channel Ch Use this parameter to select the current MIDI channel number Settings 1 to 16 Bank S...

Страница 35: ...ew value Reverb Send Level RevSend Use this parameter to set the reverb send level to be sent by the current song on the selected MIDI channel Settings 0 to 127 NOTE If off or PC has been selected for the Transmit parameter above see page 34 this setting will be displayed as and modification will not be possible If you change the reverb send level for MIDI channel 10 the current kit s Reverb Send ...

Страница 36: ...Bank has been set to RECORDER From the Import SMF page you can import a stan dard MIDI file SMF into the DTX700 from a USB memory device for use as a User song These files contain sequenced MIDI data and have a mid file extension It should be noted that the DTX700 sup ports Format 0 SMFs only SONG MEMORY INFO To confirm the status of memory usage for song data navigate to the Menu area s Song MemI...

Страница 37: ...TE A cent is a unit of pitch defined as one hundredth of a semi tone 100 cents 1 semitone Panorama Depth PanDepth Use this parameter to adjust the width of the DTX700 s overall stereo panning field while maintaining the individual pan set tings for drum and musical instrument sounds Settings 1 to 127 General MasterVolume MasterTune PanDepth AuxOutSel PlayCount AutoPowerOff LCD Mode MasterEQ LowGai...

Страница 38: ...the Master Equalizer The parameters from the Menu area s Utility Master EQ page can be used to adjust the master equalizer that shapes the tone of voices songs and other audio output In specific terms this three band mas ter equalizer allows the signal level to be freely boosted or cut around a center frequency specified for each of the bands In addition the low and high frequency bands can be set...

Страница 39: ...uencies will be affected and the tone will change markedly around the center frequency If you set a smaller value a wider band of frequencies will be affected and the tone will change gradually around the center frequency Settings 0 1 to 12 0 NOTE If the LowShape or HighShape parameter has been set to shelving the corresponding width Q setting will be displayed as and modification will not be poss...

Страница 40: ... to 32 Splash Sensitivity FootSplashSens Use this parameter to set the degree of sensitivity for detecting hi hat foot splashes The higher the value the easier it will be to pro duce a foot splash sound with a hi hat controller High values may however result in splash sounds being unintentionally pro duced when for example you depress the hi hat controller lightly as you keep time It is a good ide...

Страница 41: ...rike them Irre spective of this parameter s setting DTX700 performance data is output via the MIDI OUT connector and MIDI data from other devices is accepted for processing via the MIDI IN connector An off setting can prove highly useful when you wish to record your drum performances as MIDI data on a hardware sequencer or DAW software Settings off on MIDI Synchronization MIDI Sync Use this parame...

Страница 42: ...in line with song settings and in response to signals from external MIDI devices this parameter should be set to on Settings off on Channel 10 Program Change Receive RcvPC10ch Use this parameter to enable on or disable off the receipt of MIDI Program Change messages sent on MIDI channel 10 If you want kits to change in line with song settings or in response to signals from external MIDI devices th...

Страница 43: ...s the F3 button EXECUTE You will be asked to confirm that you wish to restore the Factory Set 2 To proceed press the dial Alternatively you can press the EXIT button to cancel the process The following message is displayed during the restoration process CAUTION Whenever the instrument is reset in this way any settings you have made will be overwritten with the corresponding defaults All important ...

Страница 44: ...r Setup Name Name From the Trigger Setup Name Name page you can assign a name of up to 12 characters in length to the current trigger setup Move the cursor within the name field using the F1 and F3 buttons and select a character for that position by turning the dial or pressing the DEC and INC buttons The following char acters can be used NOTE If you hold down the SHIFT button and press the F1 or ...

Страница 45: ...ad A velocity curve determines how the relative strength of playing affects the signal produced For example with the loud2 veloc ity curve shown below relatively loud sounds i e high veloci ties can be produced even with softer playing In contrast the hard2 curve only produces loud sounds when the pad in ques tion is struck quite hard Settings loud2 loud1 normal hard1 hard2 For pad related trigger...

Страница 46: ...e performances Settings 1 to 64 RejectTime Use this parameter to specify the time period after a pad is struck during which a second input signal will be ignored The larger the value set here the longer the period during which a second sound will not be produced Settings 4ms to 500ms NOTE In the following special case a second sound will be produced during the reject time The struck pad has a type...

Страница 47: ...mum Velocity 1 to 127 for Maximum Velocity WaitTime These parameters are used to set the time until the current pad detects a trigger signal In specific terms they define how long it takes for detection of the peak trigger signal in order that the strength of playing can be accurately reflected in the sound gen erated In the case of two zone and three zone pads each zone has a different setting He...

Страница 48: ... parameter is used as a countermeasure in situations where for whatever reason noise enters the trigger signals output when the pad is struck or other instability in trigger signals leads to sounds not being generated correctly Settings 1 to 10 NOTE Larger values can in cases where the pad is struck multiple times in rapid succession result in sounds being dropped If you must make an adjustment tr...

Страница 49: ... Crash1 Crash2 HiHat Kick Pad10 Pad11 NOTE When more than one pad is selected for the From parameter the name of the first one is indicated followed by a symbol Setting Procedure 1 Select the pad to be set i e the current pad either by striking it or by pressing the F1 button PAD to open a popup window and making a selection by turning the dial 2 Turn the dial to move the cursor to the row shown b...

Страница 50: ... copy data into the current trigger setup Use Bank and Number to select the trigger setup whose settings are to be copied and then press the F3 button EXECUTE to copy the data Bank Use this parameter to indicate the bank containing the trigger setup whose data is to be copied PRE refers to the trigger set ups stored as the DTX700 s default settings and USER refers to the trigger setups that can be...

Страница 51: ...Menu area s Click page A click track quarter note sound will be produced upon the receipt of a MIDI note with the note number set by the MIDI Noteq MIDI Quarter note Number parameter also from the Menu area s Click page Settings off on Click track MIDI Out MIDI Out Use this parameter to turn the output of click track MIDI events i e MIDI Note On messages on and off When set to on the DTX700 operat...

Страница 52: ... also from the Menu area s Click page are both set to off no MIDI Note On messages will be output for click track sounds If however this parameter is set to off but the MIDI Noteq MIDI Quarter note Number parameter is set to a value other than off MIDI Note On messages with the corresponding note number will be output for all click track sounds MIDI Quarter note Number MIDI Noteq Use this paramete...

Страница 53: ...d For details on editing start end and loop points see the descriptions of this page s Start End and Loop parameters oneshot The wave will be played once only from the start point to the end point This mode is normally selected for drums special effects and other non looped sounds loop The wave will be played continuously first from the start point to the end point and then repeatedly from the loo...

Страница 54: ...r values produce a faster rate of decay This setting applies to both one shot and looped playback modes Settings 0 to 127 Hi hat Control Sensitivity HHCtrlSens Use this parameter to specify how the playback volume of the wave decays in response to operation of a hi hat controller con nected to the HI HAT CONTROL jack The smaller the value the faster the rate of decay Settings 64 to 0 to 64 Wave Na...

Страница 55: ... will be made Settings off SnareHd SnareOp SnareCl SnrHdOff SnrOpOff SnrClOff Tom1Hd Tom1Rm1 Tom1Rm2 Tom2Hd Tom2Rm1 Tom2Rm2 Tom3Hd Tom3Rm1 Tom3Rm2 RideBw RideEg RideCp Crash1Bw Crash1Eg Crash1Cp Crash2Bw Crash2Eg Crash2Cp HHBwOp HHEgOp HHBwCl HHEgCl HHFtCl HHSplsh Kick Pad10 Pad11Hd Pad11Rm1 Pad11Rm2 HHKick Using the Import All page you can import all WAV and AIFF files from a USB memory device s ...

Страница 56: ... to increase the amount of memory available for waves WAVE MEMORY INFO To confirm the status of memory usage for wave data navigate to the Menu area s Wave MemInfo Memory Info page q Memory available MB This indicates the amount of unused wave memory in megabyte MB units w Memory availability ratio This indicates how much of the total wave memory is currently unused in percentage format e Total me...

Страница 57: ...t to 1 024 KB and 1 GB is equivalent to 1 024 MB USB memory device The term USB memory device is used to refer to flash mem ory and other USB memory units used for the storage and retrieval of files Directory A hierarchical directory system is used on memory devices in order to group files together according to type or application In this regard a directory is equivalent to a folder as used on a c...

Страница 58: ... button to return to the previous page NOTE Any space characters included in file names will be automatically replaced with _ i e an under score 5 Press the F3 button EXECUTE You will be asked to confirm that the file is to be saved Press the dial to proceed Alternatively you can press the EXIT button to return to Step 2 above without saving If a file of the same name already exists you will be as...

Страница 59: ...e file to be loaded press the F3 button Case 1 If All AllKit AllWave AllSong All Trigger or Utility was selected Press the F3 button EXECUTE and proceed to Step 7 Case 2 If Kit Wave Song or Trigger was selected Press the F3 button NEXT and proceed to Step 6 6 Select the required package of data from inside the selected file 6 1 Move the cursor to Src or Dst and press the dial Src indicates the fil...

Страница 60: ...ry device containing the file to be renamed into the USB TO DEVICE port on the side panel 2 Navigate to the Menu area s File Rename page The page will appear as follows 3 Use the Type parameter to select the type of file to be renamed 3 1 Turn the dial to move the cursor to the Type row and then press the dial 3 2 Turn the dial to select the type of file to be renamed Settings All AllKit AllWave A...

Страница 61: ...le When the renaming process has been completed the mes sage Completed will be displayed and you will be returned to the page from Step 2 above CAUTION Do not unplug the USB memory device from the USB TO DEVICE port or turn off either the mem ory device or the DTX700 while a file is being renamed Failure to observe this precaution can lead to the memory device or the DTX700 being permanently damag...

Страница 62: ...B memory device will be deleted during the formatting process Before formatting such a device therefore ensure that any important data it contains is backed up NOTE In certain cases USB memory devices formatted on a com puter will not be recognized by the DTX700 Be sure there fore to always use the drum trigger module to format memory devices that will be used with it Procedure 1 Plug the USB memo...

Страница 63: ...mount of unused USB device memory in megabyte MB units w Memory availability ratio This indicates how much of the total USB device memory is cur rently unused in percentage format e Total memory MB This indicates the total USB device memory in megabyte MB units NOTE The units used here will depend on the corresponding memory size i e KB for kilobytes MB for megabytes and GB for giga bytes FILE MEM...

Страница 64: ...put Ensure that the Attack Attack Time and Decay Decay Time parameters from the Menu area s Kit Voice page have been set appropriately See page 18 Check relevant MIDI settings as follows Ensure that the MessageType parameter from the Menu area s Kit MIDI Assign page is set to note Ensure that the VoiceNumber parameter from the Menu area s Kit Voice page is not set to no assign See pages 17 20 Ensu...

Страница 65: ...oduce hi hat sounds note the following In certain cases hi hat sounds will be more difficult to produce when the hi hat controller is configured to produce a kick drum sound i e Double Bass mode If the volumes of the DTX700 and external audio devices are not well balanced proceed as follows Individually adjust the output volumes of the DTX700 and the external audio devices If headphones are connec...

Страница 66: ...ollowing Turn off the Effect Bypass KIT m SHIFT F2 Ensure that enable has been selected for the effect s in question on the Menu area s Utility Effect Switch page See page 41 Ensure that the VarSend Dry Variation Send Level ChoSend Chorus Send Level and RevSend Reverb Send Level parame ters from the Menu area s Kit Voice page have been set appropriately See page 19 Ensure that the ChoSend Chorus S...

Страница 67: ...Kit MIDI Assign page has not been set to off for all four layers A through D See page 21 If a pad controller does not work as expected try the following Ensure that the PadFunc Pad Function parameter from the Menu area s Utility Pad page is not set to off Avoid holding the rim while adjusting the pad controller as this can prevent it from working properly If you are trying to record multiple songs...

Страница 68: ...sure that you are using a high quality drum trigger such as the DT20 and that it is secured firmly in place using adhesive tape Remember to also remove any old tape Carry out the checks listed above in the section No sound is produced when a pad is struck or the volume is lower than expected Ensure that the signal cable is securely plugged into the jack on the DT20 or other drum trigger If closed ...

Страница 69: ...f you want to exchange MIDI data with a computer via USB ensure that the MIDI IN OUT parameter is set to USB Alternatively if you want to exchange MIDI data with external devices via MIDI cables ensure that this parameter is set to MIDI See page 41 If starting a sequencer connected via MIDI causes the DTX700 to also start playback or vice versa proceed as fol lows Ensure that the SeqCtrl Sequencer...

Отзывы: