8
English
●
Installing the driver on a Windows XP system
1
Start the computer.
2
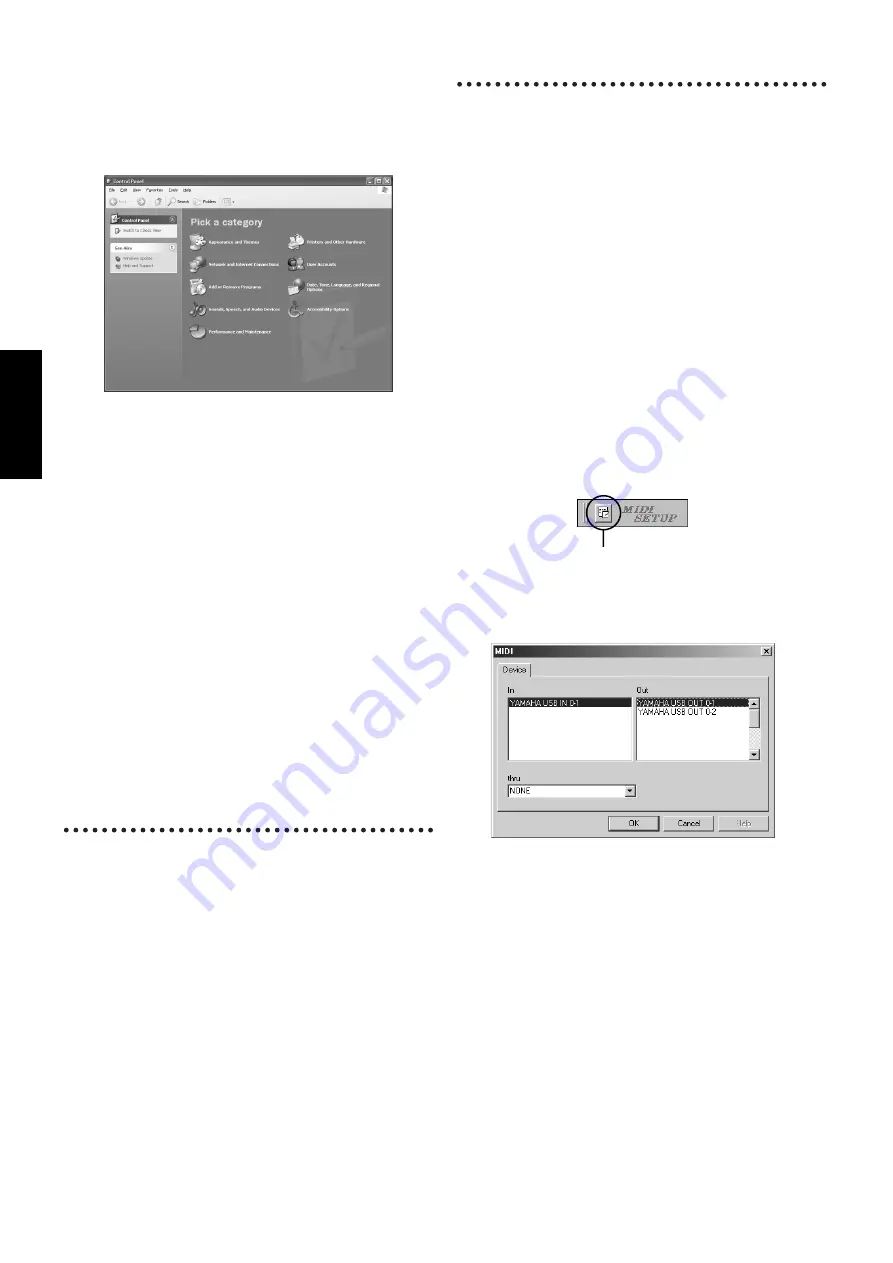
Select [Start | Control Panel].
If the control panel appears as shown below, click “Switch to
Classic View” in the upper left of the window.
All control panels and icons will be displayed.
3
Go to [System | Hardware | Driver Signing | File Signature Verifi-
cation], and check the radio button to the left of “Ignore -Install
all files, regardless of file signature” and click [OK].
4
Click the [OK] button to close System Properties, and then click
“X” in the upper right of the window to close the Control Panel.
5
Insert the included CD-ROM into the CD-ROM drive.
6
Make sure the POWER switch on the Clavinova is set to OFF and
use the USB cable to connect the USB terminal of the computer
to the USB terminal of the Clavinova. When the Clavinova is
turned on, the computer automatically displays the “Found New
Hardware Wizard.”
7
Check the radio button to the left of “Search for a suitable driver
for my device. (Recommended).” Click [Next].
The system starts the installation.
8
When the installation is complete, the system displays “Complet-
ing the Found New Hardware Wizard.” Click [Finish].
n
Some computers may take about ten seconds to show this screen
after the installation is complete.
9
Restart the computer.
The driver has been installed.
Serial Driver
1
Double-click on the “Mididrv_” folder.
“Setup.exe” file will be displayed.
2
Double-click on the “Setup.exe” file.
Follow the instructions on the screen to install the serial driver.
• For the setting of the COM port, click the radio button to the
left of the COM port to use. Normally you will use COM1.
• For the setting of the MIDI output ports, click the radio button
to the left of the “Use multiple MIDI output ports.”
File Utility
Once you‘ve installed these software programs, you can use your
computer to access and organize data stored to media connected to the
Clavinova (Storage memory and floppy disk).
1
Double-click on the “FileUtil_” folder in the CD-ROM.
“Setup.exe” file will be displayed.
2
Double-click on the “Setup.exe” file.
The File Utility setup dialog will be displayed.
3
Execute the installation by following the on-screen directions.
For details, refer to the on-line Help or the PDF owner’s manual.
MIDI port setting (when starting the software
as a stand-alone application)
Before setting the MIDI port on the File Utility, you should set the
MIDI port from the MIDI SETUP toolbar.
n
When you start the File Utility as a plug-in application in the Open
Plug-in Technology compatible application, refer to the the PDF man-
ual for the respective software.
1
Start the File Utility.
2
Click the MIDI Setup button in the Toolbar called up via step #1.
3
In the MIDI Setup window called up via step #2, click the [
▼
]
button at the right end of each box and make the port settings as
shown.
n
In order for MIDI ports to be available here, you’ll need to select the
relevant MIDI port within File Utility. This is the port that will be used
in the relevant MIDI applications. For details on setting the MIDI port,
refer to the on-line manual of File Utility.
MIDI Setup button
Содержание Clavinova CLP-175
Страница 18: ...18 MEMO ...
Страница 19: ...19 MEMO ...


