64
EDITING TRACKS
Add Fade In
You can add fade-in at the beginning of a track. The beginning of
the track is played with gradually rising level when fade-in has
been added.
1.
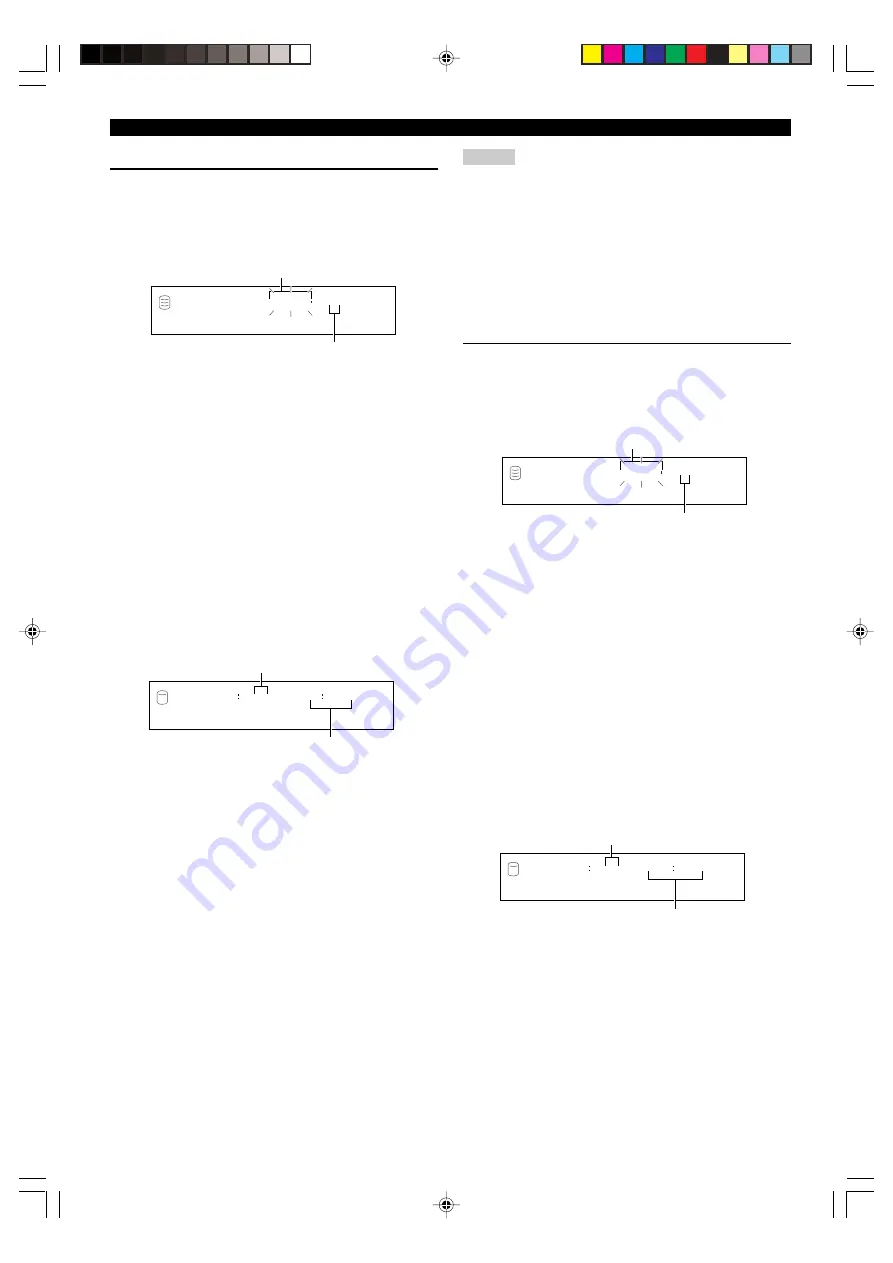
If “Add Fade In” is selected (P.58), the following
screen appears.
If the edit menu is selected during playback, the unit
automatically selects the item to be edited. In this case, skip to
step 6 since you do not need to select an item.
2.
Rotate the MULTI JOG knob (press +/– on the remote
control) to select the disc that contains the track to
add fade-in.
3.
Press the MULTI JOG knob (ENTER on the remote
control) to confirm the disc.
The number of the track to add fade-in flashes.
Press CLEAR to cancel the confirmed selection.
4.
Rotate the MULTI JOG knob (press +/– on the remote
control) to select the track to add fade-in.
5.
Press the MULTI JOG knob (ENTER on the remote
control) to confirm the track.
The beginning of the track for eight seconds is repeatedly
played with a three second (initial setting) fade-in.
6.
Rotate MULTI JOG knob (+/– on the remote control)
to set the fade-in length.
The fade-in length can be set in the 1 to 10 second range by
one second steps.
If you stop rotating the MULTI JOG knob, this unit starts
repeated playback of the beginning of the track with a fade-in
of the length set in above step, with extra portion for further
five seconds.
Press CLEAR to cancel the setting.
7.
Press COMPLETE.
The fade-in is added to the beginning of the selected track for
the selected length.
This unit returns to the editing menu item selection. (If the edit
menu is carried on during playback, playback restarts.)
F d . I n
0 0 1
1 ?
GROUP
L
R
dB
–30 –10
–6
–2
0
Disc that contains the track to add fade-in
Track to add fade-in
F . I n
3
0 0 1
TIME
L
R
dB
–30 –10
–6
–2
0
Fade-in length
Playing time of the track
Memo
• Fade-in cannot be added to a track that is shorter than 21 seconds.
• The fade-in effect becomes ineffective if the following editing is
performed to the track which the fade-in is added to.
– Erasing a certain part of the track (Part Erase).
– Combining the track (Track Combine).
– Dividing the track (Track Divide).
– Adjusting the beginning of the track (Track Adjust).
• If “Track Adjust” has been performed, the fade-in effect of both
the adjusted track and the previous track becomes ineffective.
Add Fade Out
You can add fade-out at the end of a track. The end of the track is
played with gradually lowering the level when fade-out has been
added.
1.
If “Add Fade Out” is selected (P.58), the following
screen appears.
If the edit menu is selected during playback, the unit
automatically selects the item to be edited. In this case, skip to
step 6 since you do not need to select an item.
2.
Rotate the MULTI JOG knob (press +/– on the remote
control) to select the disc that contains the track to
add fade-out.
3.
Press the MULTI JOG knob (ENTER on the remote
control) to confirm the disc.
The number of the track to add fade-out flashes.
Press CLEAR to cancel the confirmed selection.
4.
Rotate the MULTI JOG knob (press +/– on the remote
control) to select the track to add fade-out.
5.
Press the MULTI JOG knob (ENTER on the remote
control) to confirm the track.
The ending of the track for eight seconds is repeatedly played
with a three second (initial setting) fade-out.
Disc that contains the track to add fade-out
Track to add fade-out
F d . O u t
0 0 1
1 ?
GROUP
L
R
dB
–30 –10
–6
–2
0
F . O u t
3
1 0 0 1
TIME
L
R
dB
–30 –10
–6
–2
0
Fade-out length
Playing time of the track
106_HD1500(E)58-70.p65
3/18/05, 15:46
64


