background image

E-26

E-26

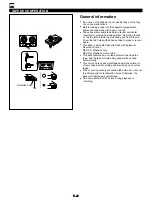
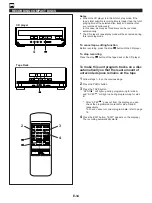
Detection hole

Tab

TAPE DECK OPERATION

General information

Do not use C-120 tapes or poor-quality tapes, since they
can cause malfunctions.

Before loading a tape into the cassette compartment,
tighten the tape slack with a pen or pencil.

Tapes have removable tabs which prevent accidental
recording or erasing from taking place. Removing the tab
on the top left protects the side facing you from erasure.
Cover the tab holes with adhesive tape to erase or record
again.

This deck is a Double Cassette Deck with Automatic
Reverse Function.
DECK A: Playback only.
DECK B: Playback or recording.

This deck features an auto tape selector. Just load the
tape, and the tape formula being used will be sensed
automatically.

This unit can play back metal tapes as well as normal or
chrome tapes, and recording can also be done on metal
tapes.

When covering erasure prevention tab holes, do not cover
the chrome and metal detection holes. Otherwise, the
deck will treat tape as normal tape.

Do not press the EJECT button during playback or
recording.

Содержание CC-75

Страница 1: ...en System Natural Sound Mini Komponent System Sistema di Componenti Mini a Suono Naturale Sistema de Componentes con Sonido Natural Natural Sound Mini Component Systeem OWNER S MANUAL MODE D EMPLOI BEDIENUNGSANLEITUNG BRUKSANVISNING MANUALE DI ISTRUZIONI MANUAL DE INSTRUCCIONES GEBRUIKSAANWIJZING CC 75 RX S75 CDC S75 KXW S75 NX S75 ...

Страница 2: ... parti seguenti siano contenute nell imballaggio dell apparecchio ACCESORIOS INCLUIDOS Desembale el aparato y verificar que los siguientes accesorios están en la caja BIJGELEVERDE ACCESSOIRES Controleer na het uitpakken of de volgende onderdelen voorhanden zijn This product complies with the radio frequency interference requirements of the Council Directive 82 499 EEC and or 87 308 EEC Cet apparei...

Страница 3: ...EDIT REPEAT RANDOM SKIP SEARCH PLAY CHANGE OPEN CLOSE TIME SINGLE SINGLE REMAIN TOTAL TOTAL REMAIN TOTAL REMAIN S F REPEAT PROGRAM RANDOM EDIT A B 2 3 4 5 6 7 8 9 10 11 12 13 14 15 16 17 18 19 1 20 OVER 1 2 5 6 7 8 3 9 4 0 A 1 9 2 3 4 5 6 7 8 0 A ...

Страница 4: ...de modellen voor Groot Brittannië en Europa DSS ON OFF MODE VOLUME INPUT SELECTOR CD TAPE TUNER AUX 1 AUX 2 POWER STEREO RECEIVER RX S75 PHONES DISPLAY DOWN UP TUNER PRESET A B C D E TIMER MEMORY TIME ADJ DOWN HOUR UP MINUTE TUNING AUTO MAN L SEC BAND AUTO MEMO TIMER REC BASS TREBLE BALANCE L R 0 I0 SP PHONES Active Servo Technology ROCK JAZZ CLASSIC RELAXED MHz MEMORY AUTO TUNING STEREO TUNED SLE...

Страница 5: ... Europa RDS MODE FREQ PS PTY RT CT PTY SEEK MODE START VOLUME INPUT SELECTOR CD TAPE TUNER AUX PHONO POWER PTY SELECTOR STEREO RECEIVER RX S75 PHONES DISPLAY DOWN UP TUNER PRESET A B C D E TIMER MEMORY TIME ADJ DOWN HOUR UP MINUTE TUNING AUTO MAN L SEC BAND AUTO MEMO TIMER REC BASS TREBLE BALANCE L R 0 I0 Active Servo Technology MHz MEMORY PTY H AUTO TUNING STEREO TUNED SLEEP TIMER V C D WX Y H I ...

Страница 6: ...6 6 3 KXW S75 4 NX S75 CASSETTE DECK KXW S75 EJECT EJECT MODE DUBBING REC PAUSE NORM HIGH OFF B C PLAYBACK RECORD PLAYBACK DECK A DECK B DIRECTION PLAY NR Z a b c e h k d ij l a f g m n ...

Страница 7: ...CT LEVEL SP PHONES MODE DSS POWER SLEEP DISPLAY VOLUME 1 2 3 4 5 6 8 9 0 A B C 7 5 2 3 1 6 0 2 m 6 m 8 20 30 30 7 1 2 3 4 5 CD 6 7 8 6 7 8 9 0 1 2 3 4 5 TIME PROG TAPE EDIT 10 A B C D E REPEAT RANDOM STOP PLAY PAUSE OPEN CLOSE MODE DISC SKIP TUNER D E F HIJ K L M N O P G DECK A B PLAY STOP PLAY TAPE INPUT REC PAUSE EFFECT LEVEL SP PHONES MODE DSS POWER SLEEP DISPLAY VOLUME Q R S T U V W ...

Страница 8: ...S 9 To AC outlet Vers la prise c a Zur Netzsteckdose Till nätuttag Alla presa AC Al tomacorriente Naar wisselstroom stopcontact 0 A DECK A B INPUT REC PAUSE EFFECT LEVEL SP PHONES MODE DSS POWER SLEEP DISPLAY VOLUME ...

Страница 9: ...ny years of trouble free enjoyment For the best performance read this manual carefully It will guide you in operating your YAMAHA product FEATURES 75W 75W 6Ω Output Power 10 THD 1 kHz Random Access Programmable CD Playback Single Track Entire Disc All Disc Repeat Play Random sequence Play Automatic Synchronized Recording with CD Playback Automatic CD Editing Function for Recording to Tape Double C...

Страница 10: ... to other equipment Never pull the wire itself Do not attempt to clean the unit with chemical solvents this might damage the finish Use a clean dry cloth Be sure to read the TROUBLESHOOTING section regarding common operating errors before concluding that the unit is faulty To prevent lightning damage disconnect the AC power plug and the antenna cable when there is an electrical storm Do not plug t...

Страница 11: ... model only Laser Diode Properties Material GaAlAs Wavelength 780nm Emission Duration continuous Laser Output max 44 6µW This output is the value measured at a distance of about 200mm from the objective lens surface on the Optical Pick up Block The apparatus is not disconnected from the AC power source as long as it is connected to the wall outlet even if the apparatus itself is turned off 1 cm 1 ...

Страница 12: ...elector Button R AUTO MEMORY TIMER REC Button S BASS Tone Control T TREBLE Tone Control U BALANCE Control V INPUT SELECTOR PTY SELECTOR Control W PTY SEEK MODE Button X RDS MODE Selector Button Y PTY SEEK START Button Display For CD player 1 Track Number Indicator 2 S F REPEAT Indicator 3 Time Display 4 Play Indicator 5 Disc Indicator 6 EDIT Indicator 7 Tape Side Indicator 8 Music Calendar Indicat...

Страница 13: ...ontrol Transmitter Window 2 Preset Station Number Buttons 3 A B C D E Selector Buttons 4 EFFECT LEVEL Down Up Buttons 5 POWER Switch 6 SLEEP Button 7 SP PHONES Mode Selector Button 8 DISPLAY Button 9 VOLUME Down Up Buttons 0 TUNER Input Selector Button A INPUT Selector Button B DSS On Off Button C DSS MODE Selector Button CD player control buttons D Track Number Input Buttons E TIME Button F REPEA...

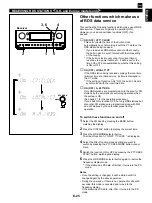
Страница 14: ...batteries with rechargeable batteries Proper use of the remote control transmitter See figure 7 on page 7 7 Aim within the range of 60 with no obstacles the remote control transmitter at the remote control sensor and operate as shown Notes concerning use Replace the batteries if control distance decreases or operation becomes unstable Periodically clean the transmitter window on the remote control...

Страница 15: ...lace the AM MW LW loop antenna away from the unit 3 External FM antenna Use an external FM antenna instead of an indoor FM antenna if you need better reception Consult your dealer 4 External AM MW LW antenna Use an external AM MW LW antenna if you need better reception Consult your dealer Note When using an external AM MW LW antenna be sure to keep the wire of the AM MW LW loop antenna connected C...

Страница 16: ... KXW S75 DECK A B on the remote control transmitter Automatic power off function When the CD or TAPE input source is selected if there is no operation and in the stop mode for about 30 minutes the system will be turned off automatically Speaker connection Connect each speaker wire to the SPEAKERS terminals Cautions Do not let the bare speaker wires touch each other as this could damage the receive...

Страница 17: ... and the second is reset to 00 If the current minute is 59 in this case the hour is also advanced by 1 hour In the event of a power failure or when the AC supply lead is disconnected The time display will go out however the clock will function for about 5 minutes without power supply So you do not have to reset the time if the AC power supply is resumed within about 5 minutes When the AC power sup...

Страница 18: ...rease or counter clockwise to decrease the high frequency response BALANCE L R BASS TREBLE The Digital Super Surround DSS Processor built into this unit presents you with sound effect which simulates acoustic environments suitable for some genres of music This unit provides the following 4 DSS modes Mode ROCK JAZZ CLASSIC RELAXED Feature Low frequency and high frequency of the source sound are som...

Страница 19: ... to other sections described later 4 Adjust the level of effects by pressing the EFFECT LEVEL down or up button Effect level can be checked with the effect level indicator on the display Each of the DSS modes can be set with a different effect level If you will not use the DSS Press the DSS ON OFF selector button so that the effect level indicator on the display goes off When listening with headph...

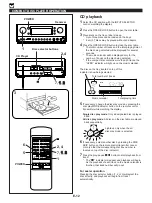
Страница 20: ...ally 6 If necessary select another disc by pressing the DISC SKIP button on the remote control transmitter once or more so that the corresponding disc tray number is located on top of the disc indicator 7 Press the play pause button to start playback from track 1 The indicator will appear and playback will begin As the playback of each track on the music calendar is finished that track number will...

Страница 21: ...ion can cause mistracking Playing some compact discs at high volume can cause mistracking In this case listen at lower volume Do not pull open the disc table forcibly with your hands Do not push the disc table while it is moving If the power fails while the table is open wait until the power supply returns or gently push the table manually to close it The temperature range for playing compact disc...

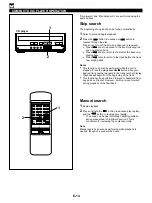
Страница 22: ...r appears in the track number display Playback will begin from the beginning of the track This function will be performed forward or backward from any point on the disc However it will not move forward during playback of the final track Manual search 1 Begin playback 2 Press and hold the button to advance play rapidly and the button to reverse play rapidly The sound can be heard although slightly ...

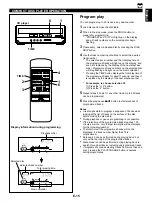
Страница 23: ...f programmed tracks Notes It is also possible to program a sequence of tracks while looking at the list of tracks on the surface of the disc before closing the disc table During playback or pause programming is not possible If the total time of the programmed tracks reaches 100 minutes or more only the last two digits will be displayed for the three digit number The total time of the programmed tr...

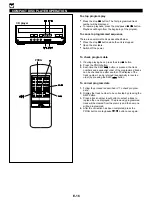
Страница 24: ... one after another The display of the track number can be returned sequentially in reverse order by pressing the SKIP button To correct program data 1 Follow the procedure described in To check program data 2 Display the track number to be corrected by pressing the SKIP button 3 Press a track number input button to select a track to replace the one displayed The previously programmed track will be...

Страница 25: ...m play mode the selected disc is repeatedly played back but the order of tracks is different every time When the unit is in the all disc play mode All discs on the disc table are played back repeatedly In the random play mode the random play is performed among all discs and repeated with a different order of tracks every time Note In the program play mode a sequence of programmed tracks is played ...

Страница 26: ... total play time of the disc will be displayed If the unit is in the program play mode the total play time of the programmed tracks will be displayed The total remaining play time from the point being played at that time will be displayed 41 minutes remain till the end of the disc Notes During random play the total remaining play time on the disc will not be displayed The remaining play time will ...

Страница 27: ...described below STEREO indicator will light up when an FM stereo broadcast with sufficient signal strength is received Manual tuning 1 1 Follow steps 1 and 2 of the Automatic tuning method 2 2 Press the AUTO MAN L button so that AUTO TUNING disappears from the display In this mode stations are received in monaural 3 3 Press and hold the TUNING UP button to tune to a higher frequency or press and h...

Страница 28: ...r stations to A2 A3 A8 You can program more stations to the preset station numbers on other areas in the same way by selecting other areas in step 3 To recall a preset station 1 1 Select the area of preset station numbers by pressing the A B C D E button 2 2 Select the desired preset station number by pressing the TUNER PRESET DOWN or UP button repeatedly Notes A new setting can be programmed in p...

Страница 29: ...are stored automatically If the station you want to program is weak in signal strength tune to it in monaural manually and program it by following the procedure of the section To store stations on the previous page You can replace a preset station by another FM or AM MW or LW station manually by simply following the procedure of the section To store stations on the previous page TUNING OPERATION F...

Страница 30: ...dvice in the widest sense including meteorological reports and forecasts consumer affairs medical help etc Sport Program concerned with any aspect of sport Education Program intended primarily to educate of which the formal element is fundamental Drama All radio plays and serials Culture Programs concerned with any aspect of national or regional culture including religious affairs philosophy socia...

Страница 31: ...e of the built in clock by synchronizing it with the CT data This function can also be canceled if so desired Refer to page 25 for details CT WAIT may flash while the unit is receiving the data If the data is accidentally cut off CT WAIT may flash and then turn into NO CT If the RDS station does not employ the CT data service NO CT lights up on the display for about 2 seconds and then returns to u...

Страница 32: ...into the PS mode If the called station is not the desired one press the PTY SEEK START button once more before PTY H goes out from the display The unit begins searching for another station which broadcasts a program of the same program type If no station is found NO PTY appears and then returns to frequency display If the station has PS data after that it turns into the PS mode If the PTY SEEK STA...

Страница 33: ...the area for FM stations by the automatic preset tuning operation when the setting is ON See page 21 for the operating procedure If you switch this function OFF not only RDS stations but also other FM stations are programmed along with MW and LW stations by the automatic preset tuning operation To switch these functions on and off 1 Select the FM band by pressing the BAND button watching the displ...

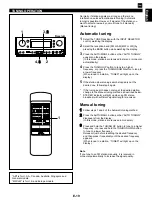
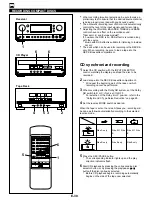
Страница 34: ... the tab holes with adhesive tape to erase or record again This deck is a Double Cassette Deck with Automatic Reverse Function DECK A Playback only DECK B Playback or recording This deck features an auto tape selector Just load the tape and the tape formula being used will be sensed automatically This unit can play back metal tapes as well as normal or chrome tapes and recording can also be done o...

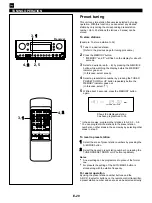
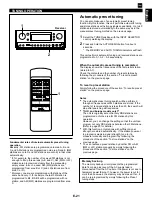
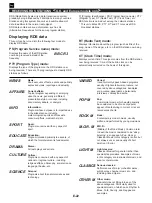
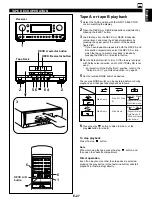
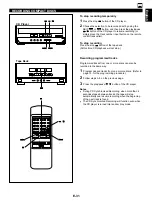
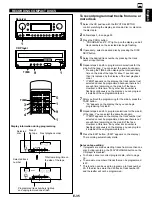
Страница 35: ...e MODE switch can be operated before or during playback and changes tape playback as follows 6 Press the play button to listen to side A or the play button for side B To stop playback Press the stop button Note When removing the tape press the stop button and then open the cassette compartment Direct operation Even if an input source other than tape deck is selected pressing the play button or the...

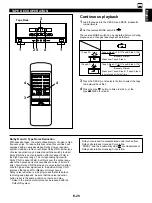
Страница 36: ...ing of a desired selection on the tape To listen to the same selection Press the button if the direction of the current playback is Press the button if the direction of the current playback is To listen to the next selection Press the button if the direction of the current playback is Press the button if the direction of the current playback is While searching the corresponding play direction indi...

Страница 37: ...ar is most sensitive to noise 2 kHz to 8 kHz Also Dolby C NR has the same noise reduction effect at both high and low signal levels In addition Dolby C NR improves the tape s MOL Maximum Output Level Dolby noise reduction is a 2 part process that acts both on recording and playback be sure that the noise reduction button is set to the same position on record and play Noise in the source material c...

Страница 38: ...ing cannot be performed 3 When recording with the Dolby NR system set the Dolby NR switch to B or C if not set it to OFF For selection of the Dolby B or C position refer to the Dolby B and C Type Noise Reduction on page 29 4 Set the reverse MODE switch as desired When the tape is set so that side A faces you recording will be done as follows automatically according to the selected reverse mode 5 P...

Страница 39: ...tracks from one or more discs Refer to page 15 for the programming procedure 2 Follow steps 2 5 on the previous page 3 Press the play pause button of the CD player Notes During CD Synchronized Recording when more than 4 seconds elapse between tracks the tape will stop automatically and resume recording when the beginning of the next track is found The CD Synchronized Recording will function even w...

Страница 40: ...ayed back the sound is automatically faded out and then the recording stops The recording on side B starts from the beginning of the same track Notes When this CD player is in the all disc play mode if the tape s total possible recording time is longer than the total playing time of the selected disc tracks on another disc are recorded continuously In this case as many as three discs can be record...

Страница 41: ...the display in turn and next it returns to the normal display mode When using tapes other than C 46 C 54 C 60 or C 90 When C 46 C 54 C 60 or C 90 is appearing on the display input the tape length by using the track number input buttons on the remote control transmitter Examples C 62 Press 6 and then 2 C 30 Press 3 and then 0 or press 10 three times and then 0 7 Press the EDIT button EDIT appears o...

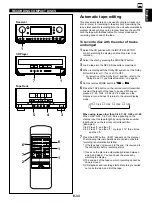
Страница 42: ... automatically so that the least amount of unrecorded space remains on the tape 1 Follow steps 1 6 on the previous page 2 Press the PROG button 3 Press the TAPE button AP A will light up during programming for side A and AP B will light up during programming for side B After AP B goes out from the display you can check the programmed contents for side A and B respectively To check cancel or correc...

Страница 43: ... 5 to program selections for the side B of the tape You can select the same track again If ERR appears on the display the track number just selected cannot be programmed because there is not enough time remaining on the side B of the tape However at this time if any other track number is flashing continuously on the display you can program it instead of the unprogrammable one 9 Press the EDIT butt...

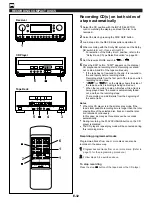
Страница 44: ...e compartment 4 When recording with the Dolby NR system set the Dolby NR switch to B or C if not set it to OFF For selection of the Dolby B or C position refer to the Dolby B and C Type Noise Reduction on page 29 5 Set the reverse MODE switch to to record on only one side or to or for continuous recording on both sides 6 Press the REC PAUSE button The corresponding indicator lights up and the play...

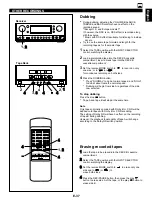
Страница 45: ...dubbing Press the stop button Tape A and tape B will stop at the same time Note Only tapes originally encoded with Dolby B or C NR will be dubbed onto tapes with Dolby B or C NR encoding The setting of Dolby NR will have no effect on the recording of tape B during dubbing However the playback tonal quality of tape A will change according to the Dolby NR switch position Erasing recorded tapes 1 1 L...

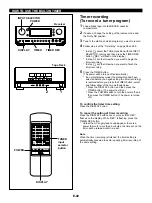
Страница 46: ...e Source selecting mode TAPE TUNER CD ON TIME Time setting mode OFF TIME Time setting mode Normal display mode The display mode will be changed to the next mode after about 8 seconds elapse automatically If the mode is changed before the setting is completed call the mode again by pressing the DISPLAY button once or more Setting procedure At the display of current time Check to be sure that the cu...

Страница 47: ...etting After the timer play is finished press the DISPLAY button to call the current time While the current time is displayed press the TIMER button so that TIMER goes out from the display If it is not canceled the system will be turned on at the same time every day so it can be used as an alarm However if you are planning to go out at that time cancel the timer play setting Unless the AC supply l...

Страница 48: ...and then press the TIMER button The power is still on Press the POWER switch to turn the power off and then press the TIMER button The power is turned off To confirm the timer time setting Press the DISPLAY button To cancel the setting of timer recording Press the DISPLAY button once or more so that REC flashes on the display While REC is flashing press the TIMER REC button Unless the AC supply le...

Страница 49: ...LEEP appears on the display and soon it is replaced by the remaining time of the selected sleep time To change the sleep time While the SLEEP indicator is being illuminated press the SLEEP button repeatedly until the desired time appears To stop the sleep timer operation Press the POWER switch or press the SLEEP button repeatedly until OFF SLEEP appears on the display The SLEEP indicator will go o...

Страница 50: ...assette player LD player etc to the AUX terminals of this system red right channel white left channel To listen to 1 Select the AUX position with the INPUT SELECTOR control watching the display 2 Operate the unit connected to the AUX terminals Its audio source can be recorded by this system s tape deck Turntable PHONO To connect 1 Connect the output terminals of the turntable to the PHONO terminal...

Страница 51: ...apstans may become magnetized causing poor sound Demagnetize these parts once every 30 hours of playing recording time by using a commercially available tape head demagnetizer Read the demagnetizer s instructions carefully before use External care Periodically clean the surfaces of this system especially the top panel of the receiver to prevent the ventilation holes from being blocked with dust et...

Страница 52: ...won t move during playback or recording Can t record Sound is distorted or fades out Poor sound quality Stereo balance is poor Excessive noise Tape travel stops in middle of playback or recording Can t find the beginning of desired selections on tape Remote control doesn t work TV functions strangely when the remote control is used TROUBLESHOOTING If your unit fails to operate normally check the f...

Страница 53: ...Europe and Singapore models AC 230V 50 Hz General model AC 110 120 220 240V 60 50 Hz Power consumption U S A and Canada models 155W Australia U K Europe and General models 150W Dimensions W x H x D 280 x 107 5 x 345 mm 11 x 4 1 4 x 13 9 16 Weight 6 0 kg 13 lbs 3 oz CD player CDC S75 Power Source AC supplies from receiver unit Type 3 DISC Carousel Auto changer Signal Readout Non contact 3 beam semi...

Страница 54: ...BEI HAMBURG F R OF GERMANY YAMAHA ELECTRONIQUE FRANCE S A RUE AMBROISE CROIZAT BP70 CROISSY BEAUBOURG 77312 MARNE LA VALLEE CEDEX02 FRANCE YAMAHA ELECTRONICS UK LTD YAMAHA HOUSE 200 RICKMANSWORTH ROAD WATFORD HERTS WD1 7JS ENGLAND YAMAHA SCANDINAVIA A B J A WETTERGRENS GATA 1 BOX 30053 400 43 VÄSTRA FRÖLUNDA SWEDEN YAMAHA MUSIC AUSTRALIA PTY LTD 17 33 MARKET ST SOUTH MELBOURNE 3205 VIC AUSTRALIA V...

Отзывы: