background image

3-44

CHECKING AND CHARGING THE BATTERY

CHK

ADJ

NOTE:

CAUTION:

NOTE:

Since MF batteries are sealed, it is not pos-
sible to check the charge state of the battery
by measuring the specific gravity of the elec-
trolyte. Therefore, the charge of the battery
has to be checked by measuring the voltage
at the battery terminals.

1. Remove:

seat

2. Disconnect:

battery leads
(from the battery terminals)

First, disconnect the negative lead 

1

,

then the positive lead 

2

.

3. Remove:

battery

4. Check:

battery charge

a. Connect a digital voltmeter to the battery

terminals.

Tester positive
lead

battery positive
terminal

Tester negative
lead

battery negative
terminal

The charge state of a MF battery can be
checked by measuring its open-circuit volt-
age (i.e., the voltage when the positive ter-
minal is disconnected).

No charging is necessary when the open-
circuit voltage equals or exceeds 12.8 V.

b. Check the charge of the battery, as

shown in the charts and the following ex-
ample.

Example
c. Open-circuit voltage = 12.0 V
d. Charging time = 6.5 hours
e. Charge of the battery = 20 

 30 %

5. Charge:

battery
(refer to the appropriate charging method
illustration)

Содержание 1998 FZS600 5DM1-AE1

Страница 1: ......

Страница 2: ......

Страница 3: ...ZS600 SERVICE MANUAL 1997 by Yamaha Motor Co Ltd First edition December 1997 All rights reserved Any reproduction or unauthorized use without the written permission of Yamaha Motor Co Ltd is expressly prohibited ...

Страница 4: ...s models Modifications and significant changes in specifications or procedures will be forwarded to all authorized Yamaha dealers and will appear in future editions of this manual where applicable Designs and specifications ar subject to change without notice IMPORTANT INFORMATION Particularly important information is distinguished in this manual by the following The Safety Alert Symbol means ATTE...

Страница 5: ...spections and Adjustments where the sub section title s appear In Chapter3 Periodic Inspections and Adjustments the sub section title appears at the top of each page instead of the section title 3 Sub section titles appear in smaller print than the section title 4 To help identify parts and clarify procedure steps there are exploded diagrams at the start of each removal and disassembly section 5 N...

Страница 6: ...ndicate the following 10 Serviceable with engine mounted 11 Filling fluid 12 Lubricant 13 Special tool 14 Tightening torque 15 Wear limit clearance 16 Engine speed 17 Electrical data Symbols 18 to 23 in the exploded diagrams indicate the types of lubricants and lubrication points 18 Apply engine oil 19 Apply gear oil 20 Apply molybdenum disulfide oil 21 Apply wheel bearing grease 22 Apply lightwei...

Страница 7: ...MATION SPECIFICATIONS PERIODIC INSPECTIONS AND ADJUSTMENTS ENGINE COOLING SYSTEM CARBURETORS CHASSIS ELECTRICAL SYSTEM TROUBLESHOOTING GEN INFO 1 SPEC 2 CHK ADJ 3 ENG 4 COOL 5 CARB 6 CHAS 7 ELEC 8 TRBL SHTG 9 INDEX ...

Страница 8: ......

Страница 9: ...GEN INFO 1 ...

Страница 10: ...ICATION NUMBER 1 1 MODEL CODE 1 1 IMPORTANT INFORMATION 1 2 PREPARATION FOR REMOVAL AND DISASSEMBLY 1 2 REPLACEMENT PARTS 1 2 GASKETS OIL SEALS AND O RINGS 1 2 LOCK WASHERS PLATES AND COTTER PINS 1 3 BEARINGS AND OIL SEALS 1 3 CIRCLIPS 1 3 CHECKING THE CONNECTIONS 1 4 SPECIAL TOOLS 1 5 ...

Страница 11: ...GEN INFO ...

Страница 12: ... MOTORCYCLE IDENTIFICATION EB100010 VEHICLE IDENTIFICATION NUMBER The vehicle identification number 1 is stamped into the right side of the steering head EB100020 MODEL CODE The model code label 1 is affixed to the frame This information will be needed to order spare parts ...

Страница 13: ...ng disassembly clean all of the parts and place them in trays in the order of disas sembly This will speed up assembly and al low for the correct installation of all parts 5 Keep all parts away from any source of fire EB102010 REPLACEMENT PARTS 1 Use only genuine Yamaha parts for all re placements Use oil and grease recom mended by Yamaha for all lubrication jobs Other brands may be similar in fun...

Страница 14: ...rs are vis ible When installing oil seals apply a light coat of lithium soap base grease onto the oil seal lips Oil bearings liberally when instal ling if appropriate 1 Oil seal Do not spin the bearing with compressed air because this will damage the bearing surfaces 1 Bearing EB102050 CIRCLIPS 1 Before reassembly check all circlips careful ly and replace damaged or distorted circlips Always repla...

Страница 15: ...ins Connect and disconnect several times 3 Check all connections Loose connection Connect properly If the pin 2 on the terminal is flattened bend in up 4 Connect lead coupler connector Make sure that all connections are tight 5 Check continuity with a pocket tester Pocket tester 90590 03112 If there is no continuity clean the termi nals When checking the wire harness perform steps 1 to 3 As a quic...

Страница 16: ...ten the steering ringnut 90890 01304 Piston pin puller This tool is used to remove the piston pin 90890 01460 01326 Damper rod holder T handle These tool ar used for holding the damper rod when removing or installing the damper rod 90890 01312 Fuel level gauge This gauge is used to measure the fuel level in the float chamber 90890 01325 01352 Radiator cap tester Adaptor These tools are used for ch...

Страница 17: ...for removing or installing the oil filter 90890 01701 Sheave holder This tool is used for holding the magneto rotor 90890 03081 Compression gauge This tool is used to measure the engine compression 90890 03094 Vacuum gauge This tool is used to measure the synchronizing the carburetors 90890 03112 Pocket tester These instruments are invaluable for checking the electrical system 90890 03133 Engine t...

Страница 18: ...alve lapper This tool is used for removing and installing the valve lifter and for lapping the valve 90890 04111 Valve guide remover 4 0 mm This tool is used to remove the valve guides 90890 04112 Valve guide installer 4 0 mm This tool is needed to install the valve guides properly 90890 04113 Valve guide reamer 4 0 mm This tool is used to rebore the new valve guide 90890 04019 04114 Valve spring ...

Страница 19: ...1 8 GEN INFO SPECIAL TOOLS Tool No Tool name Usage Illustration 90890 85505 Yamaha bond No 1215 This sealant bond is used for crankcase mating surface etc ...

Страница 20: ...SPEC 2 ...

Страница 21: ... 1 MAINTENANCE SPECIFICATIONS 2 4 ENGINE 2 4 CHASSIS 2 10 ELECTRICAL 2 14 GENERAL TIGHTENING TORQUE SPECIFICATIONS 2 17 LUBRICATIONS AND LUBRICANT TYPES 2 18 ENGINE 2 18 CHASSIS 2 19 COOLING SYSTEM DIAGRAMS 2 20 LUBRICATION DIAGRAMS 2 22 CABLE ROUTING 2 25 ...

Страница 22: ...SPEC ...

Страница 23: ...ent Bore stroke Compression ratio Compression pressure STD Starting system Lubrication system Liquid cooled 4 stroke DOHC Forward inclined parallel 4 cylinder 599 cm3 62 0 49 6 mm 12 1 1 550 kPa 400 r min 15 5 kgf cm2 Electric starter Wet sump Oil type or grade Engine oil API STANDARD SE or higher grade ACEA STANDARD G4 or G5 Periodic oil change With oil filter replacement Total amount 2 5 L 2 7 L...

Страница 24: ...2 846 37 19 1 947 34 22 1 545 28 21 1 333 25 21 1 190 29 27 1 074 Chassis Frame type Caster angle Trail Double cradle 24 88 mm Tire Type Size front rear Manufacturer front rear Type front rear Tubeless 110 70ZR 17 54W 160 60ZR 17 69W BRIDGESTONE DUNLOP BRIDGESTONE DUNLOP BT 57F D207F BT 57R D207J Tire pressure Maximum load except motorcycle Loading condition A front rear Loading condition B front ...

Страница 25: ...heel travel 120 mm 120 mm Electrical Ignition system Generator system Battery type Battery capacity T C I digital A C magneto GT12B 4 12V 10 AH Headlight bulb type Halogen bulb Bulb voltage wattage quantity Headlight Brake tail light Front turn signal light Rear turn signal light License light Meter light Indicator light Neutral indicator light High beam indicator light Oil level warning light Tur...

Страница 26: ... 75 32 85 mm 25 0 25 1 mm 7 65 7 85 mm 32 45 32 55 mm 24 95 25 05 mm 7 4 7 6 mm 0 08 mm 32 7 mm 24 95 mm 7 5 mm 32 4 mm 24 9 mm 7 25 mm 0 03 mm Cam chain Cam chain type No of links Cam chain adjustment method 92RH2010J 130 Automatic Valve valve seat valve guide Valve clearance cold IN EX 0 11 0 20 mm 0 21 0 30 mm Valve dimensions A head dia IN EX B face width IN EX C seat width IN EX D margin thic...

Страница 27: ... 17 013 mm 16 991 17 000 mm 0 07 mm Piston rings Top ring Type Dimensions B T End gap installed Side clearance installed 2nd ring Type Dimensions B T End gap installed Side clearance installed Oil ring End gap installed Barrel 0 8 2 2 mm 0 15 0 30 mm 0 020 0 075 mm Taper 0 8 2 3 mm 0 25 0 40 mm 0 020 0 055 mm 1 5 2 3 mm 0 10 0 35 mm 0 6 mm 0 1 mm 0 7 mm 0 1 mm Connecting rod Oil clearance Color co...

Страница 28: ...screw push 2 8 mm 0 1 mm 34 3 mm 0 2 mm 0 3 mm Transmission Main axle deflection limit Drive axle deflection limit 0 02 mm 0 02 mm Shifter Shifter type Guide bar bending limit Guide bar 0 05 mm Carburetor I D mark Main jet M J Main air jet M A J Jet needle J N Needle jet N J Pilot air jet P A J 1 Pilot outlet P O Pilot jet P J Bypass 1 B P 1 Bypass 2 B P 2 Bypass 3 B P 3 Pilot screw P S Valve seat...

Страница 29: ...Radiator capacity Reservoir tank capacity From low to full level 320 mm 161 4 mm 27 mm 95 125 kPa 0 95 1 25 kg cm2 0 6 L 0 61 L 0 22 L Water pump Type Reduction ratio Single suction centrifugal pump 82 48 48 49 1 673 Item Size Bearings and oil seals Big end bearing Crankshaft bearing Crankshaft oil seal Water pump bearing Water pump oil seal Main axle bearing left Main axle bearing right Drive axl...

Страница 30: ...p Bolt M6 2 10 1 0 Water pump housing Bolt M6 2 10 1 0 Radiator cover Bolt M6 4 8 0 8 Pipe 5 Pipe 6 Bolt M6 4 10 1 0 Roter housing Screw M6 1 7 0 7 Oil pump assembly Bolt M6 3 10 1 0 Strainer housing Bolt M6 2 10 1 0 Strainer cover Bolt M6 14 12 1 2 Oil cooler Union bolt M20 1 63 6 3 Oil drain bolt Bolt M14 1 43 4 3 Delivery pipe Bolt M10 2 20 2 0 Delivery pipe holder Bolt M6 1 10 1 0 Oil filter e...

Страница 31: ...Screw M5 2 5 0 5 Push rod adjuster Nut M8 1 16 1 6 Drive sprocket Nut M18 1 70 7 0 Shift drum retainer Bolt M6 1 10 1 0 Shift arm Bolt M6 1 10 1 0 Shift fork guide bar retainer Bolt M6 2 10 1 0 Shift pedal adjuster Nut M6 2 7 0 7 Stopper lever Bolt M6 1 10 1 0 Side plate 2 Screw M5 1 4 0 4 A C magneto roter Bolt M12 1 130 13 0 Stator coil Bolt M6 3 10 1 0 Pickup coil Screw M5 2 5 0 5 Starter motor...

Страница 32: ...alent 319 mm Rear suspension Shock absorber travel Spring free length Fitting length Spring Rate K1 Stroke K1 Optional spring Enclosed gas air pressure STD 50 mm 177 mm 168 mm 147 N mm 14 7 kg mm 0 50 mm No 1200 kPa 12 kg cm2 Swingarm g Swingarm free play limit end 1 mm Swingarm free play limit side 1 mm Front wheel Type Rim size Rim material Rim runout limit radial lateral Cast wheel 17 MT3 00 Al...

Страница 33: ...linder inside dia Caliper cylinder inside dia Brake fluid type Single 245 5 mm 5 5 mm 5 5 mm 12 7 mm 38 1 mm DOT No 4 0 15 mm 0 5 mm 0 5 mm Brake lever and brake pedal Brake pedal position N 36 6 mm Clutch lever free play lever end Th l i f l 10 15 mm Throttle grip free play 3 5 mm Item Size Bearings and oil seals Pivot shaft bearing Front wheel bearing left Front wheel bearing right Rear wheel be...

Страница 34: ...e mount rear upper M10 1 25 55 5 5 Engine mount rear under M10 1 25 55 5 5 Engine bracket rear M8 1 25 33 3 3 Pivot shaft M16 1 5 11 5 11 5 Rear shock absorber upper M10 1 25 40 4 0 Rear shock absorber and relay arm M10 1 25 40 4 0 Relay arm and rear shock absorber bracket M10 1 25 48 4 8 Relay arm and connecting rod M12 1 25 48 4 8 Connecting rod and rear arm M12 1 25 48 4 8 Chain guide M6 1 0 7 ...

Страница 35: ...rew M7 1 0 6 0 6 Rear brake disc M8 1 25 23 2 3 Sidestand M8 1 25 23 2 3 Bracket footrest and frame M8 1 25 28 2 8 Rear master cylinder and bracket M8 1 25 23 2 3 Footrest bracket and footrest M10 1 25 55 5 5 Footrest bracket rear and frame M8 1 25 28 2 8 Center stand nut M10 1 25 56 5 6 Footrest bracket and exhaust pipe M8 1 25 20 2 0 Footrest bracket rear and muffler M10 1 25 30 3 0 1 First tigh...

Страница 36: ... winding resistance J0313 DENSO 1 87 2 53 Ω at 20 C 12 18 kΩ at 20 C Spark plug cap Type Resistance Resin type 10 kΩ Charging system Type Model manufacturer Standard output Stator coil resistance A C magneto F4T359 MITSUBISHI 12 V 18 A at 5 000 r min 0 36 0 44 Ω at 20 C W W Voltage regulator Type Model manufacturer No load regulated voltage Semi conductor short circuit type SH650 12 SHINDENGEN 14 ...

Страница 37: ... 62 Ω at 20 C Horn Type Quantity Model manufacturer Maximum amperage Performance Coil winding resistance Plane type 1 pcs YF 12 NIKKO 3 0 A 105 120 db 2 m 1 15 1 25 Ω at 20 C Flasher relay Type Model manufacturer Self cancelling device Hazard flasher device Flasher frequency Wattage Full transistor type FE246BH DENSO No Yes 75 95 cyl min 21 W 2 1 4 W Oil level gauge Model manufacture 4JH SOMIC Fue...

Страница 38: ...2 16 MAINTENANCE SPECIFICATIONS SPEC Item Standard limit Amperage for individual circuit Main Headlight Signal Ignition Fan Back up Reserve 30 A 20 A 20 A 20 A 10 A 5 A 30 A 20 A 10 A 5 A ...

Страница 39: ... of this manual To avoid warpage tighten multi fastener assemblies in a crisscross pattern and progressive stages until the specified tightening torque is reached Unless otherwise specified tightening torque specifications require clean dry threads Components should be at room temperature A Width across flats B Thread diameter A Nut B Bolt General tightening torques Nut Bolt Nm m kg 10 mm 6 mm 6 0...

Страница 40: ...er Camshaft cap Water pump seal Coolant Water pump shaft Radiator hose Silicon Oil pump Relief valve O ring Oil cooler O ring Oil filter Oil level gauge Starter moter O ring Starter idrer gear Main axle 5 6th pinion Drive axle 1 X 4th wheel gear Push lever Push rod Shift cam Shift fork guide bar Shift shaft Starter idrer gear shaft 1 Neutral switch O ring Push rod Push rod 1 O ring Shift pedal Shi...

Страница 41: ...seal Rear arm cover oil seal lips Relay arm bearing Relay arm oil seal Rear shock absorber upper lower Front wheel oil seal Speed sensor oil seal Rear wheel oil seal Clutch damper oil seal Clutch and rear wheel Throttle cable inner surface Starter cable inner surface and lever pivot Rear brake pedal shaft Shift pedal shaft Side stand sliding surface Rear foot rest pivot bolt ...

Страница 42: ...t hose 9 Radiator 10 Radiator inlet hose 1 Engine outlet hose 2 Engine outlet hose 3 Carburetor inlet hose 4 Carburetor outlet hose 5 Water pump 6 Coolant drain bolt 7 Water pump outlet hose COOLING SYSTEM DIAGRAMS SPEC EB203000 COOLING SYSTEM DIAGRAMS ...

Страница 43: ...2 21 1 Radiator 2 Water pump outlet hose 3 Oil cooler inlet hose 4 Oil cooler outlet hose 5 Carburetor outlet hose COOLING SYSTEM DIAGRAMS SPEC ...

Страница 44: ...2 22 1 2 3 4 7 6 5 4 1 Oil nozzle main nozzle 2 Oil nozzle drive axle 3 Projection 4 Oil filter 5 Relief valve 6 Oil strainer 7 Oil pump LUBRICATION DIAGRAMS SPEC EB204000 LUBRICATION DIAGRAMS ...

Страница 45: ...2 23 1 2 3 4 LUBRICATION DIAGRAMS SPEC 1 Main axle 2 Drive axle 3 Camshaft 4 Oil delivery pipe ...

Страница 46: ...2 24 1 2 LUBRICATION DIAGRAMS SPEC 1 Camshaft 2 Crankshaft ...

Страница 47: ...lead left clutch cable and starter cable B Pass the brake hose out side of the speed sensor lead then use a plastic clamp to fasten them 1 Throttle cable 2 Clutch cable 3 Handlebar switch right 4 Starter cable 5 Main switch 6 Brake hose 7 Speed sensor lead 8 Headlight lead CABLE ROUTING SPEC EB205000 CABLE ROUTING ...

Страница 48: ...cuit cut off relay 13 Battery positive lead 14 Seat lock cable 15 AC magneto lead 16 Starter motor lead 17 Air filter drain hose 18 Sidestand switch 19 Neutral switch 20 Oil level switch 21 Speed sensor lead 22 Horn 23 Starter relay 24 Fuse box 25 To front brake switch 26 To battery negative lead 27 To starter relay 28 AC magneto coupler 29 Pickup coupler 30 Sidestand switch coupler 31 Oil level n...

Страница 49: ...utch cable and starter cable to the frame B Use a plastic band to fasten together wireharness starter motor lead AC magneto lead sidestand switch lead and oil level neutral switch lead then hold the clamp to the frame bracket CABLE ROUTING SPEC Position the band end to out side of chassis C Use a plastic locking tie to fasten the starter motor lead AC magneto lead sidestand switch lead and oil lev...

Страница 50: ...10 Throttle cable 11 Brake hose 12 Headlight lead 13 Speed sensor lead 14 Main switch lead 15 Reservoir tank 16 Cross tube 17 Reservoir tank over flow hose 18 Swingarm bracket A Use a plastic clamp to fasten together the throttle cables headlight lead handlebar switch right and speed sensor lead B Use a plastic locking tie to fasten the handlebar switch right and brake hose to the right front fork...

Страница 51: ... main switch lead under the throttle cables headlight lead handlebar switch lead right and speed sensor lead then insert it right side of the box D Pass the reservoir tank over flow hose fuel tank breather hose and fuel tank drain hose through the cable holder CABLE ROUTING SPEC ...

Страница 52: ...ve lead 12 Battery 13 Rear brake reservoir tank 14 Rear brake switch lead 15 Seat lock cable 16 Ignitor 17 Rear turn signal light lead right 18 Taillight lead 19 Rear turn signal light lead left 20 Starter motor lead 1 Throttle cable 2 Handlebar switch lead right 3 Headlight lead 4 Speed sensor lead 5 Carburetor heater hose 6 Reservoir tank hose 7 Fuel pump 8 Fuel filter 9 T P S lead 10 Fuel sende...

Страница 53: ...fier regulator lead fan motor lead handlebar switch lead left main switch lead headlight lead handlebar switch lead right and speed sensor lead through front side of the box then connecte each coupler in the box C Align the connector position of rear turn signal light leads left and right then bend the rear 31 Starter cable 32 Clutch cable 33 Handlebar switch lead left 34 Main switch lead 35 To ta...

Страница 54: ...SPEC ...

Страница 55: ...CHK ADJ 3 ...

Страница 56: ...HECKING THE EXHAUST SYSTEM 3 25 CHECKING THE COOLANT LEVEL 3 26 CHECKING THE COOLING SYSTEM 3 26 CHANGING THE COOLANT 3 27 CHASSIS 3 30 ADJUSTING THE FRONT BRAKE 3 30 ADJUSTING THE REAR BRAKE 3 30 CHECKING THE BRAKE FLUID LEVEL 3 31 ADJUSTING THE REAR BRAKE LIGHT SWITCH 3 32 CHECKING THE BRAKE HOSES 3 33 BLEEDING THE HYDRAULIC BRAKE SYSTEM 3 33 ADJUSTING THE SHIFT PEDAL 3 34 ADJUSTING THE DRIVE CH...

Страница 57: ...CHK ADJ ...

Страница 58: ...lace if necessary 6 Clutch Check operation Adjust or replace cable 7 Front brake Cehck operation fluid level and vehicle for fluid leakage See NOTE Correct accordingly Replace brake pads if necessary 8 Rear brake Check operation fluid level and vehicle for fluid leakage See NOTE Correct accordingly Replace brake pads if necessary 9 Wheels Check balance runout and for damage Rebalance or replace if...

Страница 59: ...d starter operation Adjust if necessary 22 Engine oil Check oil level and vehicle for oil leakage Correct if necessary Change Warm engine before draining 23 Engine oil filter cartridge Replace 24 Cooling system Check coolant level and vehicle for coolant leakage Correct if necessary Change coolant every 24 000 km or 24 months whichever comes first Since these items require special tools data and t...

Страница 60: ...ty Remarks 1 2 3 4 5 6 7 Removing the front cowling View mirror left right Inner panel left right Cowling stay left right Head light lead Front flasher light lead left right Front cowling Head light assembly 1 1 1 1 1 1 2 2 2 1 1 33 Nm 3 3 m kg CHK ADJ FRONT COWLING SEAT SIDE COVER FUEL TANK FRONT COWLING SEAT SIDE COVER FUEL TANK FRONT COWLING ...

Страница 61: ...ser hose Fuel tank drain hose Fuel hose Side cover left right Grab bar Tail cover 1 1 1 1 1 1 1 1 1 1 Remove the parts in the order listed Disconnect the couplers For installation reverse the removal procedure NOTE 10 Nm 1 0 m kg 10 Nm 1 0 m kg 4 Nm 0 4 m kg 19 Nm 1 9 m kg FRONT COWLING SEAT SIDE COVER FUEL TANK CHK ADJ SEAT SIDE COVER AND FUEL TANK ...

Страница 62: ...or adjusted the piston must be at top dead center TDC on the compression stroke 1 Remove front cowling seat fuel tank Refer to FRONT COWLING SEAT SIDE COVER AND FUEL TANK in chapter 3 2 Drain the coolant Refer to COOLANT REPLACEMENT in chapter 3 3 Remove radiator Refer to RADIATOR in chapter 5 4 Remove spark plug cap spark plug magneto cover 5 Measure valve clearance Out of specification Adjust Va...

Страница 63: ...valve clearance with a thick ness gauge 1 S If the valve clearance is incorrect record the measured reading S Measure the valve clearance in the follow ing sequence Valve clearance measuring sequence Cylinder 1 2 4 3 A Front d For each cylinder starting with cylinder 1 at TDC turn the crankshaft counter clockwise as specified in the following table B Degrees that the crankshaft is turned countercl...

Страница 64: ...ts fasten a wire to the timing chain to retrieve it if it falls into the crankcase 10 Adjust valve clearance a Remove the valve lifter 1 and the valve pad 2 Cover the timing chain opening with a rag to prevent the valve pad from falling into the crankcase Make a note of the position of each valve lifter 1 and valve pad 2 so that they can be installed in the correct place b Select the proper valve ...

Страница 65: ...riginal valve pad number according to the following table Last digit Rounded valve 0 or 2 0 5 5 8 10 EXAMPLE Original valve pad number 148 thickness 1 48 mm Rounded value 150 d Locate the rounded number of the origi nal valve pad and the measured valve clearance in the valve pad selection table The point where the column and row in tersect is the new valve pad number The new valve pad number is on...

Страница 66: ... 1 37 240 Measured clearance exa EXAMPLE VALVE CLEARANCE 0 21 0 30 mm Installed is 175 Measured clearance is 0 35 mm Replace 175 pad with 185 pad INSTALLED PAD NUMBER 120 125 130 135 140 145 150 155 160 165 170 175 180 185 190 195 200 205 210 215 220 225 230 235 240 0 00 0 02 120 125 130 135 140 145 150 155 160 165 170 175 180 185 190 195 200 205 210 215 0 03 0 07 120 125 130 135 140 145 150 155 1...

Страница 67: ...als First install the exhaust camshaft Align the camshaft marks a with the cam shaft cap marks Rotate the crankshaft counterclockwise several turns to seat the parts The camshaft caps must be tightened evenly or damage to the cylinder head camshaft caps and camshafts will result g Measure the valve clearance again h If the valve clearance is still out of specifi cation repeat all of the valve clea...

Страница 68: ...idling speed should be properly adjusted and the ignition timing should be checked 1 Stand the motorcycle on a level surface Place the motorcycle on a suitable stand 2 Remove cap 3 Install vacuum gauge 1 engine tachometer 2 to the spark plug lead of cyl 1 Vacuum gauge 90890 03094 Engine tachometer 90890 03113 4 Start the engine and let it warm up for sever al minutes 5 Check engine idling speed Ou...

Страница 69: ...either direction until both gauges read the same c Synchronize carburetor 2 to carburetor 3 by turning the synchronizing screw 3 in either direction until both gauges read the same Vacuum pressure at engine idling speed 30 7 33 3 kPa 230 250 mm Hg The difference in vacuum pressure between two carburetors should not exceed 1 33 kPa 10 mm Hg 0 4 in Hg 7 Check engine idling speed Out of specification...

Страница 70: ...0890 03113 3 Check engine idling speed Out of specification Adjust Engine idling speed 1 150 1 250 r min 4 Adjust engine idling speed a Turn the pilot screw 1 in or out until it is lightly seated b Turn the pilot screw out by the specified number of turns Carburetor angle driver 90890 03158 Pilot screw 2 turns out c Turn the throttle stop screw 2 a or b un til the specified idling speed is obtaine...

Страница 71: ...ble 2 2 is pushed a Loosen the locknut 3 on throttle cable 2 b Turn the adjuster 4 a or b to take up any slack on throttle cable 2 c Loosen the locknut 5 on throttle cable 1 d Turn the adjuster 6 a or b until the spe cified free play is obtained Direction Throttle cable free play is increased Direction Throttle cable free play is decreased e Tighten the locknuts If the specified throttle cable fre...

Страница 72: ...oving the spark plugs blow away any dirt accumulated in the spark plug wells with compressed air to pre vent it from falling into the cylinders 3 Check spark plug type Incorrect Change Spark plug type manufacturer CR8E NGK U24ESR N DENSO 4 Check electrode 1 Damage wear Replace the spark plug insulator 2 Abnormal color Replace the spark plug Normal color is a medium to light tan color 5 Clean spark...

Страница 73: ...l timing light 1 engine tachometer 2 to the spark plug lead of cyl 1 Timing light 90890 03141 Engine tachometer 90890 03113 3 Check ignition timing a Start the engine warm it up for several minutes and then let it run at the speci fied engine idling speed Engine idling speed 1 150 1 250 r min b Check that the stationary pointer a is within the firing range b on the generator rotor Incorrect firing...

Страница 74: ...emoving the spark plugs use compressed air to blow away any dirt ac cumulated in the spark plug wells to pre vent it from falling into the cylinders 5 Install compression gauge 1 Compression gauge 90890 03081 6 Measure compression pressure Above the maximum pressure Inspect the cylinder head valve surfaces and pis ton crown for carbon deposits Below the minimum pressure Squirt a few measure again ...

Страница 75: ...the engine The difference in compression pressure between cylinders should not exceed 100 kPa 1 kg cm2 1 bar 7 Install spark plug Spark plug 13 Nm 1 3 m kg 8 Connect spark plug cap EB303070 CHECKING THE ENGINE OIL LEVEL 1 Stand the motorcycle on a level surface Place the motorcycle on a suitable stand Make sure that the motorcycle is upright 2 Let the engine idle for a few minutes 3 Check engine o...

Страница 76: ...a or higher and do not use oils labeled ENERGY CONSERVING II b or higher Do not allow foreign materials to enter the carankcase 4 Start the engine warm it up for several min utes and then turn it off 5 Check the engine oil level again Before checking the engine oil level wait a few minutes until the oil has settled EB303081 CHANGING THE ENGINE OIL 1 Start the engien warm it up for several min utes...

Страница 77: ...tridge to spec ification with an oil filter wrench Oil filter cartridge 17 Nm 1 7m kg 6 Check engine oil drain bolt gasket Damage Replace 7 Install engine oil drain bolt 1 8 Fill crankcase with the specified amount of the recom mended engine oil Quantity Total amount 3 5 L Without oil filter cartridge replacement 2 5 L With oil filter cartridge replacement 2 7 L 9 Install engine oil filler cap 10 ...

Страница 78: ... engine oil pressure after warming up the engine 3 Remove oil gallery bolt 1 The engine muffler and engine oil are extremely hot 4 Install oil pressure gauge 1 adapter 2 Oil pressure gauge 90890 03153 Adapter 90890 03139 5 Measure engine oil pressure at the following conditions Engine oil pressure 450 kPa 4 5 kg cm2 Engine speed Approx 10 000 r min Engine oil temperature 115 C Out of specification...

Страница 79: ...ut 1 b Turn the adjusting bolt 2 in direction a or b until the specified clutch cable free play is obtained Direction Clutch cable free play is increased Direction Clutch cable free play is decreased c Tighten the locknut If the specified clutch cable free play cannot be obtained on the handlebar side of the cable use the adjusting nut on the engine side Engine side a Loosen the locknuts 3 b Turn ...

Страница 80: ...he outer surface of the air filter element 4 Check air filter element Damage Replace 5 Install air filter element air filter case cover Never operate the engine without the air filter element installed Unfiltered air will cause rapid wear of engine parts and may damage the engine Operating the engine without the air filter element will also af fect the carburetor turning leading to poor engine per...

Страница 81: ...MANIFOLDS The following procedure applies to all of the car buretor joints and intake manifolds 1 Remove seat fuel tank 2 Check carburetor joint 1 intake manifold 2 Cracks damage Replace Refer to CARBURETOR in chapter 6 3 Install fuel tank seat EB303181 CHECKING THE FUEL HOSES AND FUEL FILTER The following procedure applies to all of the fuel hoses 1 Remove seat fuel tank 2 Check fuel hose 1 Crack...

Страница 82: ...t the crankcase breather hose is routed correctly 3 Install carburetor fuel tank seat EB303200 CHECKING THE EXHAUST SYSTEM The following procedure applies to all of the ex haust pipes and gaskets 1 Check exhaust pipe 1 muffler 2 Cracks damage Replace gasket 3 Exhaust gas leaks Replace 2 Check tightening torque Exhaust pipe ring nut 4 10 Nm 1 0 m kg Exhaust pipe and footrest bracket 5 20 Nm 2 0 m k...

Страница 83: ...eze content of the coolant If water is used instead of coolant check and correct the antifreeze concentra tion of the coolant Use only distilled water Soft water may be used if distilled water is not avail able 4 Start the engine warm it up for several min utes and then turn it off 5 Check coolant level Before checking the coolant level wait a few minutes until it settles 6 Install side cover righ...

Страница 84: ...tor cap as follows Place a thick rag or a towel over the radia tor cap and slowly rotate the radiator cap counterclockwise towrd the detent to al low any residual pressure to escape When the hissing sound has stopped press down on the radiator cap while still pressing down turn it counterclock wise and then remove it The following procedure applies to all of the coolant drain bolts and copper wash...

Страница 85: ...ecial care If coolant splashes in your eyes thor oughly wash them with water and con sult a doctor If coolant splashes on your clothes quickly wash it away with water and then with soap and water If coolant is swallowed induce vomit ing and get immediate medical atten tion Adding water instead of coolant lowers the antifreeze content of the coolant If water is used instead of coolant check and if ...

Страница 86: ...ant to the maximum level mark a 13 Install coolant reservoir cap 14 Start the engine warm it up for several min utes and then turn if off 15 Check coolant level Refer to CHECKING THE COOLANT LEVEL Before checking the coolant level wait a few minutes until it settles 16 Install fuel tank seat ...

Страница 87: ...t Position 4 Distance is the smallest After adjusting the brake lever position make sure that the pin on the brake lever holder is firmly inserted in the hole in the adjusting dial EB304010 ADJUSTING THE REAR BRAKE 1 Check brake pedal position distance a from the top of the rider foot rest to the top of the brake pedal Out of specification Adjust Brake pedal position below the top of the rider foo...

Страница 88: ...ill considerably reduce braking performance and could result in loss of control and possibly an accident There fore inspect and if necessary bleed the brake system After adjusting the brake pedal position make sure that there is no brake drag 3 Adjust rear brake light switch Refer to ADJUSTING THE REAR BRAKE LIGHT SWITCH EB304020 CHECKING THE BRAKE FLUID LEVEL 1 Stand the motorcycle on a level sur...

Страница 89: ...ted sur faces and plastic parts Therefore al ways clean up any spilt brake fluid im mediately In order to ensure a correct reading of the brake fluid level make sure that the top of the reservoir is horizontal EB304050 ADJUSTING THE REAR BRAKE LIGHT SWITCH The rear brake light switch is operated by movement of the brake pedal The rear brake light switch is properly ad justed when the brake light c...

Страница 90: ...aulic brake system when ever the system was disassembled a brake hose was loosened or removed the brake fluid level is very low brake operation is faulty 1 Remove reservoir cap diaphragm 1 Be careful not to spill any brake fluid or al low the brake master cylinder reservoir or brake fluid reservoir to overflow When bleeding the hydraulic brake sys tem make sure that there is always enough brake fl...

Страница 91: ...brake pedal to fully extend h Tighten the bleed screw and then release the brake lever or brake pedal i Repeat steps e to h until all of the air bubbles have disappeared from the brake fluid in the plastic hose j Tighten the bleed screw to specification Bleed screw 6 Nm 0 6 m kg k Fill the reservoir to the proper level Refer to CHECKING THE BRAKE FLUID LEVEL After bleeding the hydraulic brake sys ...

Страница 92: ... danger of it falling over Both wheels should be on the ground with out rider on the motorcycle 2 Rotate the rear wheel several times and check the drive chain to locate its tightest point 3 Check drive chain slack a Out of specification Adjust Drive chain slack 30 40 mm 4 Loosen wheel axle nut 1 5 Adjust drive chain slack a Loosen both locknuts 1 b Turn both adjusting nuts 2 in direction a or b u...

Страница 93: ...of a coarse brush can damage these O rings Therefore use only ker osine to clean the drive chain Wipe the drive chain dry and thoroughly lubricate it with engine oil or chain lubricant that is suitable for O ring chains Do not use any other lubricants on the drive chain since they may contain solvents that could damage the O rings Recommended lubricant Engine oil or chain lubricant suitable for O ...

Страница 94: ...ion Do not overtighten the lower ring nut Lower ring nut final tightening torque 18 Nm 1 8 m kg d Check the steering head for looseness or binding by turning the front fork all the way in both directions If any binding is felt remove the lower bracket and inspect the upper and lower bearings Refer to STEERING HEAD AND HAN DLEBAR in chapter 7 e Install the rubber washer 6 f Install the upper ring n...

Страница 95: ...ver 2 Check inner tube Damage scratches Replace oil seal Oil leakage Replace 3 Hold the motorcycle upright and apply the front brake 4 Check operation Push down hard on the handlebar several times and check if the front fork rebounds smoothly Unsmooth operation Repair Refer to FRONT FORK in chapter 7 EB304160 ADJUSTING THE REAR SHOCK ABSORBER ASSEMBLY Securely support the motorcycle so that there ...

Страница 96: ... Adjusting positions 1 4 9 EB304170 CHECKING THE TIRES The following procedure applies to both of the tires 1 Measure tire pressure Out of specification Regulate The tire pressure should only be checked and regulated when the tire temperature equals the ambient air temperature The tire pressure and the suspension must be adjusted according to the total weight including cargo rider passen ger and a...

Страница 97: ... Damage wear Replace the tire Minimum tire tread depth 1 6 mm 1 Tire tread depth 2 Side wall 3 Wear indicator Do not use a tubeless tire on a wheel de signed only for tube tires to avoid tire failure and personal injury from sudden deflation When using a tube tire be sure to install the correct tube Always replace a new tube tire and a new tube as a set To avoid pinching the tube make sure that th...

Страница 98: ...cture Size Type BRIDGESTONE 160 60 ZR17 69 W BT57R DUNLOP 160 60 ZR17 69 W D207J After mounting a new tire ride conserva tively for a while to become accustomed to the feel of the new tire and to allow the tire to seat itself properly in the rim Failure to do so could lead to an accident with possible injury to the rider or dam age to the motorcycle For tires with a direction of rotation mark 1 In...

Страница 99: ... Hold the cable end upright and pour a few drops of lubricant into the cable sheath or use a suitable lubing device DB304210 LUBRICATING THE LEVERS AND PEDALS Lubricate the pivoting point and metal to metal moving parts parts of the levers and pedals Recommended lubricant Lithium soap base grease EB304220 LUBRICATING THE SIDESTAND Lubricate the pivoting point and metal to metal moving parts of the...

Страница 100: ...lectrolyte as it can cause severe burns or permanent eye injury First aid in case of bodily contact External SKIN Wash with water EYES Flush with water for 15 minutes and get immediate medical attention Internal Drink large quantities of water or milk fol lowed with milk of magnesia beaten egg or vegetable oil Get immediate medical attention This is a sealed battery Never remove the sealing caps b...

Страница 101: ...battery 4 Check battery charge a Connect a digital voltmeter to the battery terminals Tester positive lead battery positive terminal Tester negative lead battery negative terminal The charge state of a MF battery can be checked by measuring its open circuit volt age i e the voltage when the positive ter minal is disconnected No charging is necessary when the open circuit voltage equals or exceeds ...

Страница 102: ...do not plug in the battery charger until the bat tery charger leads are connected to the battery Before removing the battery charger lead clips from the battery terminals be sure to turn off the battery charger Make sure that the battery charger lead clips are in full contact with the battery terminal and that they are not shorted A corroded battery charger lead clip may generate heat in the conta...

Страница 103: ...hecking steps If the current does not exceed the standard charging current after 5 minutes replace the battery If charging requires more than 5 hours it is advisable to check the charging current after a lapse of 5 hours If there is any change in the amperage readjust the voltage to obtain the standard charging current Measure the battery open circuit voltage after leaving the battery unused for m...

Страница 104: ...5 V Charge the battery until the battery s charging voltage is 15 V This type of battery charger cannot charge the MF battery A variable voltage charger is recommended Measure the battery open circuit voltage after leaving the battery unused for more than 30 minutes 12 8 V or more Charging is complete 12 7 V or less Recharging is required Under 12 0 V Replace the battery NOTE Set the charging time...

Страница 105: ... Connect properly 9 Lubricate battery terminals Recommended lubricant Dielectric grease 10 Install seat EB305040 CHECKING THE FUSES The following procedure applies to all of the fuses To avoid a short circuit always turn the main switch to OFF when checking or replacing a fuse 1 Remove seat 2 Check fuse a Connect the pocket tester to the fuse and check it for continuity Se the pocket tester select...

Страница 106: ... A 1 Headlight fuse 20 A 1 Signaling system fuse 20 A 1 Ignition fuse 20 A 1 Radiator fan fuse 5 A 1 30 A 1 Reserve fuse 20 A 1 10 A 1 Never use a fuse with an amperage rating other than that specified Improvising or using a fuse with the wrong amperage rating may cause extensive damage to the electrical system cause the lighting and ignition systems to malfunction and could possibly cause a fire ...

Страница 107: ... the glass part of the headlight bulb to keep it free from oil otherwise the transparency of the glass the life of the bulb and the luminous flux will be adversely affected If the headlight bulb gets soiled thoroughly clean it with a cloth moistened with alcohol or lacquer thinner 5 Install headlight bulb holder 6 Connect headlight lead EB305061 ADJUSTING THE HEADLIGHT BEAMS The following procedur...

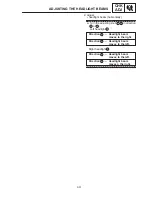
Страница 108: ...am horizontally a Turn the adjusting knob 2 4 in direction a or b Left headlight 2 Direction Headlight beam moves to the right Direction Headlight beam moves to the left Right headlight 4 Direction Headlight beam moves to the left Direction Headlight beam moves o the right ...

Страница 109: ...CHK ADJ ...

Страница 110: ...ENG 4 ...

Страница 111: ...ND VALVE GUIDES 4 19 CHECKING THE VALVE SEATS 4 20 CHECKING THE VALVE SPRINGS 4 22 CHECKING THE VALVE LIFTERS 4 22 CHECKING THE CAMSHAFT CAP 4 23 INSTALLING THE VALVES 4 23 CYLINDERS AND PISTONS 4 25 REMOVING THE CYLINDERS AND PISTONS 4 26 CHECKING THE CYLINDERS AND PISTONS 4 26 CHECKING THE PISTON RINGS 4 27 CHECKING THE PISTON PINS 4 28 INSTALLING THE PISTON AND CYLINDER 4 29 CLUTCH 4 31 CLUTCH ...

Страница 112: ... THE OIL PUMP 4 51 INSTALLING THE OIL PUMP 4 52 INSTALLING THE OIL STRAINER 4 52 INSTALLING THE OIL PAN 4 52 CRANKCASE 4 54 DISASSEMBLING THE CRANKCASE 4 56 CHECKING THE CRANKCASE 4 56 ASSEMBLING THE CRANKCASE 4 57 CRANKSHAFT 4 59 CONNECTING ROD 4 60 REMOVING THE CRANKSHAFT ASSEMBLY 4 61 REMOVING THE CONNECTING RODS 4 61 CHECKING THE CRANKSHAFT AND CONNECTING RODS 4 61 INSTALLING THE CONNECTING RO...

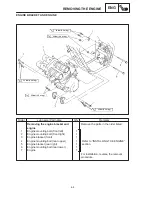
Страница 113: ...adiator Carburetor Starter motor Exhaust pipe assembly Exhaust pipe gasket Oil filter 1 4 1 Remove the parts in the order listed Refer to CHANGING THE ENGINE OIL section in capter 3 Refer to FRONT COWLING SEAT SIDE COVER FUEL TANK section in chapter 3 Refer to RADIATOR section in chapter 5 Refer to CARBURETOR section in chapter 6 Refer to STARTER MOTOR section in chapter 8 REMOVING THE ENGINE ENG ...

Страница 114: ...7 m kg Order Job name Part name Q ty Remarks 4 5 6 7 8 9 Shift arm Drive sprocket cover Drive chain sprocket gasket Dowel pin Lock washer Drive sprocket Drive chain 1 1 1 2 1 1 1 Refer to INSTALLING THE ENGINE section For installation reverse the removal procedure REMOVING THE ENGINE ENG ...

Страница 115: ...l switch lead Ground lead Plug cap Crankcase breather hose Cover Water pump outlet hose Radiator outlet hose Engine outlet hose Engine outlet hose 1 1 1 1 1 4 1 1 1 1 1 1 Disconnect the parts in the order listed For connecting reverse the disconnection procedure Engine right side Engine left side 12 Nm 1 2 m kg REMOVING THE ENGINE ENG LEADS AND HOSES ...

Страница 116: ... Engine mounting bolt front left Engine mounting bolt front right Engine bracket front Engine mounting bolt rear upper Engine bracket rear right Engine mounting bolt rear lower Engine 1 1 1 1 1 1 1 Remove the parts in the order listed Refer to INSTALLING THE ENGINE section For installation reverse the removal procedure REMOVING THE ENGINE ENG ENGINE BRACKET AND ENGINE ...

Страница 117: ...s in the following order Bolt 1 55 Nm 5 5 m kg Bolt 2 55 Nm 5 5 m kg Bolt 3 55 Nm 5 5 m kg Bolt 4 55 Nm 5 5 m kg Engine bracket 5 33 Nm 3 3 m kg Engine bracket 6 10 Nm 10 m kg 3 Install shift arm 1 Align the punch mark a in the shift shaft with the slot in the shift arm Align the bottom edge of the shift pedal b with the mark a on the frame to swingarm bracket Shift arm bolt 10 Nm 1 0 m kg ...

Страница 118: ...ug cap Cylinder head side cover Cylinder head cover Cylinder head cover gasket 4 1 1 Remove the parts in the order listed Refer to FRONT COWLING SEAT SIDE COVER FUEL TANK section in chapter 3 Refer to RADIATOR section in chapter 5 Refer to CARBURETOR section in chapter 6 Refer to REMOVING THE ENGINE section For installation reverse the removal procedure CAMSHAFT ENG CAMSHAFT CYLINDER HEAD COVERS ...

Страница 119: ...park plug Magneto cover Timing chain guide upper Timing chain tensioner assembly Timing chain guide exhaust side Camshaft cap Dowel pin Camshaft intake Cmashaft exhaust Camshaft sprocket 4 1 1 1 1 4 12 1 1 2 Remove the parts in the order listed Refer to REMOVING INSTALLING THE CAMSHAFT section For installation reverse the removal procedure CAMSHAFT ENG CAMSHAFT ...

Страница 120: ...ion stroke align the T mark a with the stationary pointer b TDC on the compression stroke can be found when the camshaft lobes are turned away from each other 3 Remove timing chain guide top side 1 4 Loosen camshaft sprocket bolts 2 5 Loosen timing chain tensioner cap bolt 1 6 Remove timing chain tensioner 2 7 Remove timing chain guide exhaust side 1 camshaft caps 2 For reference during installati...

Страница 121: ...event the timing chain from falling into the crankcase fasten it with a wire 3 EB401401 CHECKING THE CAMSHAFTS 1 Check camshaft lobes Blue discoloration pitting scratches Replace the camshaft 2 Measure camshaft lobe dimensions A and B Out of specification Replace the cam shaft Camshaft lobe dimension limit Intake A 32 7 mm B 24 95 mm Exhaust A 32 4mm B 24 9 mm 3 Measure camshaft runout Out of spec...

Страница 122: ... journal to camshaft cap clearance with the Plastigauge Camshaft cap bolt 10 Nm 1 0 m kg a Remove the camshaft caps and then measure the width of the Plastigauge 1 EB401421 CHECKING THE TIMING CHAIN CAMSHAFT SPFROCKETS AND TIMING CHAIN GUIDES The following procedure applies to all of the camshaft sprockets and timing chain guides 1 Check timing chain 1 Damage stiffness Replace the timing chain and...

Страница 123: ...the defective part s EB401702 INSTALLING THE CAMSHAFTS 1 Install exhaust camshaft 1 intake camshaft 2 with the camshaft sprockets temporarily tightened Install the camshafts with their punch marks facing up 2 Install dowel pins 1 intake camshaft caps 2 exhaust camshaft caps 3 Install the camshaft cap with the arrow mark a pointing towards the right side of the en gine 3 Install camshaft cap bolts ...

Страница 124: ...mshaft sprockets start with the exhaust camshaft and be sure to keep the timing chain as tight as possible on the exhaust side Make sure that the match marks c are parallel with the edge of the cylinder head I Intake side E Exhaust side Do not turn the crankshaft when instal ling the camshaft to avoid damage or im proper valve timing d After the crankshaft is turned several full turns and piston 1...

Страница 125: ...b on the crankcase camshaft punch marks c Make sure that the punch marks on the camshafts are aligned with the embossed marks d on the camshaft cap Out of alignment Adjust Refer to the installation steps above 9 Tighten camshaft sprocket bolts Be sure to tighten the camshaft sprocket bolts to the specified torque to avoid the possiblity of the bolts coming loose and damaging the engine Camshaft sp...

Страница 126: ...ead Camshaft Union bolt Copper washer Oil delivery pipe Cylinder head Cylinder head gasket Dowel pin 2 4 1 1 1 2 Remove the parts in the order listed Refer to CAMSHAFT section Refer to REMOVING INSTALLING THE CYLINDER HEAD section For installation reverse the removal procedure CYLINDER HEAD ENG CYLINDER HEAD ...

Страница 127: ...t to avoid dam aging or scratching spark plug threads valve seats 2 Check cylinder head Damage scratches Replace cylinder head water jacket Mineral deposits rust Eliminate 3 Measure cylinder head warpage Out of specification Resurface the cylin der head Cylinder head warpage Less than 0 05 mm a Place a straightedge 1 and a thickness gauge 2 across the cylinder head b Measure the warpage c If the l...

Страница 128: ...st face up 2 Install cylinder head Apply engine oil onto the threads of the cyl inder head nuts Tighten the cylinder head nuts in the prop er tightening sequence as shown and torque them in two stages Cylinder head nut First 20 Nm 2 0 m kg Second 35 Nm 3 5 m kg 3 Install exhaust camshaft intake camshaft Refer to INSTALLING THE CAM SHAFTS ...

Страница 129: ...e cotters Upper spring seat Valve spring Valve intake Valve exhaust Oil seal Lower spring seat 4 4 8 4 4 2 2 4 4 Remove the parts in the order listed Refer to CAMSHAFT section Refer to CYLINDER HEAD section Refer to REMOVING INSTALLING THE VALVES section For installation reverse the removal procedure VALVES AND VALVE SPRINGS ENG VALVES AND VALVE SPRINGS ...

Страница 130: ...eck valve sealing Leakage at the valve seat Check the valve face valve seat and valve seat aidth Refer to CHECKING THE VALVE SEATS a Pour a clean solvent a into the intake and exhaust ports b Check that the valves properly seal There should be no leakage at the valve seat 1 3 Remove valve cotters 1 Remove the valve cotters by compressing the valve spring with the valve spring com pressor 2 and att...

Страница 131: ...To ease valve guide removal and installa tion and to maintain the correct fit heat the cylinder head to 100_C 212_C in an oven a Remove the valve guide with a valve guide remover 1 b Install the new valve guide with a valve guide installer 2 and valve guide remov er 1 c After installing the valve guide bore the valve guide with a valve guide reamer 3 to obtain the proper valve stem to valve guide ...

Страница 132: ...ace the valve When installing a new valve always re place the valve guide If the valve is removed or replaced always replace the oil seal Valve stem runout Limit 0 04 mm EB403410 CHECKING THE VALVE SEATS The following procedure applies to all of the valves and vlve seats 1 Eliminate carbon deposits from the valve face and valve seat 2 Check valve seat Pitting wear Replace the cylinder head 3 Measu...

Страница 133: ...the valve guide b Apply molybdenum disulfide oil onto the valve stem c Install the valve into the cylinder head d Turn the valve until the valve face and valve seat are evenly polished then clean off all of the lapping compound For the best lapping results lightly tap the valve seat while rotating the valve back and forth between your hand e Apply a fine lapping compound to the valve face and repe...

Страница 134: ...7 5 mm 2 Measure compressed spring force a Out of specification Replace the valve spring b Installed length Compressed spring force Intake and exhaust spring 13 4 15 6 kg at 34 5 mm 3 Measure valve spring tilt a Out of specification Replace the valve spring Spring tilt limit Intake and exhaust spring 1 8 mm EB403430 CHECKING THE VALVE LIFTERS The following procedure applies to all of the valve lif...

Страница 135: ...ace the defective part s Dirt obstruction Wash the pipe s and then blow it out with compressed air EB403700 INSTALLING THE VALVES The following procedure applies to all of the valves and related components 1 Deburr valve stem end with an oil stone 2 Lubricate valve stem 1 oil seal with the recommended lubricant Recommended lubricant Molybdenum disulfide oil 3 Install valve 1 lower spring seat 2 oi...

Страница 136: ... lightly tap the valve tip with a soft face hammer Hitting the valve tip with excessive force could damage the valve 6 Install valve pad 1 valve lifter 2 Apply molybdenum disulfide oil onto the valve lifter and valve pad The valve lifter must move smoothly when rotated with a finger Each valve lifter and valve pad must be re installed in its original position ...

Страница 137: ...el pin O ring Piston pin circlip Piston pin Piston Piston ring set 1 2 1 1 2 4 8 4 4 4 Remove the parts in the order listed Refer to CYLINDER HEAD section Refer to INSTALLING THE PISTON AND CYLINDER section Refer to REMOVING THE CYLINDER AND PISTONS INSTALLING THE PISTON AND CYLINDER section For installation reverse the removal procedure CYLINDER AND PISTON ENG CYLINDER AND PISTON ...

Страница 138: ...as are deburred and the piston pin is still difficult to remove re move it with the piston pin puller 4 Piston pin puller 90890 01304 2 Remove top ring 2nd ring oil ring When removing a piston ring open the end gap with your fingers and lift the other side of the ring over the piston crown EB404405 CHECKING THE CYLINDERS AND PISTONS The following procedure applies to all of the cyl inders and pist...

Страница 139: ...inder clear ance with the following formula Piston to cylinder clearance cylinder bore C Piston skirt diameter P Piston to cylinder clearance 0 025 0 050 mm Limit 0 07 mm f If out of specification replace the cylin der piston and piston rings as a set EB404410 CHECKING THE PISTON RINGS 1 Measure piston ring side clearance 1 Out of specification Replace the piston and piston rings as a set Before m...

Страница 140: ... oil ring rail s gap is excessive replace all three piston rings Piston ring end gap Top ring 0 15 0 30 mm Limit 0 6 mm 2nd ring 0 25 0 40 mm Limit 0 7 mm Oil ring 0 1 0 35 mm EB404421 CHECKING THE PISTON PINS The following procedure applies to all of the pis ton pins 1 Check piston pin Blue discoloration grooves Replace the piston pin and then check the lubrication system 2 Measure piston pin out...

Страница 141: ... 2nd ring 2 lower oil ring rail 3 upper oil ring rail 4 oil ring expander 5 Be sure to install the piston rings so that the manufacturer s marks or numbers face up 2 Install piston 1 piston pin 2 piston pin clip New 3 Apply engine oil onto the piston pin Make sure that the EX mark a on the pis ton faces towards the exhaust side of the engine Before installing the piston pin clip cover the crankcas...

Страница 142: ...istons 2 and 3 Pass the timing chain and timing chain guide exhaust side through the timing chain cavity a Install a piston ring compressor 1 to pis ton 2 and 3 b Install pistons 2 and 3 onto the cylinder c Remove the piston ring compressor d Install the piston ring compressor 1 to pistons 1 and 4 e Install pistons 1 and 4 onto the cylinder f Remove the piston ring compressor Piston ring compresso...

Страница 143: ...the clutch cover Drain the engine oil Clutch cover Clutch cover gasket Dowel pin Drive sprocket cover Clutch cable 1 1 2 1 1 Remove the parts in the order listed Refer to CHANGING THE ENGINE OIL section in chapter 3 For installation reverse the removal procedure CLUTCH ENG CLUTCH CLUTCH COVER ...

Страница 144: ...ression spring Pressure plate Short clutch push rod O ring Ball Long clutch push rod Friction plate Clutch plate Fricition plate large Clutch spring plate Nut 6 1 1 1 1 1 8 8 1 1 1 Remove the parts in the order listed Refer to INSTALLING THE CLUTCH section Refer to REMOVING INSTALLING THE CLUTCH section CLUTCH ENG CLUTCH ...

Страница 145: ...boss Thrust washer Spacer Bearing Clutch housing Thrust washer Spacer 1 1 1 1 1 1 1 1 Refer to REMOVING INSTALLING THE CLUTCH section Refer to INSTALLING THE CLUTCH section Refer to REMOVING INSTALLING THE CLUTCH section Refer to INSTALLING THE CLUTCH seciton For installation reverse the removal procedure CLUTCH ENG ...

Страница 146: ...cedure applies to all of the fric tion plates 1 Check friction plate Damage wear Replace the friction plates as a set 2 Measure friction plate thickness Out of specification Replace the friction plates as a set Measure the friction plate at four places Friction plate thickness 2 94 3 06 mm Limit 2 8 mm EB405410 CHECKING THE CLUTCH PLATES The following procedure applies to all of the clutch plates ...

Страница 147: ...ings as a set Clutch spring free length 34 9 mm Limit 34 3 mm EB405430 CHECKING THE CLUTCH SPRING PLATE 1 Check clutch spring plate Damage Replace 2 Check clutch spring plate seat Damage Replace EB405440 CHECKING THE CLUTCH HOUSING 1 Check clutch housing dogs 1 Damage pitting wear Deburr the clutch housing dogs or replace the clutch hous ing Pitting on the clutch housing dogs will cause erratic cl...

Страница 148: ...damage Replace bearing 2 Damage wear Replace EB405480 CHECKING THE CLUTCH PUSH RODS 1 Check O ring 1 short clutch push rod 2 long clutch push rod 3 ball 4 Cracks damage wear Replace the de fective part s 2 Measure long clutch push rod bending limit 1 Out of specification Replace the long clutch push rod Long clutch push rod bending limit 0 3 mm EB405701 INSTALLING THE CLUTCH 1 Install bearing 1 sp...

Страница 149: ...ch push rod ball short clutch push rod along with a new O ring 4 6 Lubricate friction plates 1 clutch plates 2 with the recommended lubricant Recommended lubricant Engine oil 7 Install friction plates 1 clutch plates 2 a Install a friction plate and clutch plate b Install a clutch spring plate friction plate large of inside dia and clutch plate c Install a friction plate and then alternate between...

Страница 150: ...4 38 CLUTCH ENG 12 Nm 1 2 m kg NOTE 9 Install clutch cover 1 Tighten the clutch cover bolts in stages and in a crisscross pattern ...

Страница 151: ...over Collar Shift shaft Shift lever spring Stopper lever SHift lever spring 1 1 1 1 1 Remove the parts in the order listed Refer to OIL PUMP section Refer to REMOVING THE ENGINE section Refer to INSTALLING THE SHIFT SHAFT section For installation reverse the removal procedure SHIFT SHAFT ENG SHIFT SHAFT ...

Страница 152: ...B408700 INSTALLING THE SHIFT SHAFT 1 Install stopper lever 1 stopper lever spring 2 shift shaft lever Hook the ends of the stopper lever spring onto the stopper lever and the crankcase boss Mesh the stopper lever with the shift drum segment assembly 2 Install shift shaft 1 Lubricate the oil seal lips with lithium soap base grease Hook the end of the shift lever spring onto the shift lever spring s...

Страница 153: ...Seat Fuel tank Stator pickup coil lead Cover Generator cover Dowel pin Stator coil 1 1 1 1 2 1 Remove the parts in the order listed Refer to FRONT COWLING SEAT SIDE COVER FUEL TANK section in chapter 3 For installation reverse the removal procedure AC MAGNETO AND STARTER CLUTCH ENG AC MAGNETO AND STARTER CLUTCH STATOR COIL ...

Страница 154: ...asket Starter clutch assembly Wood ruff key Starter wheel gear Shaft Primary Starter idle gear primary Shaft Secondary Starter idle gear secondary Shaft drive gear 1 2 1 1 1 1 1 1 1 1 1 Remove the parts in the order listed Refer to REMOVING INSTALLING THE STARTER CLUTCH section For installation reverse the removal procedure AC MAGNETO AND STARTER CLUTCH ENG STARTER CLUTCH ...

Страница 155: ... 1 2 3 Removing the generator roter Bolt washer Rotor Woodruff key 1 1 1 1 Remove the parts in the order listed Refer to REMOVING INSTALLING THE AC MAGNETO section For installation reverse the removal procedure AC MAGNETO AND STARTER CLUTCH ENG AC MAGNETO ROTOR ...

Страница 156: ...osened remove them 2 Remove starter clutch bolt 1 While holding the magneto rotor 2 with the sheave holder 3 remove the starter clutch bolt Sheave holder 90890 01701 3 Remove starter clutch 1 with the flywheel puller set 2 Flywheel puller set 90890 01362 REMOVING THE AC MAGNETO 1 Remove Bolt AC magneto rotor 1 Washer While holding the AC magneto rotor 2 with a sheave holder 3 loosen the AC magneto...

Страница 157: ...ps roughness wear Replace the defective part s 2 Check starter clutch operation a When turning the starter clutch drive gear clockwise a the starter clutch and the starter clutch drive gear should engage If the starter clutch drive gear and starter clutch do not engage the starter clutch is faulty and must be replaced b When turning the starter clutch drive gear counterclockwise b it should turn f...

Страница 158: ...oodruff key is properly seated in the key way of the crankshaft 2 Tighten Bolt magneto rotor Bolt AC magneto rotor 130 Nm 13 0 m kg While holding the AC magneto rotor 1 with a sheave holder 2 tighten the AC magneto ro tor bolt 3 Sheave holder 90890 01701 EB410710 INSTALLING THE STARTER CLUTCH 1 Install starter clutch 1 While holding the generator rotor 1 with the sheave holder 2 tighten the starte...

Страница 159: ...sket Relief valve O ring Oil strainer Oil strainer housing Oil bypass valve Oil cooler O ring 1 1 1 2 1 1 1 1 1 1 1 1 Remove the parts in the order listed Refer to REMOVING THE ENGINE section Refer to INSTALLING THE OIL PAN section Refer to INSTALLING THE OIL STRAINER section Refer to INSTALLING THE ADAPTOR section For installation reverse the removal procedure OIL PAN AND OIL STRAINER ENG OIL PAN...

Страница 160: ...Removing the oil pump Clutch Oil pump assembly Oil pump gasket Dowel pin 1 1 1 Remove the parts in the order listed Refer to CLUTCH section Refer to INSTALLING THE OIL PUMP section For installation reverse the removal procedure OIL PAN AND OIL STRAINER ENG OIL PUMP ...

Страница 161: ...l pump rotor housing Dowel pin Inner rotor outer rotor Dowel pin Oil pump shaft assembly Oil pump cover Washer 1 2 1 1 1 1 1 1 Disassembly the parts in the order listed Refer to ASSEMBLING THE OIL PUMP section For assembly reverse the disassembly procedure 7 OIL PAN AND OIL STRAINER ENG ...

Страница 162: ...r rotor tip clearance A outer rotor to oil pump housing clear ance B oil pump housing to inner rotor and out er rotor clearance C Out of specification Replace the oil pump 1 Inner rotor 2 Outer rotor 3 Oil pump housing Inner rotor to outer rotor tip clearance 0 03 0 09 mm Limit 0 15 mm Outer rotor to oil pump housing clearance 0 03 0 08 mm Limit 0 15 mm Oil pump housing to inner rotor and outer ro...

Страница 163: ...place oil nozzle passage Obstruction Blow out with compressed air EB411701 ASSEMBLING THE OIL PUMP 1 Lubricate inner rotor outer rotor oil pump shaft with the recommended lubricant Recommended lubricant Engine oil 2 Install oil pump shaft 1 to the oil pump cover 2 washer pin 3 inner rotor 4 outer rotor 5 dowel pin 6 oil pump housing 7 When installing the inner rotor align the pin a in the oil pump...

Страница 164: ... pump shaft Align the arrow c on the oil pump with the arrow d on the crankcase EB411720 INSTALLING THE OIL STRAINER 1 Install oil strainer housing 1 LOCKTITE The arrow on the oil strainer housing must point towards the front of the engine 2 Install oil strainer cover 1 The arrow on the oil strainer cover must point towards the rear of the engine EB411730 INSTALLING THE OIL PAN 1 Install dowel pin...

Страница 165: ...AN AND OIL STRAINER ENG NOTE Tighten the oil pan bolts in stages and in a crisscross pattern Lubricate the oil level switch s O ring with engine oil Oil pan bolt 12 Nm 1 2 m kg Oil level switch bolt 7 Nm 0 7 m kg ...

Страница 166: ... stopper plate Neutral switch lead Neutral switch 1 1 1 Disassembly the parts in the order listed Refer to REMOVING THE ENGINE section Refer to CAMSHAFT section Refer to CYLINDER HEAD section Refer to CYLINDER AND PISTON section Refer to CLUTCH section in chapter 4 Refer to OIL PUMP section Refer to SHIFT SHAFT section Refer to AC MAGNETO AND STARTER CLUTCH section Refer to OIL PAN AND OIL STRAINE...

Страница 167: ... 12 Nm 1 2 m kg Order Job name Part name Q ty Remarks 4 5 6 7 8 9 O ring Upper crankcase Dowel pin Oil seal Oil jet O ring 1 1 1 1 1 1 Refer to DISASSEMBLING ASSEMBLING THE CRANKCASE section For assembly reverse the disassembly procedure CRANKCASE ENG ...

Страница 168: ...move lower crankcase Tap on one side of the crankcase with a soft face hammer Tap only on reinforced portions of the crankcase not on the crankcase mating surfaces Work slowly and carefully and make sure that the crankcase halves separate evenly 5 Remove dowel pins oil jet 6 Remove crankshaft journal lower bearing from the lower crankcase Identify the position of each crankshaft jour nal lower bea...

Страница 169: ...to within 2 3 mm of the crankshaft journal bearings 3 Install dowel pin 4 Install crankshaft journal lower bearings 1 into the lower crankcase Align the projections a on the crankshaft journal lower bearings with the notches b in the crankcase Install each crankshaft journal lower bear ing in its original place 5 Set the shift drum assembly and transmis sion gears in the neutral position 6 Install...

Страница 170: ... lower crankcase bolts Lubricate the bolt threads with engine oil Tighten the bolts in increasing numerical order Install washers on bolts 1 12 Install the cable holder on bolt 35 A Upper crankcase B Lower crankcase M8 bolt 24 Nm 2 4 m kg M6 bolt 12 Nm 1 2 m kg ...

Страница 171: ...kcase Timing chain guide intake side Crankshaft assembly Oil seal Timing chain Crankshaft journal bearing 1 1 1 1 12 Remove the parts in the order listed Refer to CRANKCASE section Refer to REMOVING INSTALLING THE CRANKSHAFT ASSEMBLY section For installation reverse the removal procedure CRANKSHAFT ENG CRANKSHAFT ...

Страница 172: ...ecting rod bolt Connecting rod Connecting rod cap Connecting rod big end bearing 8 8 4 4 8 Remove the parts in the order listed Refer to INSTALLING THE CONNECTING RODS section Refer to REMOVING INSTALLING THE CONNECTING RODS section For installation reverse the removal procedure CRANKSHAFT ENG CONNECTING ROD ...

Страница 173: ...DS 1 Remove connecting rods 1 big end bearings 2 Identify the position of each big end bearing so that it can be reinstalled in its original place EB412401 CHECKING THE CRANKSHAFT AND CONNECTING RODS 1 Measure crankshaft runout Out of specification Replace the crank shaft Crankshaft runout Less than 0 03 mm 2 Check crankshaft journal surfaces crankshaft pin surfaces bearing surfaces Scratches wear...

Страница 174: ...ankcase b Place the upper crankcase upside down on a bench c Install the crankshaft journal upper bear ings 1 and the crankshaft into the upper crankcase Align the projections a of the crankshaft journal upper bearings with the notches b in the crankcase d Put a piece of Plastigauge 2 on each crankshaft journal Do not put the Plastigauge over the oil hole in the crankshaft journal e Install the cr...

Страница 175: ...urnal lower bearings h Measure the compressed Plastigauge width C on each crankshaft journal If the clearance is out of specification se lect replacement crankshaft journal bear ings 4 Select Crankshaft journal bearings J1 J6 The numbers A stamped into the crank shaft web and the numbers 1 stamped into the lower crankcase are used to deter mine the replacement crankshaft journal bearing sizes J1 J...

Страница 176: ...0 066 mm Limit 0 08 mm The following procedure applies to all of the connecting rods Do not interchange the big end bearings and connecting rods To obtain the cor rect crankshaft pin to big end bearing clearance and prevent engine damage the big end bearings must be installed in their original positions a Clean the big end bearings crankshaft pins and bearing portions of the connect ing rods b Ins...

Страница 177: ...e connecting rod nuts Nut connecting rod 15 Nm 1 5 mSkg 11 ftSlb turn the nut another 90_ Refer to INSTALLING THE CONNECT ING RODS f Remove the connecting rod and big end bearings Refer to REMOVING THE CONNECT ING RODS g Measure the compressed Plastigauge width e on the crankshaft pin If the clearance is out of specification se lect replacement big end bearings 6 Select S big end bearings P1 P4 S ...

Страница 178: ...lybdenum disulfide grease 2 Lubricate crankshaft pins big end bearings connecting rod inner surface with the recommended lubricant Recommended lubricant Engine oil 3 Install big end bearings 1 connecting rods 2 connecting rod caps 3 onto the crankshaft pins Align the projections on the big end bear ings with the notches in the connecting rods and connecting rod caps Be sure to reinstall each big e...

Страница 179: ...nnecting rod bolts and nuts c Tighten the connecting rod nuts d Put a mark 1 on the corner of the con necting rod nut 2 and the connecting rod 3 e Tighten the nut further to reach the speci fied angle 90_ When the nut is tightened more than the specified angle do not loosen the nut and then retighten it Replace the bolt with a new one and per form the procedure again S Do not use a torque wrench t...

Страница 180: ...ankshaft journal upper bearings with the notches b in the crankcase Be sure to install each crankshaft journal upper bearing in its original place 2 Install timing chain 1 onto the crankshaft sprocket crankshaft assembly 2 Pass the timing chain through the timing chain cavity To prevent the timing chain from falling into the crankcase fasten it with a wire 3 Install timing chain guide 1 ...

Страница 181: ...earing Bearing Drive axle assembly Circlip Nozzle Bearing Plate washer Oil seal collar Bearing 1 1 1 1 1 1 1 1 1 1 1 1 Remove the parts in the order listed Refer to CRANKCASE section Refer to INSTALLING THE TRANSMISSION section Refer to INSTALLING THE TRANSMISSION section For installation reverse the removal procedure TRANSMISSION ENG TRANSMISSION ...

Страница 182: ...st wheel gear 5th wheel gear Circlip Washer 4th wheel gear 3rd wheel gear 6th wheel gear 2nd wheel gear Washer Circlip Drive axle 2nd pinion gear 6th pinion gear 1 1 1 1 1 1 1 1 1 1 1 1 1 Disassembly the parts in the order listed 10 1 2 3 4 5 6 7 8 9 11 12 13 TRANSMISSION ENG ...

Страница 183: ...4 71 Order Job name Part name Q ty Remarks 3rd 4th pinion gear Circlip Washer 5th Main axle 1 1 1 1 1 For assembly reverse the disassembly procedure 14 15 16 17 18 TRANSMISSION ENG ...

Страница 184: ... runout limit 0 02 mm 3 Check transmission gears Blue discoloration pitting wear Re place the defective gear s transmission gear dogs Cracks damage rounded edges Re place the defective gear s 4 Check transmission gear engagement each pinion gear to its respective wheel gear Incorrect Reassemble the transmission axle assemblies 5 Check transmission gear movement Rough movement Replace the defec tiv...

Страница 185: ...Install main axle assembly 1 drive axle assembly 2 oil seals circlips lock washer Make sure that the drive axle bearing cir clips 3 are inserted into the grooves 4 in the upper crankcase The main axle bearing pin 5 must face to wards the front of the crankcase and the drive axle bearing pin 6 must face to wards the rear of the crankcase 3 Check transmission Rough movement Repair Oil each gear shaf...

Страница 186: ...nstallation reverse the removal procedure Order Job name Part name Q ty Remarks 1 2 3 4 5 6 7 8 Removing the shift drum and shift forks Disassembly the crankcase Transmission Shift fork guide bar retainer Shift drum retainer Shift fork guide bar 1 Shift fork C Shift fork guide bar 2 Shift fork L Shift fork R Shift drum 1 1 1 1 1 1 1 1 SHIFT DRUM AND SHIFT FORKS ENG SHIFT DRUM AND SHIFT FORKS ...

Страница 187: ...e bar on a flat sur face Bend Replace Do not attempt to straighten a bent shift fork guide bar 3 Check shift fork movement on the shift fork guide bar Rough movement Replace the shift forks and shift fork guide bar as a set EB413410 CHECKING THE SHIFT DRUM ASSEMBLY 1 Check shift drum grooves Damage scratches wear Replace the shift drum shift drum segment 1 Damage wear Replace shift drum bearing 2 ...

Страница 188: ...S shift fork C 3 S shift fork R 4 S The embossed marks on the shift forks should face towards the left side of the en gine and be in the following sequence L C R S The grooved side of the shift fork guide bar should face towards the right side of the engine 3 Install S shift drum retainer 1 LOCKTITER S shift fork guide bar retainer 2 ...

Страница 189: ...COOL 5 ...

Страница 190: ...NG THE RADIATOR 5 2 INSTALLING THE RADIATOR 5 3 THERMOSTAT 5 4 CHECKING THE THERMOSTAT 5 6 ASSEMBLING THE THERMOSTAT 5 7 INSTALLING THE THERMOSTAT 5 7 WATER PUMP 5 8 REMOVING THE WATER PUMP 5 9 CHECKING THE WATER PUMP 5 9 INSTALLING THE WATER PUMP 5 9 ...

Страница 191: ...COOL ...

Страница 192: ...s Radiator outlet hose Radiator inlet hose Radiator Fan 1 1 1 1 1 Remove the parts in the order listed Refer to FRONT COWLING SEAT SIDE COVER FUEL TANK section in chapter 3 Refer to CHANGING THE COOLANT section in chapter 3 Disconnect the coupler For installation reverse the removal procedure NOTE RADIATOR COOL COOLING SYSTEM RADIATOR ...

Страница 193: ...ge Replace 3 Measure radiator cap opening pressure Below the specified pressure Replace the radiator cap Radiator cap opening pressure 95 125 kPa 0 95 1 25 kg cm2 a Install the radiator cap tester 1 and adapter 2 to the radiator cap 3 Radiator cap tester 90890 01325 Adapter 90890 01352 b Apply the specified pressure for ten se conds and make sure that there is no drop in pressure 4 Check radiator ...

Страница 194: ...f the recom mended coolant Refer to CHANGING THE COOLANT in chapter 3 2 Check cooling system Leaks Repair or replace any faulty part a Attach the radiator cap tester 1 to the radiator Radiator cap tester 90890 01325 b Apply 100 kPa 1 0 kg cm2 of pressure c Measure the indicated pressure with the gauge ...

Страница 195: ...ose Carburetor inlet hose Engine outlet hose Engine outlet hose Radiator inlet hose Thermostat housing Ground read 1 1 1 1 1 1 1 1 1 Remove the parts in the order listed Refer to FRONT COWLING SEAT SIDE COVER FUEL TANK section in chapter 3 Refer to CHANGING THE COOLANT section in chapter 3 Disconnect the lead Disconnect the coupler For installation reverse the removal procedure NOTE NOTE THERMOSTA...

Страница 196: ...e thermostat Thermo switch fan motor Thermo switch engine temperature Thermostat housing cover O ring Thermostat Thermostat housing 1 1 1 1 1 1 Disassembly the parts in the order listed Refer to ASSEMBLING THE THERMOSTAT section For assembly reverse the disassembly procedure 1 2 3 4 5 6 THERMOSTAT COOL ...

Страница 197: ...ature 1 Thermometer 2 Water 3 Thermostat 4 Container A Closes B Opens If the accuracy of the thermostat is in doubt replace it A faulty thermostat could cause serious overheating or overcooling 2 Check S thermostat housing cover 1 S thermostat housing 2 Cracks damage Replace 3 Measure S radiator cap opening pressure Below the specified pressure Replace the radiator cap Refer to CHECKING THE RADIAT...

Страница 198: ...e temperature 2 Use extreme care when handling the thermo switch and temperature sender Replace any part that was dropped or subjected to a strong impact EB502040 INSTALLING THE THERMOSTAT 1 Fill cooling system with the specified amount of the recom mended coolant Refer to CHANGING THE COOLANT in chapter 3 2 Check cooling system Leaks Repair or replace any faulty part 3 Measure radiator cap openin...

Страница 199: ...ter pump outlet hose Water pump outlet pipe Water pump housing cover O ring Water pump assembly O ring 1 1 1 1 1 1 1 Remove the parts in the order listed Refer to CHANGING THE COOLANT section in chapter 3 Refer to REMOVING THE ENGINE section in chapter 4 Refer to REMOVING INSTALLING THE WATER PUMP section For installation reverse the removal procedure WATER PUMP COOL WATER PUMP ...

Страница 200: ...EB503032 CHECKING THE WATER PUMP 1 Check water pump housing cover water pump housing 1 impeller 2 2 Check water pump seal 1 oil seal 2 Cracks damage wear Replace 3 Check bearing 1 Roughness Replace 4 Check water pump inlet pipe radiator outlet hose Cracks damage wear Replace EB503052 INSTALLING THE WATER PUMP 1 Install water pump housing Always use a new O ring ...

Страница 201: ...p outlet pipe apply a thin coat of lithium soap base grease onto the O rings Water pump housing cover bolt 10 Nm 1 0 m kg 3 Install gasket dowel pins drive chain sprocket cover 1 4 Install shift arm 1 Align the slot a on the shift arm 1 with the punch mark b on the shift shaft 2 5 Fill cooling system with the specified amount of the recom mended coolant Refer to CHANGING THE COOLANT in chapter 3 6...

Страница 202: ...CARB 6 ...

Страница 203: ...TORS 6 1 AIR FILTER CASE 6 1 CARBURETORS 6 2 CHECKING THE CARBURETORS 6 5 ASSEMBLING THE CARBURETORS 6 7 INSTALLING THE CARBURETORS 6 8 MEASURING AND ADJUSTING THE FUEL LEVEL 6 9 CHECKING AND ADJUSTING THE THROTTLE POSITION SENSOR 6 10 ...

Страница 204: ...CARB ...

Страница 205: ...ter case left right Battery negative lead Battery positive lead Battery Stay 1 1 1 1 1 1 Remove the parts in the order listed Refer to FRONT COWLING SEAT SIDE COVER FUEL TANK section in chapter 3 Refer to CHANGING THE COOLANT section For installation reverse the removal procedure CARBURETORS CARB CARBURETORS CARBURETORS AIR FILTER CASE ...

Страница 206: ...s Throttle position sensor lead Air filter joint screw Carburetors joint screw Carburetor inlet outlet hose Carburetors assembly Starter cable Throttle cable 4 4 1 1 1 1 2 Remove the parts in the order listed Disconnect the coupler For installation reverse the removal procedure NOTE CARBURETORS ...

Страница 207: ...Carburetors assembly Vacuum chamber cover Piston valve spring Piston valve Needle kit Float chamber Float chamber gasket Float pin Float Needle valve assembly Main jet 1 4 1 1 1 1 1 1 1 1 1 1 Disassembly the parts in the order listed 1 2 3 4 Refer to ASSEMBLING THE CARBURETERS section 1 2 3 4 5 6 7 8 9 10 11 12 ...

Страница 208: ...der Job name Part name Q ty Remarks Main jet holder Needle jet Pilot jet Pilot screw set Starter plunger kit 1 1 1 1 1 Refer to ASSEMBLING THE CARBURETORS section For assembly reverse the disassembly procedure 13 14 15 16 17 ...

Страница 209: ...lvent Do not use any caustic carbure tor cleaning solution b Blow out all of the passages and jets with compressed air 3 Check float chamber body 1 Dirt Clean 4 Check float chamber rubber gasket 2 Cracks damage wear Replace 5 Check float 1 Damage Replace 6 Check needle valve 1 needle valve seat 2 Damage obstruction wear Replace the needle valve needle valve seat and O ring as a set 7 Check O ring ...

Страница 210: ... pilot screw 5 starter plunger 6 Bends damage wear Replace Obstruction Clean Blow out the jets with compressed air 11 Check piston valve movement Insert the piston valve into the carburetor body and move it up and down Tightness Replace the piston valve 12 Check fuel feed pipes hose joint Cracks damage Replace Obstruction Clean Blow out the pipes with compressed air 13 Check fuel hoses Cracks dama...

Страница 211: ...ng New washer pilot screw spring pilot screw 1 Pilot screw 2 turns out 2 Install jet needle 1 washer 2 0 5 mm ring 3 clip 4 washer 5 0 5 mm Standard clip position No 3 Groove 3 Install piston valve jet needle kit 1 jet needle holder 2 piston valve spring 3 vacuum chamber cover Insert the end of the piston valve spring onto the spring guide on the vacuum chamber cover Align the tab on the piston va...

Страница 212: ...anifold side down Then tighten the connecting bolts while pushing down the carburetor assem bly with an even force After tightening the connecting bolts check that the throttle cable lever and starter plunger link operate smoothly EB600051 INSTALLING THE CARBURETORS 1 Adjust carburetor synchronization Refer to SYNCHRONIZING THE CAR BURETORS in chapter 3 2 Adjust engine idling speed Engine idling s...

Страница 213: ... Fuel level gauge 90890 01312 d Loosen the fuel drain screw 3 e Hold the fuel level gauge vertically next to the float chamber f Measure the fuel level a Fuel level readings should be equal on both sides of the carburetor assembly 2 Adjust fuel level a Remove the carburetor assembly b Check the needle valve seat and needle valve c If either is worn replace them as a set d If both are fine adjust t...

Страница 214: ...E Tester negative lead BLACK BLUE c Check the throttle position sensor maxi mum resistance Out of specification Replace the throttle position sensor Throttle position sensor maximum resistance 3 5 X 6 5 kΩ at 20_C BLUE BLACK BLUE d Install the throttle position sensor onto the carburetor e Connect the pocket tester Ω 1k to the throttle position sensor Tester positive lead YELLOW Tester negative le...

Страница 215: ...or screws 1 e Adjust the throttle position sensor angle according to the following table The angle of the throttle position sensor is in dicated by the RPM which is displayed on the tachometer Tachometer Reading Throttle position sensor angle Adjust ment direction 5000 rpm Correct 0 rpm Incorrect 10000 rpm Incorrect f After adjusting the throttle position sensor angle tighten the throttle position...

Страница 216: ...6 12 CARB ...

Страница 217: ...CHAS 7 ...

Страница 218: ...STER CYLINDER 7 20 REAR BRAKE MASTER CYLINDER 7 22 REMOVING THE FRONT BRAKE MASTER CYLINDER 7 24 REMOVING THE REAR BREAKE MASTER CYLINDER 7 24 CHECKING THE FRONT AND REAR BRAKE MASTER CYLINDERS 7 25 ASSEMBLING AND INSTALLING THE FRONT BRAKE MASTER CYLINDER 7 26 ASSEMBLING AND INSTALLING THE REAR BRAKE MASTER CYLINDER 7 27 FRONT BRAKE CALIPERS 7 29 REAR BRAKE CALIPER 7 31 DISASSEMBLING THE FRONT BR...

Страница 219: ...G THE REAR SHOCK ABSORBER 7 59 DISPOSING OF A REAR SHOCK ABSORBER 7 59 REMOVING THE REAR SHOCK ABSORBER ASSEMBLY 7 60 CHECKING THE REAR SHOCK ABSORBER ASSEMBLY 7 61 INSTALLING THE REAR SHOCK ABSORBER ASSEMBLY 7 61 SWINGARM AND DRIVE CHAIN 7 62 REMOVING THE SWINGARM 7 64 CHECKING THE SWINGARM 7 65 CHECKING THE DRIVE CHAIN 7 66 INSTALLING THE SWINGARM 7 67 INSTALLING THE DRIVE CHAIN 7 68 ...

Страница 220: ... bolt Brake hose horder left right Brake caliper left right Wheel axle Front wheel assembly Speed sensor unit Collar Brake disc left right 1 1 1 1 1 1 1 1 1 1 1 Remove the parts in the order listed Loosen Refer to REMOVING INSTALLING THE FRONT WHEEL section For installation reverse the removal procedure NOTE FRONT WHEEL AND BRAKE DISC CHAS CHASSIS FRONT WHEEL AND BRAKE DISC ...

Страница 221: ...ame Q ty Remarks Disassembling the front wheel Oil seal Bearing Spacer Bearing 1 1 1 1 Disassembly the parts in the order listed For assembly reverse the disassembly prodedure 1 2 3 4 FRONT WHEEL AND BRAKE DISC CHAS FRONT WHEEL ...

Страница 222: ...e caliper right brake caliper Do not squeeze the brake lever when re moving the brake calipers 4 Remove Wheel axle Speed sensor unit 1 Push the front wheel rearward and remove the speed sensor unit 1 from the front wheel 5 Elevate front wheel Place the motorcycle on a suitable stand so that the front wheel is elevated EB700400 CHECKING THE FRONT WHEEL 1 Measure wheel axle runout Wheel axle runout ...

Страница 223: ...lace wheel bearings New oil seals New a Clean the outside of the front wheel hub b Remove the oil seals 1 with a flat head screwdriver To prevent damaging the wheel place a rag 2 between the screwdriver and the wheel surface c Remove the wheel bearings 3 with a general bearing puller 4 d install the new wheel bearings and oil seals in the reverse order of disassembly Do not contact the wheel beari...

Страница 224: ... d Hold the dial gauge at a right angle against the brake disc surface e Measure the deflection 2 3 mm below the edge of the brake disc 3 Measure S brake disc thickness b Measure the brake disc thickness at a few different locations Out of specification Replace Brake disc thickness limit minimum Front 3 5 mm Rear 4 5 mm 4 Adjust S brake disc deflection a Remove the brake disc b Rotate the brake di...

Страница 225: ...ctions a meshed into the two slots b re spectively 3 Install front wheel Make sure that the slot a in the speed sen sor unit fits over the stopper on the outer tube b 4 Tighten wheel axle wheel axle pinch bolt brake caliper bolts Wheel axle 67 Nm 6 7 m kg Wheel axle pinch bolt 20 Nm 2 0 m kg Brake caliper bolt 40 Nm 4 0 m kg Make sure that the brake cable is routed properly Before tightening the w...

Страница 226: ... When the wheel stops put an X2 mark at the bottom of the wheel B f Repeat steps b through d several times until all the marks come to rest at the same spot g The spot where all the marks come to rest is the front wheel s heavy spot X 3 Adjust S front wheel static balance a Install a balancing weight 1 onto the rim exactly opposite the heavy spot X C Start with the lightest weight b Turn the front...

Страница 227: ...el axle Washer Drive chain puller left Drive chain puller right Rear wheel assembly 1 1 1 1 1 1 1 1 Remove the parts in the order listed Refer to REMOVING INSTALLING THE REAR WHEEL section For installation reverse the removal procedure REAR WHEEL BRAKE DISC AND REAR WHEEL SPROCKET CHAS REAR WHEEL BRAKE DISC AND REAR WHEEL SPROCKET REAR WHEEL ...

Страница 228: ...rear wheel sprocket Collar left right Brake disc Rear wheel sprocket Collar Drive hub damper Rear wheel drive hub Oil seal Bearing 1 1 1 1 1 6 1 1 1 Remove the parts in the order listed For instalation reverse the removal procedure REAR WHEEL BRAKE DISC AND REAR WHEEL SPROCKET CHAS BRAKE DISC AND REAR WHEEL SPROCKET ...

Страница 229: ... Disassembling the rear wheel Oil seal Bearing Collar Bearing 1 1 1 1 Disassembly the parts in the order listed For assembly reverse the disassembly procedure 1 2 3 4 REAR WHEEL BRAKE DISC AND REAR WHEEL SPROCKET CHAS DIASSEMBLY THE REAR WHEEL ...

Страница 230: ...ress the brake pedal when re moving the brake caliper 3 Loosen locknut 1 adjusting nut 2 4 Remove wheel axle nut 3 wheel axle 4 rear wheel Push the rear wheel forward and remove the drive chain from the rear wheel sprocket 5 Remove left collar 1 rear wheel drive hub 2 rear wheel drive hub damper 3 right collar EB701400 CHECKING THE REAR WHEEL 1 Check wheel axle rear wheel wheel bearings oil seals ...

Страница 231: ... 2 Replace rear wheel sprocket 1 a Remove the self locking nuts and the rear wheel sprocket b Clean the rear wheel drive hub with a clean cloth especially the surfaces that contact the sprocket c Install the new rear wheel sprocket Rear wheel sprocket self locking nut 60 Nm 6 0 m kg Tighten the self locking nuts 2 in stages and in a crisscross pattern EB701711 INSTALLING THE REAR WHEEL 1 Lubricate...

Страница 232: ...THE REAR WHEEL STATIC BALANCE After replacing the tire wheel or both the rear wheel static balance should be ad justed Adjust the rear wheel static balance with the brake disc and rear wheel drive hub installed 1 Adjust rear wheel static balance Refer to FRONT WHEEL AND BRAKE DISC ...

Страница 233: ...brake pads Brake caliper Brake pads clip Brake pad pin Brake pad spring Brake pad 1 2 1 1 2 Remove the parts in the order listed Refer to REPLACING THE FRONT BRAKE PADS section For installation reverse the removal procedure FRONT AND REAR BRAKES CHAS FRONT AND REAR BRAKES FRONT BRAKE PADS ...

Страница 234: ... 1 2 3 4 Removing the rear brake pads Caliper Brake pad pin Brake pad shim Brake pad spring 1 2 2 2 1 Remove the parts in the order listed Refer to REPLACING THE REAR BRAKE PADS section For instalation reverse the removal procedure FRONT AND REAR BRAKES CHAS REAR BRAKE PADS ...

Страница 235: ...aning brake components Brake fluid may damage painted sur faces and plastic parts Therefore al ways clean up any spilt fluid immedi ately Avoid brake fluid coming into contact with the eyes as it can cause serious in jury First aid for brake fluid entering the eyes Flush with water for 15 minutes and get immediate medical attention EB702112 REPLACING THE FRONT BRAKES PADS The following procedure a...

Страница 236: ... container b Loosen the bleed screw and push the brake caliper pistons into the brake cali per with your finger c Tighten the bleed screw d Install new brake pad shims onto the new brake pads e Install new brake pads and a new brake pad spring 6 Install brake pad spring brake pad pins 1 brake pad clips 2 brake caliper The arrow a on the brake pad spring must point in the direction of disc rotation...

Страница 237: ...ification Replace the brake pads as a set Brake pad wear limit 0 5 mm 5 Install brake pad shims onto the brake pads brake pads brake pad spring Always install new brake pads brake pad shims and a brake pad spring as a set a Connect a clear plastic hose 1 tightly to the bleed screw 2 Put the other end of the hose into an open container b Loosen the bleed screw and push the brake caliper pistons int...

Страница 238: ...iper 7 Check brake fluid level Below the minimum level mark a Add the recommended brake fluid to the proper level Refer to CHECKING THE BRAKE FLUID LEVEL in chapter 3 8 Check brake lever operation Soft or spongy feeling Bleed the brake system Refer to BLEEDING THE HYDRAULIC BRAKE SYSTEM in chapter 3 ...

Страница 239: ...ke lever Brake switch lead Brake switch Union bolt Copper washer brake hose Master cylinder bracket Master cylinder 1 2 1 1 2 1 1 1 Remove the parts in the order listed Refer to REMOVING ASSEMBLING AND INSTALLING THE FRONT BRAKE MASTER CYLINDER section For installation reverse the removal procedure FRONT AND REAR BRAKES CHAS FRONT BRAKE MASTER CYLINDER ...

Страница 240: ...marks Disassembling the front brake master cylinder Master cylinder boot Circlip Master cylinder kit Spring 1 1 1 1 Disassembly the parts in the order listed For assembly reverse the disassembly procedure 1 2 3 4 FRONT AND REAR BRAKES CHAS ...

Страница 241: ...in the brake fluid Master cylinder bolt Union bolt Copper washer brake hose Clip hose Cotter pin Pin Washer Master cylinder 2 1 2 1 2 1 1 1 1 1 Remove the parts in the order listed Refer to REMOVING ASSEMBLING AND INSTALLING THE REAR BRAKE MASTER CYLINDER section For installation reverse the removal procedure FRONT AND REAR BRAKES CHAS REAR BRAKE MASTER CYLINDER ...

Страница 242: ...marks 1 2 3 4 Disassembling the rear brake master cylinder Master cylinder boot Circlip Master cylinder kit Spring 1 1 1 1 Disassembly the parts in the order listed For assembly reverse the disassembly procedure FRONT AND REAR BRAKES CHAS ...

Страница 243: ...pler 1 from the brake switch 2 Remove union bolt 2 copper washers 3 brake hoses 4 To collect any remaining brake fluid place a container under the master cylinder and the end of the brake hose EB702220 REMOVING THE REAR BRAKE MASTER CYLINDER 1 Remove side cover right 2 Remove union bolt 1 copper washers 2 brake hose 3 To collect any remaining brake fluid place a container under the master cylinder...

Страница 244: ...e brake fluid delivery passages brake master cylinder body Obstruction Blow out with compressed air A Front B Rear 2 Check brake master cylinder kit 1 Damage scratches wear Replace C Front D Rear 3 Check rear brake fluid reservoir 1 Cracks damage Replace rear brake fluid reservoir diaphragm 2 Cracks damage Replace 4 Check front brake master cylinder diaphragm 1 Damage wear Replace 5 Check brake ho...

Страница 245: ...der While holding the brake hose tighten the union bolt as shown Turn the handlebar to the left and to the right to make sure that the brake hose does not touch other parts e g wire har ness cables leads Correct if necessary 2 Fill brake master cylinder reservoir with the specified amount of the recom mended brake fluid Recommended brake fluid DOT 4 Use only the designated brake fluid Other brake ...

Страница 246: ...EVEL in chapter 3 5 Check brake lever operation Soft or spongy feeling Bleed the brake system Refer to BLEEDING THE HYDRAULIC BRAKE SYSTEM in chapter 3 EB702292 ASSEMBLING AND INSTALLING THE REAR BRAKE MASTER CYLINDER 1 Install copper washers New 1 brake hose 2 union bolt 3 When installing the brake hose onto the brake master cylinder make sure that the brake pipe touches the projection a on the b...

Страница 247: ...point of the brake fluid and could cause vapor lock Brake fluid may damage painted surfaces and plastic parts Therefore always clean up any spilt brake fluid immediately 3 Bleed brake system Refer to BLEEDING THE HYDRAULIC BRAKE SYSTEM in chapter 3 4 Check brake fluid level Below the minimum level mark a Add the recommended brake fluid to the proper level Refer to CHECKING THE BRAKE FLUID LEVEL in...

Страница 248: ...rake calipers Drain the brake fluid Union bolt Copper washer Brake hose Brake caliper assembly 1 2 1 1 Remove the parts in the order listed Refer to ASSEMBLING AND INSTALLING THE FRONT BRAKE CALIPERS section For installation reverse the removal procedure FRONT AND REAR BRAKES CHAS FRONT BRAKE CALIPERS ...

Страница 249: ...e pad spring Brake pad Bleed screw kit Brake caliper piston Dust seal Piston seal 2 1 1 2 1 4 4 4 Disassembly the parts in the order listed Refer to REPLACING THE FRONT BRAKE PADS section Refer to DISASSEMBLING THE FRONT BRAKE CALIPER section For assembly reverse the disassembly procedure FRONT AND REAR BRAKES CHAS ...

Страница 250: ...ake fluid Union bolt Copper washer Brake hose Rear brake caliper 1 2 1 1 Remove the parts in the order listed Refer to ASSEMBLING AND INSTALLING THE REAR BRAKE CALIPER section For installation revers the removal procedure 30 Nm 3 0 m kg 40 Nm 4 0 m kg FRONT AND REAR BRAKES CHAS REAR BRAKE CALIPER ...

Страница 251: ... spring Brake pad assembly shim Bleed screw kit Brake caliper piston Dust seal Piston seal 2 1 2 2 2 2 2 2 Disassembly the parts in the order listed Refer to REPLACING THE REAR BRAKE PAD section Refer to DISASSEMBLING THE REAR BRAKE CARIPER section For assembly reverse the disassembly procedure FRONT AND REAR BRAKES CHAS ...

Страница 252: ...the brake hose into a contain er and pump out the brake fluid carefully 2 Remove brake caliper pistons 1 brake caliper piston seals 2 a Secure the right side brake caliper pis tons with a piece of wood a b Blow compressed air into the brake hose joint opening b to force out the left side pistons from the brake caliper c Remove the brake caliper piston seals d Repeat the previous steps to force out...

Страница 253: ...rake caliper piston with a piece of wood a b Blow compressed air into the brake hose joint opening b to force out the left side piston from the brake caliper Never try to pry out the brake caliper pistons Do not loosen the bolts 3 c Remove the brake caliper piston seals d Repeat the previous steps to force out the right side piston from the brake caliper EB702343 CHECKING THE FRONT AND REAR BRAKE ...

Страница 254: ...racks damage Replace EB702374 ASSEMBLING AND INSTALLING THE FRONT BRAKE CALIPERS The following procedure applies to both of the brake calipers Before installation all internal brake components should be cleaned and lu bricated with clean or new brake fluid Never use solvents on internal brake components as they will cause the pis ton seals to swell and distort Whenever a brake caliper is disas sem...

Страница 255: ...e recom mended brake fluid Recommended brake fluid DOT 4 Use only the designated brake fluid Other brake fluids may cause the rub ber seals to deteriorate causing leak age and poor brake performance Refill with the same type of brake fluid that is already in the system Mixing brake fluids may result in a harmful chemical reaction leading to poor brake performance When refilling be careful that wat...

Страница 256: ...ING THE REAR BRAKE CALIPER Before installation all internal brake components should be cleaned and lu bricated with clean or new brake fluid Never use solvents on internal brake components as they will cause the pis ton seals to swell and distort Whenever a brake caliper is disas sembled replace the brake caliper pis ton seals Recommended brake fluid DOT 4 1 Install brake caliper 1 temporarily cop...

Страница 257: ...luids may cause the rub ber seals to deteriorate causing leak age and poor brake performance Refill with the same type of brake fluid that is already in the system Mixing brake fluids may result in a harmful chemical reaction leading to poor brake performance When refilling be careful that water does not enter the reservoir Water will significantly lower the boiling point of the brake fluid and co...

Страница 258: ... the minimum level mark a Add the recommended brake fluid to the proper level Refer to CHECKING THE BRAKE FLUID LEVEL in chapter 3 7 Check brake pedal operation Soft or spongy feeling Bleed the brake system Refer to BLEEDING THE HYDRAULIC BRAKE SYSTEM in chapter 3 ...

Страница 259: ...lower bracket Front fork assembly left right 1 2 2 2 1 1 Remove the parts in the order listed Refer to FRONT WHEEL AND BRAKE DISCS section Refer to FRONT AND REAR BRAKES section Loosen Loosen Loosen Refer to REMOVING INSTALLING THE FRONT FORK LEGS section For installation reverse the removal procedure NOTE Refer to REMOVING INSTALLING THE FRONT FORK LEGS section NOTE NOTE FRONT FORK CHAS FRONT FOR...

Страница 260: ...ork Cap bolt O ring Spacer Washer Front fork spring Dust seal Oil seal clip Bolt Gasket Damper rod rebound spring Inner tube Inner tube bushing Oil seal Washer 1 1 1 1 1 1 1 1 1 1 1 1 1 1 Disassembly the parts in the order listed Refer to ASSEMBLING THE FRONT FORK LEGS section Refer to DISASSEMBLING ASSEMBLING THE FRONT FORK LEGS section FRONT FORK CHAS ...

Страница 261: ... 3 0 m kg 7 9 8 11 14 13 12 15 Order Job name Part name Q ty Remarks 14 15 Outer tube bushing Oil flow stopper 1 1 1 Refer to ASSEMBLING THE FRONT FORK LEGS section For assembly reverse the disassembly procedure 6 FRONT FORK CHAS ...

Страница 262: ...per bracket pinch bolt 1 cap bolt 2 lower bracket pinch bolt 3 Before loosening the upper and lower bracket pinch bolts support the front fork leg 3 Remove front fork leg EB703110 DISASSEMBLING THE FRONT FORK LEGS The following procedure applies to both of the front fork legs 1 Remove dust seal 1 oil seal clip 2 with a flat head screwdriver Do not scratch the inner tube 2 Remove damper rod bolt Wh...

Страница 263: ... The following procedure applies to both of the front fork legs 1 Check inner tube 1 outer tube 2 Bends damage scratches Replace Do not attempt to straighten a bent inner tube as this may dangerously weaken it 2 Measure spring free length a Over the specified limit Replace Spring free length limit 319 mm 3 Check damper rod 1 Damage wear Replace Obstruction Blow out all of the oil pas sages with co...

Страница 264: ...ollowing parts inner tube bushing outer tube bushing oil seal dust seal Before assembling the front fork leg make sure that all of the components are clean 1 Install damper rod 1 Allow the damper rod to slide slowly down the inner tube until it protrudes from the bottom of the inner tube Be careful not to damage the inner tube 2 Lubricate inner tube s outer surface Recommended lubricant Fork oil 1...

Страница 265: ... the oil seal apply lithium soap base grease onto its lips Apply fork oil onto the outer surface of the inner tube 6 Install oil seal clip 1 Adjust the oil seal clip so that it fits into the outer tube s groove 7 Install dust seal 1 with the fork seal driver weight 1 Fork seal driver weight 90890 01367 8 Fill front fork leg with the specified amount of the recom mended fork oil Quantity each front...

Страница 266: ...g Temporarily tighten the cap bolt EB703710 INSTALLING THE FRONT FORK LEGS The following procedure applies to both of the front fork legs 1 Install front fork leg Temporarily tighten the upper and lower bracket pinch bolts Make sure that the inner fork tube is flush with the top of the handlebar holder 2 Tighten lower bracket pinch bolt 1 cap bolt 2 upper bracket pinch bolt 3 Lower bracket pinch b...

Страница 267: ...aster cylinder assembly Throttle cable housing cover Handle bar switch right Throttle cable housing Throttle cable Grip end Grip assembly Clutch cable Clutch switch Handle bar switch left Starter cable Grip end 1 1 1 1 1 1 1 1 1 1 1 1 1 Remove the parts in the order listed Refer to INSTALLING THE HANDLEBAR section Refer to INSTALLING THE HANDLEBAR section HANDLEBAR CHAS HANDLEBAR ...

Страница 268: ...Order Job name Part name Q ty Remarks 14 15 16 17 Grip left Clutch lever holder Upper handlebar holder Handle bar 1 1 2 1 Refer to REMOVING THE HANDLEBAR section Refer to INSTALLING THE HANDLEBAR section For installation reverse the removal procedure HANDLEBAR CHAS ...

Страница 269: ...adually push the grip off the handlebar EB704400 CHECKING THE HANDLEBAR 1 Stand the motorcycle on a level surface Securely support the motorcycle so that there is no danger of it falling over 2 Check handlebar 1 Bends cracks damage Replace Do not attempt to straighten a bent han dlebar as this may dangerously weaken it 3 Install handlebar grip a Apply a light coat of rubber adhesive onto the left ...

Страница 270: ...uel tank adjust the handlebar posi tion The upper handlebar holders should be installed with the arrows facing forward Align the match marks b on the handlebar with the upper surface of the lower handle bar holders 3 Install clutch lever holder handlebar grip 1 left grip end 2 There should be 1 0 mm of clearance a be tween the handlebar grip and the left grip end 4 Install left handlebar switch 1 ...

Страница 271: ...r 7 Install right grip end right handlebar switch 1 Make sure that the throttle grip operates smoothly Align the projection a on the right handle bar switch with the hole b in the handle bar 8 Adjust clutch cable free play Refer to ADJUSTING THE CLUTCH CABLE FREE PLAY in chapter 3 Clutch cable free play at the end of the clutch lever 10 15 mm 9 Adjust throttle cable free play Refer to ADJUSTING TH...

Страница 272: ... Steering stem nut Upper bracket Lock washer Ring nut upper Rubber washer 1 Ring nut lower 1 1 1 1 1 1 1 1 1 Remove the parts in the order listed Refer to FRONT COWUNG SEAT SIDE COVER FUEL TANK section in chapter 3 Refer to FRONT WHEEL section Refer to FRONT FORK section Refer to HANDLEBAR section Disconnect the coupler Refer to REMOVING THE LOWER BRACKET INSTALLING THE STEER ING HEAD section NOTE...

Страница 273: ... kg 2nd Order Job name Part name Q ty Remarks 9 10 11 12 13 Lower bracket Ball race cover Ball bearing Rubber washer 1 Ball bearing 1 1 1 1 1 Refer to INSTALLING THE STEERING HEAD section For installation reverse the removal procedure STEERING HEAD CHAS ...

Страница 274: ...g nut wrench 2 then remove the up per ring nut with the ring nut wrench Exhaust and steering nut wrench 90890 01268 Securely support the lower bracket so that there is no danger of it falling EB705401 CHECKING THE STEERING HEAD 1 Wash bearing balls bearing races Recommended cleaning solvent Kerosine 2 Check bearing 1 bearing race 2 Damage pitting Replace 3 Replace bearing balls bearing races a Rem...

Страница 275: ...replace the dust seal 4 Check upper bracket lower bracket along with the steering stem Bends cracks damage Replace EB705700 INSTALLING THE STEERING HEAD 1 Lubricate upper bearing lower bearing bearing races Recommended lubricant Lithium soap base grease 2 Install lower ring nut 1 rubber washer 2 upper ring nut 3 lock washer 4 Refer to CHECKING AND ADJUSTING THE STEERING HEAD in chapter 3 3 Install...

Страница 276: ...f locking nut washer Bolt Self locking nut bolt Rear shock absorber assembly Self locking nut 1 1 1 1 1 1 1 1 1 1 Remove the parts in the order listed Refer to FRONT COWLING SEAT SIDE COVER FUEL TANK section in chapter 3 Refer to REAR WHEEL BRAKE DISK AND REAR WHEEL SPROCKET section 120 mm 40 mm Refer to REMOVING INSTALLING THE REAR SHOCK ABSORBER section REAR SHOCK ABSORBER AND RELAY ARM CHAS REA...

Страница 277: ...me Q ty Remarks 8 9 10 11 12 13 14 15 16 17 18 19 Bolt Relay arm Self locking nut washer Bolt Connecting plate Spacer Spacer Spacer Oil seal Bearing Bearing Bearing 1 1 1 1 1 2 1 2 1 2 2 1 1 80 mm 120 mm For installation reverse the removal procedure REAR SHOCK ABSORBER AND RELAY ARM CHAS ...

Страница 278: ...pen the rear shock absorber Do not subject the rear shock absorber to an open flame or any other source of high heat High heat can cause an ex plosion due to excessive gas pressure Do not deform or damage the rear shock absorber in any way If the rear shock absorber or both are damaged damping performance will suffer EB706111 DISPOSING OF A REAR SHOCK ABSORBER a Gas pressure must be released befor...

Страница 279: ...2 Disconnect battery leads from the battery terminals First disconnect the negative lead 1 then the positive lead 2 3 Remove battery 4 Remove side covers connecting plate bolt 1 rear shock absorber assembly lower bolt 2 While removing the rear shock absorber as sembly lower bolt hold the swingarm so that it does not drop down 5 Remove rear shock absorber assembly upper bolt 1 rear shock absorber a...

Страница 280: ...ace bolts Bends damage wear Replace EB706701 INSTALLING THE REAR SHOCK ABSORBER ASSEMBLY 1 Lubricate spacers bearings Recommended lubricant Molybdenum disulfide grease 2 Install rear shock absorber assembly Rear shock absorber assembly upper nut 40 Nm 4 0 m kg Rear shock absorber assembly lower nut 40 Nm 4 0 m kg Relay arm to frame nut 48 Nm 4 8 m kg When installing the rear shock absorber assembl...

Страница 281: ...procket Drive chain guard Brake hose holder Caliper bracket Compression bar Drive chain guide Pivot shaft Swingarm Drive chain Cover 1 2 1 1 1 1 1 1 2 Removing the parts in the order listed Refer to REAR WHEEL BRAKE DISC AND REAR WHEEL SPROCKET section Refer to REAR SHOCK ABSORBER AND RELAY ARM section Refer to REMOVING THE ENGINE section in chapter 4 SWINGARM AND DRIVE CHAIN CHAS SWINGARM AND DRI...

Страница 282: ...7 63 115 Nm 11 5 m kg 23 Nm 2 3 m kg 7 Nm 0 7 m kg Order Job name Part name Q ty Remarks 10 11 12 Spacer Bearing Washer 1 2 2 For installation reverse the removal procedure SWINGARM AND DRIVE CHAIN CHAS ...

Страница 283: ...sorber assembly lower bolt 2 When removing the rear shock absorber as sembly lower bolt hold the swingarm so that it does not drop down 3 Check swingarm side play swingarm vertical movement a Check the tightening torque of the pivot shaft nut Pivot shaft nut 115 Nm 11 5 m kg b Check the swingarm side play A by mov ing the swingarm from side to side c If the swingarm side play is out of specifi cat...

Страница 284: ...t shaft on a flat surface Bends Replace Do not attempt to straighten a bent pivot shaft 3 Wash pivot shaft dust covers spacer washers bearings Recommended cleaning solvent Kerosine 4 Check dust covers 1 spacer 2 washers 3 oil seals 4 Damage wear Replace bearings 5 Damage pitting Replace 5 Check connecting arms 6 relay arm 7 Damage wear Replace ...

Страница 285: ...t the drive chain in kerosine and re move any remaining dirt c Remove the drive chain from the kerosine and completely dry it This motorcycle has a drive chain with small rubber O rings 1 between the drive chain side plates Never use high pressure water or air steam gasoline certain solvents e g benzine or a coarse brush to clean the drive chain High pressure methods could force dirt or water into...

Страница 286: ...hain roller 2 Drive chain sprocket EB707700 INSTALLING THE SWINGARM 1 Lubricate bearings spacers dust covers pivot shaft Recommended lubricant Molybdenum disulfide grease 2 Install drive chain swingarm 1 relay arm 2 left connecting plate 3 right connecting plate 4 Swingarm pivot shaft nut 115 Nm 11 5 m kg Relay arm nut 48 Nm 4 8 m kg Connecting plate nut 48 Nm 4 8 m kg Install the swingarm bolt 5 ...

Страница 287: ...rocket 2 washer 3 drive sprocket nut 4 While applying the rear brake tighten the drive sprocket nut Never install a new drive chain onto worn drive chain sprockets this will dramati cally shorten the drive chain s life 5 Adjust drive chain slack Refer to ADJUSTING THE DRIVE CHAIN SLACK in chapter 3 Drive chain slack 30 45 mm A drive chain that is too tight will over load the engine and other vital...

Страница 288: ...ELEC 8 ...

Страница 289: ...ION 8 14 TROUBLESHOOTING 8 15 STARTER MOTOR 8 22 CHECKING THE STARTER MOTOR 8 23 CHARGING SYSTEM 8 25 CIRCUIT DIAGRAM 8 25 TROUBLESHOOTING 8 26 LIGHTING SYSTEM 8 29 CIRCUIT DIAGRAM 8 29 TROUBLESHOOTING 8 30 LIGHTING SYSTEM CHECK 8 33 SIGNAL SYSTEM 8 36 CIRCUIT DIAGRAM 8 36 TROUBLESHOOTING 8 38 SIGNAL SYSTEM CHECK 8 40 COOLING SYSTEM 8 51 CIRCUIT DIAGRAM 8 51 TROUBLESHOOTING 8 52 FUEL PUMP SYSTEM 8...

Страница 290: ...ELEC ...

Страница 291: ...ermo switch fan motor 16 Horn 17 Diode 7 Starting circuit cut off relay 8 Flasher relay 9 Sidestand switch 10 Neutral switch 11 Oil level gauge 12 Ignition coil 1 Main switch 2 Fuel sender 3 Rear brake switch 4 Battery 5 Ignitor unit 6 Starter relay EB800000 ELECTRICAL ELECTRICAL COMPONENTS ...

Страница 292: ...8 2 CIRCUIT DIAGRAM ELEC CIRCUIT DIAGRAM ...

Страница 293: ...t turn signal lights 42 Rear turn signal lights 43 Head light 44 Tail Brake light 45 Auxiliary light 46 Fan motor 47 Thermo switch fan motor 48 Fuse fan 49 Fuse head 50 Rear brake switch 51 Fuse signal 52 Front brake switch 53 Lights switch 54 Engine stop switch 55 Starter switch 56 Fuse ignition 57 Alarm option NOTE B Black Br Brown Ch Chocolate Dg Dark green G Green L Blue Lg Light green O Orang...

Страница 294: ... checking switches Set the pocket tester selector to 1 Ω SWITCH CONNECTION AS SHOWN IN THIS MANUAL This manual contains connection charts like the one shown on the left showing the terminal con nections of switches e g the main switch han dlebar switch brake switch lighting switch etc The column on the extreme left indicates the dif ferent switch positions the top line indicates the colors of the ...

Страница 295: ...n in the left page and check for the correct terminal connections closed circuit according to the color combinations shown in the chart Poor connection fault Repair or replace indicates coupler positions CHECKING SWITCHES ELEC YP SWITCH POSITION AND TERMINAL CONNECTION ...

Страница 296: ... 22 11 12 13 14 16 56 54 Main switch Battery Sidestand switch Ignitor unit Ignition coil Spark plug Pickup coil Neutral switch Fuse ignition Engine stop switch IGNITION SYSTEM ELEC EB802000 IGNITION SYSTEM CIRCUIT DIAGRAM ...

Страница 297: ...B802010 TROUBLESHOOTING IF THE IGNITION SYSTEM FAILS TO OPERATE NO SPARK OR INTERMITTENT SPARK Procedure Check 1 Fuses main and ignition 2 Battery 3 Spark plugs 4 Ignition spark gap 5 Spark plug cap resistance 6 Ignition coil resistance 7 Main switch 8 Engine stop switch 9 Neutral switch 10 SIdestand switch 11 Diode starting circuit cut off relay 12 Pickup coil resistance 13 Wiring connection the ...

Страница 298: ... EB802014 4 Ignition spark gap S Disconnect the spark plug cap from the spark plug S Connect the ignition checker as shown Spark plug cap S Turn the main switch to ON 1 S Check the ignition spark gap S Crank the engine by pushing the starter switch and increase the spark gap until a misfire occurs The ignition system is not faulty Minimum spark gap 6 0 mm OUT OF SPECIFICATION OR NO SPARK MEETS SPE...

Страница 299: ...s S Connect the pocket tester Ω 1 to the ignition coil S Check if the secondary coil has the speci fied resistance Replace the ignition coil Secondary coil resistance 12 X 18 kΩ at 20_C BOTH MEET SPECIFICATION OUT OF SPECIFICATION S Check if the primary coil has the specified resistance Primary coil resistance 1 87 X 2 53 Ω at 20_C MEETS SPECIFICATION EB802016 S Connect the pocket tester Ω 1k to t...

Страница 300: ...02018 8 Engine stop switch S Disconnect the right handlebar switch cou pler from the wire harness S Check for continuity as follows Red White Red Black Replace the right handlebar switch CONTINUITY NO CONTINUITY 1 EB802019 9 Neutral switch S Disconnect the neutral switch lead from the neutral switch S Check for continuity as follows Neutral switch terminal Ground 1 2 2 IGNITION SYSTEM ELEC ...

Страница 301: ...switch coupler from the wire harness Check for continuity as follows Black Black Replace the sidestand switch NO CONTINUITY 1 2 CONTINUITY 11 Diode starting circuit cut off relay unit Remove the relay unit from the wire har ness Check for continuity as follows Blue Yellow Light green 1 2 IGNITION SYSTEM ELEC ...

Страница 302: ...p coil terminal 1 S Check if the pickup coil has the specified re sistance Replace the pickup coil Pickup coil resistance 189 X 231 Ω at 20_C Yellow Blue MEETS SPECIFICATIONS OUT OF SPECIFICATION EB80201D 13 Wiring connection S Check the connections of the entire ignition system Refer to CIRCUIT DIAGRAM Properly connect the ignition system CORRECT POOR CONNECTION Replace the ignitor unit Tester le...

Страница 303: ...er motor Starting circuit cut off relay Neutral switch Sidestand switch Clutch switch Start switch Fuse ignition 8 9 Fuse main 3 4 6 Main switch Battery Starter relay 7 ELECTRIC STARTING SYSTEM ELEC EB803000 ELECTRIC STARTING SYSTEM CIRCUIT DIAGRAM ...

Страница 304: ...closed The starting circuit cut off relay prevents the starter from operating when neither of these conditions have been met In this instance the starting circuit cut off relay is open so current cannot reach the starter motor When at least one of the above conditions have been met however the starting circuit cut off relay is closed and the engine can be started by pressing the starter switch WHE...

Страница 305: ...ge or replace the battery CORRECT INCORRECT EB803020 TROUBLESHOOTING IF THE STARTER MOTOR FAILS TO OPERATE Procedure Check 1 Fuses main and ignition 2 Battery 3 Starter motor 4 Starting circuit cut off relay 5 Starter relay 6 Main switch 7 Engine stop switch 8 Neutral switch 9 Sidestand switch 10 Clutch switch 11 Start switch 12 Diode starting circuit cut off relay 13 Wiring connection the entire ...

Страница 306: ...e operation of the starter motor Repair or replace the starter motor MOVES DOES NOT MOVE 1 Battery terminal Red Black terminal Battery terminal Black Yellow terminal EB803023 4 Starting circuit cut off relay relay unit S Remove the relay unit from the wire har ness S Connect the pocket tester Ω 1 and bat tery 12 V to the relay unit terminals S Check the starting circuit cut off relay for continuit...

Страница 307: ...NTINUITY CONTINUITY EB802017 6 Main switch S Disconnect the main switch couplers from the wire harness S Check for continuity as follows Red Brown Blue Replace the main switch CONTINUITY NO CONTINUITY 1 2 Battery terminal Red White terminal Battery terminal Blue White terminal 3 4 Tester lead Red terminal Tester lead Black terminal 3 4 S Check the starter relay for continuity ELECTRIC STARTING SYS...

Страница 308: ...as follows Red White Red White Replace the right handlebar switch CONTINUITY NO CONTINUITY 1 EB802019 8 Neutral switch S Disconnect the neutral switch lead from the neutral switch S Check for continuity as follows Neutral switch terminal Ground Replace the neutral switch CONTINUITY NO CONTINUITY 1 2 ELECTRIC STARTING SYSTEM ELEC ...

Страница 309: ...uity as follows Black Black Replace the sidestand switch CONTINUITY NO CONTINUITY 1 EB803025 10 Clutch switch S Disconnect the clutch switch coupler from the wire harness S Check for continuity as follows Black Yellow Blue Yellow Replace the clutch switch CONTINUITY NO CONTINUITY 1 2 2 ELECTRIC STARTING SYSTEM ELEC ...

Страница 310: ...CONTINUITY NO CONTINUITY 1 EB803026 12 Diode starting circuit cut off relay S Remove the relay unit from the wire har ness S Check for continuity as follows Black Yellow Light green Replace the relay unit CORRECT INCORRECT 1 2 2 Tester lead Black Yellow Tester lead Light green 1 Tester lead Light green Tester lead Black Yellow Continuity No Continuity 2 1 2 ELECTRIC STARTING SYSTEM ELEC ...

Страница 311: ...8 21 EB803028 13 Wiring connection S Check the connections of the entire starting system Refer to CIRCUIT DIAGRAM Properly connect the starting system POOR CONNECTION ELECTRIC STARTING SYSTEM ELEC ...

Страница 312: ...isassembly Front bracket Washers Rear bracket Shims Brush holder Brush Armature ass y 1 1 1 1 2 1 1 1 1 Remove the parts in order Reverse the removal procedure for installation Disassembly the parts in order Reverse the disassembly procedure for assembly 1 2 3 4 5 6 ELECTRIC STARTING SYSTEM ELEC EB803030 STARTER MOTOR ...

Страница 313: ...ect S Commutator Dirty Clean it with 600 grit sandpaper 4 Inspect S Armature coil resistances insulation con tinuity Defects Replace the starter motor Inspection steps S Connect the pocket tester for the continuity 1 and insulation 2 checks S Measure the armature coil resistances Armature coil continuity resistance 1 0 0015 X 0 0025 Ω at 20_C Armature coil insulation resistance 2 More than 1 MΩ at...

Страница 314: ...r motor Commutator wear limit 27 mm 6 Measure Mica undercut a Out of specification Scrape the mica to the proper measurement using a hacksaw blade which has been grounded to fit the commutator Mica undercut 0 7 mm The mica insulation of the commutator must be undercut to ensure proper operation of the commutator ...

Страница 315: ...8 25 Battery 1 2 4 AC magneto Rectifier regulator Fuse main 6 CHARGING SYSTEM ELEC EB804000 CHARGING SYSTEM CIRCUIT DIAGRAM ...

Страница 316: ... to BATTERY INSPECTION in CHAPTER 3 S Clean the battery terminals S Recharge or replace the battery CORRECT INCORRECT EB803020 TROUBLESHOOTING IF THE BATTERY IS NOT CHARGED Procedure Check 1 Fuse main 2 Battery 3 Charging voltage 4 Stator coil resistance 5 Wiring connections the entire charging system S Remove the following part s before trouble shooting 1 Seat 2 Side cover left S Use the followin...

Страница 317: ...stance S Remove the generator cover S Connect the pocket tester Ω 1 to the stator coils Replace the stator coil assembly BOTH MEET SPECIFICATION OUT OF SPECIFICATION Tester lead White terminal Tester lead White terminal Tester lead White terminal Tester lead White terminal S Measure the stator coil resistance Tester lead Battery terminal Tester lead Battery terminal S Measure the battery terminal ...

Страница 318: ... SYSTEM ELEC EB804015 5 Wiring connections S Check the connections of the entire charg ing system Refer to CIRCUIT DIAGRAM Properly connect the charging system POOR CONNECTION Replace the rectifier regulator CORRECT ...

Страница 319: ...in switch Battery Dimmer switch High beam indicator light Meter light Pass switch Headlight Tail brake light 49 45 53 Fuse head Auxiliary light Lights switch 6 Fuse main LIGHTING SYSTEM ELEC EB805000 LIGHTING SYSTEM CIRCUIT DIAGRAM ...

Страница 320: ...Recharge or replace the battery CORRECT INCORRECT EB803020 TROUBLESHOOTING IF THE HEADLIGHT HIGH BEAM INDICATOR LIGHTS TAILLIGHT AUXILIARY LIGHT AND OR METER LIGHT FAIL TO COME ON Procedure Check 1 Fuses main and head 2 Battery 3 Main switch 4 Lights switch for Europe 5 Dimmer switch 6 Pass switch for Europe and Australia 7 Wiring connections the entire lighting system S Remove the following part ...

Страница 321: ...tinuity as follows Red Yellow Blue Red Yellow Blue Black 1 1 2 1 2 1 2 2 1 EB802017 3 Main switch Disconnect the main switch couplers from the wire harness Check for continuity as follows Red Brown Blue Blue Red Blue Replace the main switch CONTINUITY NO CONTINUITY EB805011 The lights switch is faulty Replace the right handlebar switch CONTINUITY NO CONTINUITY 4 Lights switch 2 LIGHTING SYSTEM ELE...

Страница 322: ...ft handlebar switch cou pler from the wire harness Turn the pass switch to ON Check for continuity as follows Red Yellow Yellow The pass switch is faulty Replace the left handlebar switch CONTINUITY NO CONTINUITY 2 2 EB805013 7 Wiring connections Check the connections of the entire lighting system Refer to CIRCUIT DIAGRAM Properly connect the lighting system CORRECT POOR CONNECTION Check the condi...

Страница 323: ...er lead Black lead High beam indicator light Tester lead Yellow lead Tester lead Black lead 1 Turn the main switch to ON Turn the light switch to ON Turn the dimmer switch to LO or HI Check the voltage 12 V of the Black Yel low Black Blue and Yellow leads on the bulb socket connector The wiring circuit from the main switch to the bulb socket connector is faulty repair it MEETS SPECIFICATION OUT OF...

Страница 324: ... V of the blue lead on the bulb socket connector The wiring circuit from the main switch to the bulb socket connector is faulty repair it MEETS SPECIFICATION OUT OF SPECIFICATION The circuit is not faulty 2 2 1 1 Bulb and bulb socket Check the bulb and bulb socket for continu ity Replace the bulb and or bulb socket CONTINUITY NO CONTINUITY Tester lead Blue terminal Tester lead Black terminal 2 Vol...

Страница 325: ...lb socket for continu ity Replace the bulb and or bulb socket CONTINUITY NO CONTINUITY Tester lead Blue Red terminal Tester lead Black terminal 2 Voltage Connect the pocket tester DC 20 V to the bulb socket connector Turn the main switch is ON Turn the lights switch to ON or PO Check the voltage 12 V of the Blue Red lead on the bulb socket connector The wiring circuit from the main switch to the b...

Страница 326: ...8 36 SIGNAL SYSTEM ELEC EB806000 SIGNAL SYSTEM CIRCUIT DIAGRAM ...

Страница 327: ...ght 28 Neutral indicator light 29 Oil level warning light 31 Turn indicator light 34 Oil level switch 35 Flasher relay 36 Horn 39 Horn switch 40 Turn switch 41 Front turn signal light 42 Rear turn signal light 44 Tail brake light 50 Rear brake switch 51 Fuse signal 52 Front brake switch 55 Start switch SIGNAL SYSTEM ELEC ...

Страница 328: ...TER 3 S Clean the battery terminals S Recharge or replace the battery CORRECT INCORRECT B806010 TROUBLESHOOTING IF THE TURN SIGNAL LIGHT BRAKE LIGHT AND OR INDICATOR LIGHT FAIL TO COME ON IF THE HORN FAILS TO SOUND Procedure Check 1 Fuses main and signal 2 Battery 3 Main switch 4 Wiring connection the entire signal system S Remove the following part s before trouble shooting 1 Seat 2 Fuel tank 3 S...

Страница 329: ...lue Replace the main switch CONTINUITY NO CONTINUITY 2 EB806011 4 Wiring connections Check the connections of the entire signal system Refer to CIRCUIT DIAGRAM Properly connect the signal system CORRECT POOR CONNECTION Check the condition of each of the signal sys tem s circuits Refer to SIGNAL SYSTEM CHECK 1 SIGNAL SYSTEM ELEC ...

Страница 330: ... Voltage Connect the pocket tester DC 20 V to the horn lead Turn the main switch to ON Check the voltage 12 V of the Brown lead at the horn terminal The wiring circuit from the main switch to the horn terminal is faulty repair it MEETS SPECIFICATION OUT OF SPECIFICATION 1 Horn switch 3 Horn Disconnect the Pink lead at the horn termi nal Connect a jumper lead to the horn termi nal and ground the ju...

Страница 331: ...minal Turn the main switch to ON Check the voltage 12 V of the Pink lead at the horn terminal Replace the horn MEETS SPECIFICATION OUT OF SPECIFICATION Adjust or replace the horn SIGNAL SYSTEM ELEC 1 Bulb and bulb socket Check the bulb and bulb socket for continu ity Replace the bulb and or bulb socket CONTINUITY NO CONTINUITY EB806022 2 If the brake light fails to come on ...

Страница 332: ...n Check the voltage 12 V of the Yellow lead on the bulb socket connector The wiring circuit from the main switch to the bulb socket connector is faulty repair it MEETS SPECIFICATION OUT OF SPECIFICATION This circuit is not faulty 2 Brake switch Disconnect the front brake switch leads Disconnect the rear brake switch coupler from the wire harness Check for continuity as follows Brown Green Yellow B...

Страница 333: ...Check the voltage 12 V of the Brown lead at the flasher relay terminal The wiring circuit from the main switch to the flasher relay connector is faulty repair it MEETS SPECIFICATION OUT OF SPECIFICATION 2 Turn switch Disconnect the left handlebar switch cou plers from the wire harness Check for continuity as follows Brown White Chocolate Brown White Dark green Replace the left handlebar switch CON...

Страница 334: ...he main switch to ON Turn the turn switch to L or R Check the voltage 12 V of the Chocolate lead or Dark green lead on the bulb socket connector The wiring circuit from the turn switch to the bulb socket connector is faulty repair it MEETS SPECIFICATION OUT OF SPECIFICATION This circuit is not faulty 1 Tester lead Brown White terminal Tester lead Frame ground 4 Voltage Connect the pocket tester DC...

Страница 335: ...llows Sky blue Light green Replace the diode CORRECT INCORRECT 2 Neutral switch Disconnect the neutral switch lead from the neutral switch Check for continuity as follows Neutral switch terminal Ground Replace the neutral switch CONTINUITY NO CONTINUITY Tester lead Sky blue Tester lead Light green 1 Tester lead Light green Tester lead Sky blue Continuity No Continuity 2 1 2 EB806024 4 If the neutr...

Страница 336: ...lack Red terminal Tester terminal White Black 8 Ω at 20_C MEETS SPECIFICATION OUT OF SPECIFICATION Replace the starting circuit cut off relay 1 Bulb and bulb socket S Check the bulb and bulb socket for continu ity Replace the bulb and or bulb socket CONTINUITY NO CONTINUITY 2 Starting circuit cut off relay S Disconnect the starting circuit cut off relay coupler from the wire harness S Connect the ...

Страница 337: ...ck the oil level switch for continuity Replace the oil level switch NO CONTINUITY 1 4 Diode starting circuit cut off relay Remove the relay unit from the wire har ness Check for continuity as follows White Black Black Replace the relay unit CORRECT INCORRECT CONTINUITY 2 1 Tester lead White Black Tester lead Black 1 Tester lead Black Tester lead White Black Continuity No Continuity 2 1 2 SIGNAL SY...

Страница 338: ...V The wiring circuit from the main switch to the bulb socket connector is faulty repair it MEETS SPECIFICATION OUT OF SPECIFICATION This circuit is not faulty 1 5 Start switch Disconnect the right handlebar switch cou pler from the wire harness Check for continuity as follows Blue White Black Replace the right handlebar switch CONTINUITY NO CONTINUITY 2 1 1 2 SIGNAL SYSTEM ELEC ...

Страница 339: ...el and remove the fuel sender from the fuel tank S Connect the fuel sender to wireharness S Move the float to UP or DOWN Replace the fuel sender OUT OF SPECIFICATION Replace the fuel meter DOES NOT MOVE 1 3 Tester lead Green terminal Tester lead Black terminal S Measure the fuel sender resistance 4 S Turn the main switch to ON S Check the fuel gauge needle moves F or E 2 3 S Check the fuel sender ...

Страница 340: ...et tester DC 20 V to the bulb socket connector Drain the fuel Turn the main switch to ON Check the voltage 12 V The wiring circuit from the main switch to the bulb socket connector is faulty repair it MEETS SPECIFICATION OUT OF SPECIFICATION This circuit is not faulty 1 1 2 SIGNAL SYSTEM ELEC ...

Страница 341: ...n 3 4 6 19 Main switch Battery Thermo switch warning light 27 46 47 48 Fan motor Fuse fan 51 Fuse signal Thermo switch fan Engine temperature warning light COOLING SYSTEM ELEC EB807000 COOLING SYSTEM CIRCUIT DIAGRAM ...

Страница 342: ...ery terminals S Recharge or replace the battery CORRECT INCORRECT EB807010 TROUBLESHOOTING IF THE FAN MOTOR FAILS TO TURN IF THE WATER TEMPERTATURE METER FAILS TO MOVE WHEN THE ENGINE IS WARM Procedure Check 1 Fuses main signal and fan 2 Battery 3 Main switch 4 Fan motor 5 Thermo switch 6 Engine temperature warning light 7 Voltage 8 Wiring connections the entire cooling system S Remove the followi...

Страница 343: ...he fan motor coupler Connect the battery 12 V as shown 2 EB802017 3 Main switch Replace the main switch CONTINUITY NO CONTINUITY EB807011 The fan motor is faulty replace it MOVES DOES NOT MOVE 4 Fan motor Battery lead Black terminal Battery led Black terminal Check the operation of the fan motor 2 1 1 COOLING SYSTEM ELEC ...

Страница 344: ...ratures 2 EB802017 5 Thermo switch fan engine temperature Replace the thermo switch GOOD CONDITION BAD CONDITION THERMO SWITCH ON THERMO SWITCH OFF 1 Handle the thermo switch with special care Never subjct it to strong shocks or allow it to be dropped Should it be dropped it must be replaced Tests 1 2 Heat up tests Tests 3 4 Cool down tests f Continuity No continuity A B Test step Good condition 1...

Страница 345: ...et connector is faulty repair it MEETS SPECIFICATION OUT OF SPECIFICATION This circuit is not faulty 1 6 Engine temperature warning light Check the bulb and bulb socket for continu ity Replace the bulb and or bulb socket CONTINUITY NO CONTINUITY 8 Wiring connections Check the connections of the entire cooling system Refer to CIRCUIT DIAGRAM Properly connect the cooling system CORRECT POOR CONNECTI...

Страница 346: ...8 56 Fuse main 3 4 6 10 11 21 54 56 Main switch Battery Fuel pump relay Ignitor unit Fuel pump Engine stop switch Fuse ignition FUEL PUMP SYSTEM ELEC EB808000 FUEL PUMP SYSTEM CIRCUIT DIAGRAM ...

Страница 347: ...ignition 5 Engine stop switch 6 Ignitor unit 7 Fuel pump relay 8 Fuel pump EB808010 FUEL PUMP CIRCUIT OPERATION The fuel pump circuit consists of the fuel pump relay fuel pump engine stop switch and ignitor unit The ignitor unit includes the control unit for the fuel pump ...

Страница 348: ...in CHAPTER 3 S Clean the battery terminals S Recharge or replace the battery CORRECT INCORRECT EB808020 TROUBLESHOOTING IF THE FUEL PUMP FAILS TO OPERATE Procedure Check 1 Fuses main and ignition 2 Battery 3 Main switch 4 Engine stop switch 5 Fuel pump relay starting circuit cut off relay 6 Fuel pump resistance 7 Wiring connections the entire fuel system S Remove the following part s before troubl...

Страница 349: ... wire harness Check for continuity as follows Red Brown Blue Replace the main switch CONTINUITY NO CONTINUITY EB802018 Replace the right handlebar switch CONTINUITY NO CONTINUITY 4 Engine stop switch EB803023 5 Fuel pump relay starting circuit cut off relay Remove the relay unit from the wire har ness Connect the pocket tester Ω 1 and bat tery 12 V to the relay unit terminals 1 FUEL PUMP SYSTEM EL...

Страница 350: ... SPECIFICATION Replace the ignitor unit 1 Replace the starting circuit cut off relay CONTINUITY NO CONTINUITY 7 Wiring connections S Check the connections of the entire fuel pump system Refer to CIRCUIT DIAGRAM Properly connect the fuel pump system CORRECT POOR CONNECTION EB808022 2 EB808021 Fuel pump resistance 1 8 X 2 6 Ω at 20_C Tester lead Red Black terminal Tester lead Blue Black terminal S C...

Страница 351: ...If you do accidentally spill some wipe it up im mediately with dry rags If gasoline touches the engine when the engine is still hot there is a danger of combustion Make sure that the engine is completely cool before performing the following test 1 Check Fuel pump operation a Fill up the fuel tank b Put the end of the fuel hose into an open container c Connect the battery 12 V to the fuel pump coup...

Страница 352: ...ables the motorcycle to run so that the ignition timing is fixed when the throttle is fully opened Displays the condition code on the tachometer 3 000 r min Speed sensor Disconnected short circuit Wheel IC fails to pulse Displays the condition code on the tachometer 4 000 r min Display order on the tachometer 1 Fail to the throttle position sensor 1 0 r min 3 seconds 2 Display condition code 2 5 s...

Страница 353: ... NO CONTINUITY 2 TPS Check the TPS for continuity Refer to THROTTLE POSITION SENSOR TPS ADJUSTMENT AND INSPECTION in CHAPTER 6 Replace the TPS GOOD CONDITION BAD CONDITION Replace the ignitor unit TROUBLESHOOTING The tachometer starts to display the self diagnosis sequence Use the following special tool in this trouble shooting Pocket tester 90890 03112 1 Throttle position sensor TPS CIRCUIT DIAGR...

Страница 354: ... 11 Ignitor unit 17 Speed sensor 1 Wire harness Check the wire harness for continuity Refer to CIRCUIT DIAGRAM Repair or replace the wire harness CONTINUITY NO CONTINUITY Replace the speed sensor 2 Speed sensor CIRCUIT DIAGRAM ...

Страница 355: ...TRBL SHTG 9 ...

Страница 356: ...ES NOT MOVE 9 3 JUMPS OUT OF GEAR 9 3 FAULTY CLUTCH PERFORMANCE 9 3 CLUTCH SLIPPING 9 3 CLUTCH DRAGGING 9 3 OVERHEATING 9 4 OVERHEATING 9 4 OVERCOOLING 9 4 OVERCOOLING 9 4 POOR BRAKING 9 4 POOR BRAKING EFFECT 9 4 FAULTY FRONT FORK LEGS 9 4 MALFUNCTION 9 4 OIL LEAKAGE 9 4 UNSTABLE HANDLING 9 5 UNSTABLE HANDLING 9 5 FAULTY LIGHTING AND SIGNAL SYSTEMS 9 5 HEADLIGHT DOES NOT LIGHT 9 5 BULB BURNT OUT 9...

Страница 357: ...TRBL SHTG ...

Страница 358: ...ed pilot air passage Sucked in air Deformed float Worn needle valve Improperly sealed valve seat Improperly adjusted fuel level Improperly set pilot jet Clogged starter jet Faulty starter plunger Improperly adjusted starter cable Air filter Clogged air filter element Fuel pump Faulty fuel pump Faulty fuel pump relay ELECTRICAL SYSTEM Spark plug Improper plug gap Worn electrodes Wire between termin...

Страница 359: ...EED PERFORMANCE POOR ENGINE IDLE SPEED PERFORMANCE Carburetor Improperly returned starter plunger Loose pilot jet Clogged pilot air jet Improperly synchronized carburetors Improperly adjusted idle speed throttle stop screw Improper throttle cable free play Flooded carburetor Electrical system Faulty battery Faulty spark plug Faulty ignitor unit Faulty pickup coil Faulty ignition coil Valve train I...

Страница 360: ...mproperly returned stopper lever Shift fork Worn shift fork Shift cam Improper thrust play Worn shift cam groove Transmission Worn gear dog EB904000 FAULTY CLUTCH PERFORMANCE CLUTCH SLIPPING Clutch Improperly adjusted clutch cable Loose clutch spring Fatigued clutch spring Worn friction plate clutch plate Incorrectly assembled clutch Engine oil Improper oil level Improper viscosity low Deteriorati...

Страница 361: ...LING Faulty cooling fan Faulty thermo stat Faulty thermo switch EB906000 POOR BRAKING POOR BRAKING EFFECT Disc brake Worn brake pad Worn disc Air in brake fluid Leaking brake fluid Faulty cylinder cup kit Faulty caliper seal kit Loose union bolt Broken brake hose Oily or greasy brake disc brake pad Improper brake fluid level EB907000 FAULTY FRONT FORK LEGS MALFUNCTION Bent deformed or damaged inne...

Страница 362: ...Improperly installed bearing race EB909000 FAULTY LIGHTING AND SIGNAL SYSTEMS HEADLIGHT DOES NOT LIGHT Improper bulb Too many electric accessories Hard charging broken stator coil wire faulty rectifier regulator Incorrect connection Improperly grounded Poor contacts main or light switch FLASHER DOES NOT LIGHT Improperly grounded Discharged battery Faulty turn switch Faulty flasher relay Faulty wir...

Страница 363: ...TRBL SHTG ...

Страница 364: ... 36 Horn 37 Pass switch 38 Dimmer switch 39 Horn switch 40 Turn switch 41 Front turn signal light 42 Rear turn signal light 43 Headlight 44 Tail Brake light 45 Auxiliary light 46 Fan motor 47 Thermo switch fan motor 48 Fuse fan 49 Fuse head 50 Rear brake switch 51 Fuse signal 52 Front brake switch 53 Light switch 54 Engine stop switch 55 Starter switch 56 Fuse ignition 57 Alarm option COLOR CODE B...

Отзывы: