12
P/N 10001646 Rev. AA
June 2015
Using other than Columbus McKinnon supplied load chain may
cause the chain to jam in the hoist and/or allow the chain to break
and the load to drop.
TO AVOID INJURY:
Due to size requirements and physical properties, use only
Columbus McKinnon supplied load chain in the Yale Yalelift 360™
ATEX hand chain hoist.
Used motor oils contain known carcinogenic materials.
TO AVOID INJURY:
Never use used motor oils as a chain lubricant. Only use Lubriplate
®
Bar and Chain Oil 10-R as a lubricant for the load chain.
Worn chain can be an indication of worn hoist components. For
this reason, the hoist’s chain guide, stripper and liftwheel should be
examined for wear and replaced as necessary when replacing worn
chain (See “DISASSEMBLY AND ASSEMBLY”).
Also, the load chain is specially heat treated and hardened and
should never be repaired.
IMPORTANT: Do not use replaced chain for other purposes such
as lifting or pulling. Load chain may break suddenly without visual
deformation. For this reason, cut replaced chain into short lengths to
prevent use and then dispose of it.
NOTE: The above method of inspecting load chain can also be used
to inspect the hand chain for stretch and wear.
Chain Lubrication
A small amount of lubricant will greatly increase the life of load chain.
Do not allow the chain to run dry. Keep it clean and lubricate at
regular intervals with Lubriplate
®
Bar and Chain Oil 10-R (Fiske Bros.
Refining Co.) or equal lubricant. Normally, weekly lubrication and
cleaning is satisfactory, but under hot and dirty conditions, it may
be necessary to clean the chain at least once a day and lubricate it
several times between cleanings.
When lubricating the chain, apply sufficient lubricant to obtain
natural run-off and full coverage, especially in the interlink area.
Also check chain for stretch and wear using a vernier caliper as
shown in Figure 5. Select an unused, unstretched section of chain
(usually at the loose end) and measure and record the length over 11
chain links (pitches). Measure and record the same length on a worn
section of chain. If the result (amount of stretch and wear) is greater
than 0.145 inch, the chain must be replaced.
Figure 5 - Chain Inspection
Use only a “Knife-Edge” caliper to eliminate the possibility of a false
reading by not measuring full pitch length.
LUBRICATION
Hoist normally requires no additional lubrication except when it had
been disassembled for cleaning or repairs.
IMPORTANT: Brake is designed to operate dry. Do not use any
grease or lubricant on the braking surfaces. When lubricating parts
adjacent to the brake, do not use an excessive amount of lubricant
which could seep onto the brake surfaces.
MAINTENANCE (CONTINUED)
If hoist is disassembled for service, repair or inspection, remove and
clean existing grease from unit and replace with approximately 1
oz. of Poliplex 2 (Century Lubricants Co.) grease or equal lubricant
to the exterior surface of the drive shaft, gears, internal thread of
brake hub, surface of liftwheel bushings (1/2 ton unit), bushings in
the gear side plate and gear cover, internal and external surfaces of
handwheel bushings and rim of handwheel cover.
IMPORTANT: To assure long life and top performance, be sure to
lubricate the various parts of the hoist using the lubricants specified
above. If desired, these lubricants can be purchased from Columbus
McKinnon (See Figure 7, page 15).
REPLACING LOAD CHAIN
To replace the load chain, remove the lower hook block from the
chain. Disconnect the chain from the loose end connector and
operate the hoist in the lowering direction to run the chain out of the
hoist. Feed a length of soft wire up and over the liftwheel. Attach
the wire to the new load chain so that the chain will be entering the
center of the hoist frame. Position the chain so that the first link
to engage the liftwheel is an upstanding link and the weld on all
upstanding links will be away from the liftwheel. Pull on the wire until
the chain engages the liftwheel. Rotate the handwheel until the chain
comes out on the loose side of the hoist. Attach the chain to the
loose end connector and attach the lower hook block assembly to
the chain so that the lower hook is directly below the upper hook.
DISASSEMBLY AND ASSEMBLY
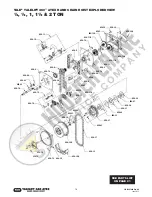
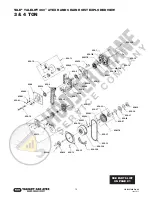
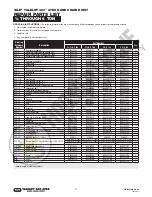
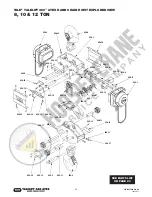
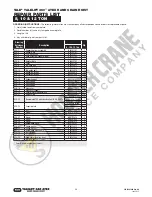
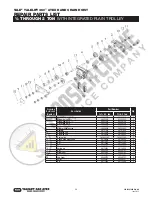
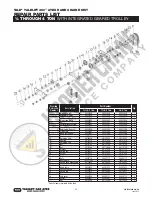
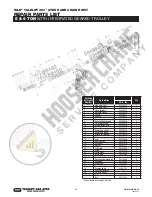
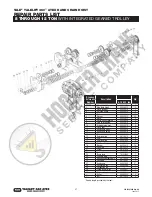
The parts list and exploded view on pages 15 to 27 show the general
arrangement and name of the parts of the Yale Yalelift 360™ ATEX
hand chain hoist. These should be used when disassembling and
reassembling the hoists so that all parts are properly installed.
1. To inspect or replace parts of the load brake system, it is
necessary to partially disassemble the hoist. Remove the hand
chain wheel cover and slide it down the hand chain . Lift the hand
chain out of the hand chain wheel pockets. Remove the cotter
pin, castle nut and washer from the drive shaft. Remove hand
chain wheel by turning hand chain wheel counter clockwise.
Inspect the friction surface of the brake hub and replace it if
the surface excessively scored. (see page 13, “HANDWHEEL
OVERLOAD CLUTCH ASSEMBLY”). Slide front brake disc, ratchet
disc assembly and rear brake disc from pressure disk. Remove
retaining ring and remove pressure disc by turning counter
clockwise. Inspect both brake discs and replace if excessive wear,
scoring, glazing or contamination is found. If brake discs are worn
down to the following thickness, replacement is required:
Capacity
Thickness Min.
in. (mm)
¼, ½, 1, 1½ & 2
.043
(1.09)
3, 4, 5, 6, 8, 10 & 12
.063
(1.60)
Inspect ratchet disc assembly and pressure disc
friction surfaces, replace if excessively scored.
After the brake discs are inspected or replaced, reassemble
the hoist in reverse to the order given above.
Using any grease or lubricant on the braking surfaces will cause
brake slippage and loss of load control which may result in injury
and/or property damage.
TO AVOID INJURY:
Do not use any grease or lubricant on braking surfaces. The brake is
designed to operate dry.


