background image


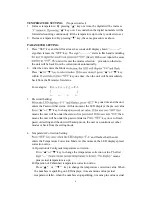
TEMPERATURE SETTING:    (No password set) 
1.


Increase temperature: By pressing 

 key one time, the digital will be increase 


 key over 2 seconds then the digital numerals will be 

forwarded counting continuously till the temperature up to what you desire to set. 

2.


Decrease temperature: By pressing

 key, the same procedure as above. 


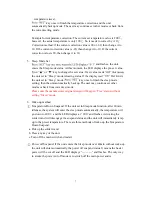
PARAMETER SETTING: 
1.


Press  SET  key and hold for at least 4 seconds until display shown 


sign then release the 

 key. The sign 


 starts to flash and reminding 

 (fixed). If the user inputs the same 

unit will enter the modes selection    procedure, otherwise, 

the unit will be back from the current mode automatically.     

2.


After the unit enters the Modes s

-

Press 


 or 

 key 

within 15 s

 key one time, then the unit will be mmediately 

back from the Parameter Set status.   


For example:    F-

-

-

 F-3   


3.


Password Setting:   

-


 key one time and the unit 

enters the Password Set status. At this moment, the LED displays the pre-set value. 

 or 

 key to change pa

means the unit will be under the status 

en 

means the unit will be under the password status. 

 key once to finish 

password setting and the unit will backup mode, the user can continue set other 
modes or back from the setting mode.   

 
4.


Temperature Correction Setting   


-

 and flashes that the unit 

enters the Temperature Correction Mode. At this moment, the LED displays preset 
correction value.   
A: Operation of Centigrade temperature correction: 

 or 

 key to change the temperature correction value. The first 


 means 

plus (actual temperature is up). 


B: Operation of Fahrenheit temperature correction value: 

Press 

  or 

  key to change the temperature correction value. When 

the numbers is sparkling on LED displays, it means minus value (actual 
temperature falls), when the numbers stop sparkling, it means plus value (actual 

Содержание LF-2000

Страница 1: ...1 Instruction Manual for Intelligent Temperature Controlled Soldering Station LF 2000 U For Lead free soldering application and rework on professional SMD electronics...

Страница 2: ...nd flammable material when in operation The soldering tip and the heating element are still remaining hot after being switched off Ensure that you do not touch the soldering tip and the heating elemen...

Страница 3: ...ndustry and suitable for work on professional SMD electronics An ergonomic handle with shorter distance between heating element and tip gets very fast heat up time and quick heat compensation A high q...

Страница 4: ...392 842 Temperature Correction Range 99 99 178 178 Default Set 200 392 Figure Dimension 111x158x137mm W x H x D Weight Unit only 2 5kg WORKING TEMPERATURE To meet RoHS requirements the 60 40 solder a...

Страница 5: ...the heating indicator light will be flashed on and off to maintain the set temperature The unit now is ready for use CAUTIONS REMEMBER THE TIP IS HOT The tip and barrel of the solder wand will cause...

Страница 6: ...tus For example F F 3 3 Password Setting key one time and the unit enters the Password Set status At this moment the LED displays the pre set value or key to change pa means the unit will be under the...

Страница 7: ...setting then the unit automatically backup The user may continue set other modes or back from current set mode Please note the manufacturer original design will keep in Free status without setting Sl...

Страница 8: ...ooper and if used properly they should maintain optimum life 1 Always tin the tip before returning it to the holder turning off the station or storing it for long periods of time Wipe the tip on a bra...

Страница 9: ...e job to avoid unnecessary component damage Gently pick up and remove components while ensuring that a vertical pick up and pull out motion is maintained Use the same procedure when reconnecting the s...

Отзывы: