5
5. Installation
1.
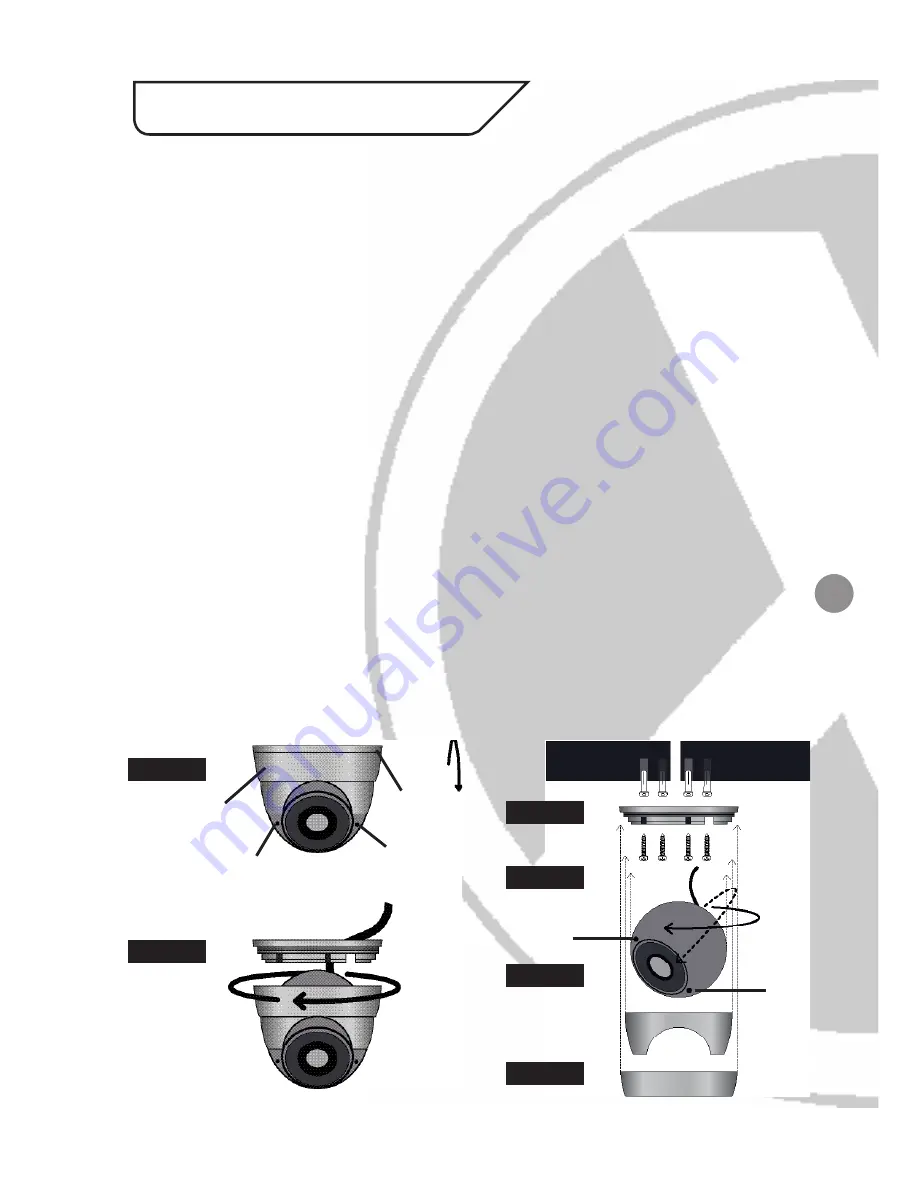
Select a suitable position on the wall or ceiling to install the camera. Take the
mounting bracket off the dome camera by unscrewing the fixing screw using
the small Allen key supplied.
2.
Rotate the upper ring of the camera, it will unscrew from the dome base. Be
careful when handling the camera as the parts are not fixed to the upper ring
or the camera ‘ball’.
3.
Using the Dome base as a guide, drill a hole in the middle of the base circle on
the wall or ceiling where the camera is to bemounted, to allow the power and
video cable to be fed through (as shown in the diagram).
4.
Screw the Dome base to the wall or ceiling using the Wall Plugs and screws
supplied.
5.
Feed the Camera’s cable through the hole and adjust the Camera ‘ball’ so the
camera is positioned in the correct direction and at the correct angle.
6.
When the camera is in the correct position, put the upper and lower ring of the
camera back into position.
7.
Screw the upper ring back onto the base and re-attach the fixing screw to
secure the camera in place
.
8. The camera’s focus and zoom can them be adjusted using the 2 adjustment
screws on the front of the camera.
STEP 1
Lower
Ring
Zoom
Adjustment
Focus
Adjustment
U
pper
Ring
STEP 2
STEP 3
STEP 4
STEP 5
STEP 6
Focus
Adjustment
Zoom
Adjustment


