4
1.
Select a suitable position on the wall or ceiling
to install the camera.
2.
Remove the dome housing from the camera
housing by removing the four cross head
retaining screws.
3.
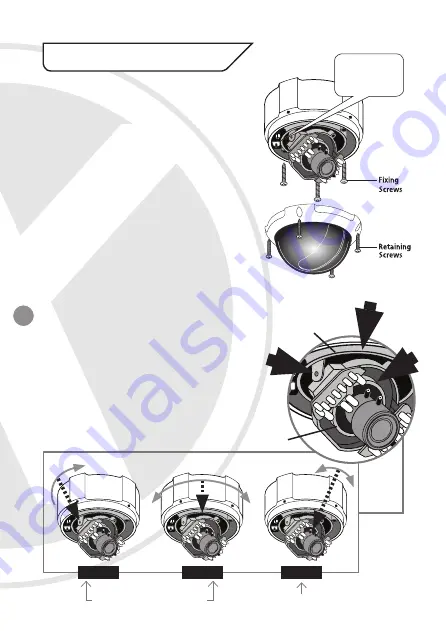
Secure the camera in the desired ceiling
position with the four fixing screws (as shown
in Figure 1).
4.
Adjust the camera viewing angle. See
‘Adjusting Camera View’ and ‘Adjusting Lens’
for more information’.
5.
Place the dome cover on the camera base and
secure it by tightening the cover screws.
Figure 1
5. Installation
ADJUSTING CAMERA VIEW
Adjust the camera viewing angle by first tilting
(STEP 1) then rotating the camera module (STEP
2), and then turn the horizontal adjustment ring
(STEP 3) to correct the image and achieve proper
orientation (as shown in Figure 2).
After adjusting, secure the fixture by tighten the
small screws located on the camera module & ring.
Figure 2
Tilt
Rotate
STEP 1
STEP 2
STEP 3
Rotate
Camera Module Adjustment
Camera Ring Adjustment
1
3
2
Camera
Module
Camera
Ring
Unscrew the
camera to also
access the
Camera
OSD Controls


