44
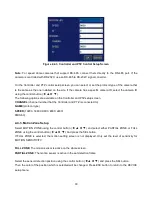
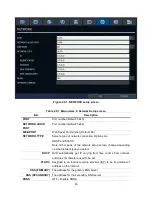
“SERVER 1” : Using free DDNS server
“SERVER 2” : Using Customers own DDNS server
“SERVER 3” : Using free Auto DDNS server
CAUTION
:
Do not change this sever name. If this is changed, the DDNS
service cannot be available.
DDNS INTERVAL
: Set the connection interval (5-60minutes)
NETWORK STREAM
Set the value for network streaming.
2-8-1. Port, Network Audio Port and Web Port
When you connect one or more DVRs to a network through an IP sharing device, each device must have a
unique TCP port number for access to each unit from outside the LAN. Also, the IP sharing device must be
configured for port forwarding so when each port is accessed on the IP sharing device, it will forward to the
appropriate DVR.
Note:
This port number is listed next to the Port menu option in the Network Setup screen. If you plan to
access the DVR units only from within the same LAN, the TCP port does not have to be changed.
2-8-2. Network Types
2-8-2-1. DHCP
An IP address is automatically assigned by the DHCP server, which automatically assigns IP address and
other parameters to new devices.
When ADSL or other network being used adopts variable IP method, not fixed IP. This option is used as a
way to automatically get IP address.
2-8-2-2.STATIC
1. For the use of fixed IP.
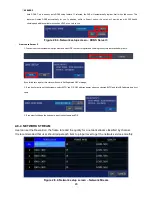
Web viewer Network access beyond Router
In order to access beyond Router (Firewall), user must open 1 TCP port that is set on NETWORK >
WEB PORT. If this port is not open properly, user can not access DVR using direct Web viewer
(Example: When NETWORK > WEB PORT is set as 80, 80 TCP port of IP address of DVR must be
open.)
Network access beyond a router
In order to access the DVR remotely beyond a router (firewall), the user must open TCP port for
command level, live/storage channels. User need to open port number 5445 and 5445.
If the DVR supports remote setup and upgrade function over the network, user need to open additional
port number 80.


