background image

Xtreme Power Conversion Corporation

P90L 6kVA & 10kVA User’s Manual

Page 24

Uninterruptible Power Supply

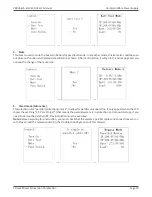
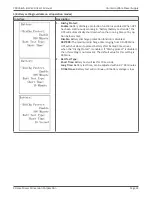
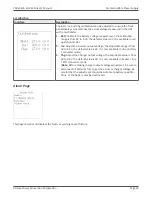
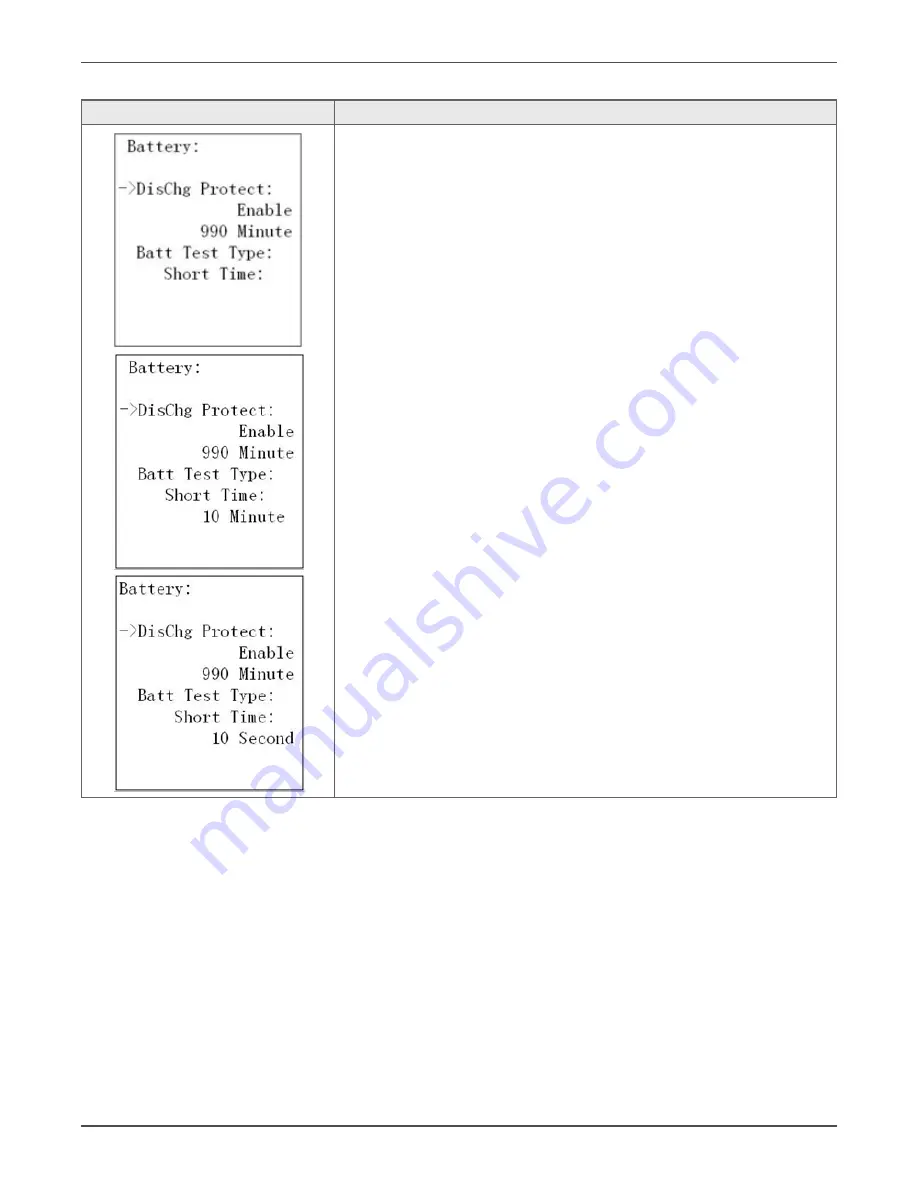
4) Battery setting (available on all operation modes)

Interface

Description
1. 

Dischg Protect: 

Enable:

 Battery discharge protection function is enabled. When UPS 

has been continuously working in “battery/battery test mode”, the  

UPS will automatically shut down when the running time set by op

-

tion below is met;


Disable: 

Battery discharge protection function is disabled.


000~999: 

The maximum discharge time ranging from 0 to 999mins. 

UPS will shut down to protect battery after backup time arrives 

when the “Dischg Protect” is enabled. If “Dischg protect” is disabled, 

then this setting is not relevant; The default value for this setting is 

990mins.

2.  Batt Test Type: 


Short Time: 

Battery test will last for 10 seconds; 


Long Time:

 Battery test time, can be adjusted within 01~99 minutes.


Till Batt Low: 

Battery test will continue until battery voltage is low. 

Содержание P90-ISO10MB

Страница 1: ...P90L 6kVA 10kVA Online UPS 6kVA 10kVA Models User Installation Manual www xpcc com 2014 Xtreme Power Conversion Corporation All rights reserved Rev 10 09 14 ...

Страница 2: ...ptible Power Supply Please comply with all warnings and operating instructions in this manual Save this manual and read the following instructions carefully before install ing the unit Do not operate this unit before reading all safety information and operating instructions carefully ...

Страница 3: ...acking and Inspection 7 Rear Panel View 7 System Single Line Diagram 10 Rack Tower Installation 10 UPS Electrical Installation 11 Operations 13 OperatingMode StatusDescription 13 ButtonOperation 13 LED Indicators 14 AudibleAlarm 14 UPS Operation 14 LCD Operation 17 Main Interface Home Screen 18 Operation Menu 18 Control Items 19 MeasurementPages 21 InformationPages 21 Setting Menu 22 Alarm Page 25...

Страница 4: ...sion Load Protection Policy 33 Appendix A P90L BP240 User Guide 36 ImportantSafetyWarnings 36 Installation and Setup 36 Storage Maintenance 38 Appendix B P90L RAIL Installation Guide 39 PackageContents 39 AssemblySteps 39 Appendix C P90L ISO6MB P90L ISO10MB User Guide 42 Important Safety Instructions 42 Rear Panel Explanation 43 InstallationAndOperation 44 Terminal Block Explanations for Input Out...

Страница 5: ...effectiveness is not recommended Do not use this equipment in the presence of a flammable anesthetic mixture with air oxygen or nitrous oxide Connect your UPS power module s grounding terminal to a grounding electrode conductor The UPS is connected to a DC energy source battery The output terminals may be live when the UPS is not connected to an AC supply Maintenance Warnings Service and repair sh...

Страница 6: ...lacement should be performed only by authorized service personnel using the same number and type of batteries Sealed Lead Acid Use tools with insulated handles The batteries are recyclable Do not open or mutilate the batteries Released electrolyte is harmful to the skin and eyes and may be toxic Do not connect or disconnect battery module s while the UPS is operating from the battery supply Standa...

Страница 7: ...ing software CD One USB cable Two sets of tower stands including feet and extensions Two Rack mounting ears Note Before installation please inspect the unit Be sure that nothing inside the package has been damaged dur ing transportation Do not turn on the unit and notify the carrier and dealer immediately if there is any damage or missing parts Please keep the original packing material in a safe p...

Страница 8: ...Xtreme Power Conversion Corporation P90L 6kVA 10kVA User s Manual Page 8 Uninterruptible Power Supply P90 BP240 Battery Pack Rear Panel Connection between P90 BP240 and P90L UPS ...

Страница 9: ... 8 Cooling fan 9 External battery connector 10 Input circuit breaker 11 Input output terminal P90L 6K ships with default cord kit 12 Input terminal 13 Ground 14 Output terminal 15 Battery pack output circuit breaker Note EPO connector is normally closed NC for normal operation To activate EPO function remove the NC signal WARNING The EPO RS 232 and USB circuits are IEC 60950 safety extra low volta...

Страница 10: ...and BP240 battery module in tower configuration 1 For UPS only assemble two feet and one short extension together as front support Assemble rear support in the same manner 2 For UPS and Battery Module assemble two feet and two long extensions together as front support As semble rear support in the same manner 3 Align the two supports in your installation area appropriately 14 inches apart 4 Then s...

Страница 11: ...nce with local and national code regulations 1 Make sure the mains wire and breakers in the building are rated for the correct capacity of UPS 2 Switch off the main feed before installation 3 Turn off all the connected devices before connecting to the UPS 4 Prepare wires based on the following table Model Wiring Spec AWG Input Output Battery Ground P90L 6K 8 8 10 8 P90L 10K 6 6 8 6 Note 1 P90L 6K ...

Страница 12: ...C breaker or other protection device be tween UPS and external battery module is installed Note Set the battery module breaker in OFF position and then install the battery module Pay attention to the polarity marking on external battery connector and make sure the battery polarity is correct Wrong connection may cause permanent damage of the UPS Make sure the protective earth ground wiring is corr...

Страница 13: ...tage is within voltage regulation range and ECO mode is enabled the UPS will bypass voltage to output for energy saving If the input voltage is out of the regulation range but it is still within acceptable range of Line mode the UPS will transfer to inverter supplying the power to load similar to Line mode Frequency Converter Mode When input frequency is within 46 to 64Hz the UPS can be set with a...

Страница 14: ...utomatically This operation is used when configuring the UPS to Rack or Tower display LED Indicators There are 4 LEDs on front panel to show the UPS working status Mode Bypass Line Battery Fault UPS power on Bypass mode Line mode Converter mode Battery mode Fault mode Battery test mode ECO mode Note means LED is lit means LED is off means LED is flashing Audible Alarm UPS status Buzzer status Bypa...

Страница 15: ...CD panel will display total load level 2 If inductive loads such as a printer are connected the in rush current should be calculated carefully to see if the capacity of the UPS is sufficient due to the huge starting power consumption of this kind of load 3 If the UPS is overloaded the buzzer will beep twice every second 4 When the UPS is overloaded please remove some loads immediately It is recomm...

Страница 16: ...e press the OFF ESC button LCD will show a prompt page of Turn Off Move the arrow to Yes by up or down button then press ON ENTER the UPS will beep once and turn off Power is still applied via bypass mode You could also enter the control menu to select the instruction Turn Off to turn off the UPS Please refer to the section of LCD operation Note Here Turn Off means that UPS is not working on line ...

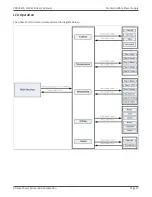
Страница 17: ...Xtreme Power Conversion Corporation P90L 6kVA 10kVA User s Manual Page 17 Uninterruptible Power Supply LCD Operation The entire LCD structure is demonstrated in diagram below ...

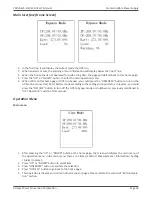
Страница 18: ...o turn on the UPS to line converter ECO battery mode according to the setting and input status in reverse you could press the OFF ESC button to turn off the UPS to bypass mode or shutdown As previously mentioned in UPS Operation section of this manual Operation Menu Main menu 1 After pressing the UP or DOWN button at the home page the screen will display the main menu of the operation menu In the ...

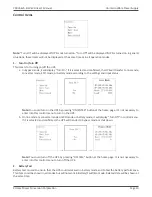
Страница 19: ...gs and input status Note You could turn on the UPS by pressing ON ENTER button at the home page It s not necessary to enter into this control menu to turn on the UPS b On line mode or converter mode or ECO mode or battery mode it will display Turn Off in control menu If it is selected and confirmed the UPS will transfer to bypass mode or shut down Note You could turn off the UPS by pressing OFF ES...

Страница 20: ...see the change of the mute icon 4 Para Unlock Future Use This selection is for parallel protection unlock to allow for parallel unit operation It only appears when the LCD shows the warning 3F Para Protect that means the parallel system is in protection and cannot startup if you need to startup the parallel UPS this instruction must be executed Note Before executing this instruction you must check...

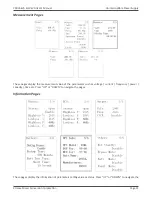
Страница 21: ...ly Measurement Pages These pages display the measurement value of the parameters such as voltage current frequency power capacity time etc Press UP or DOWN to navigate the pages Information Pages These pages display the information of parameters setting value or status Press UP or DOWN to navigate the ...

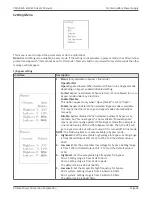
Страница 22: ...s that the UPS can go to Bypass mode automatically or manually Disable Bypass disabled When selected automatic bypass is ac ceptable but manual bypass is not available Manual bypass means users manually operate UPS to Bypass mode for example in Line mode turning off the UPS to Bypass mode Then the UPS will go to bypass mode but without output if it is turned off in line mode NOTE The following ite...

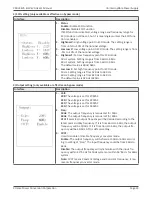
Страница 23: ...etting range is from 62 0Hz to 64 0Hz The default value is 52 0Hz 62 0Hz 3 Output setting only available or effective on bypass mode Interface Description 1 Volt 208 The voltage is set for 208VAC 220 The voltage is set for 220VAC 230 The voltage is set for 230VAC 240 The voltage is set for 240VAC 2 Freq 50Hz The output frequency is manual set for 50Hz 60Hz The output frequency is manual set for 60...

Страница 24: ...nning time set by op tion below is met Disable Battery discharge protection function is disabled 000 999 The maximum discharge time ranging from 0 to 999mins UPS will shut down to protect battery after backup time arrives when the Dischg Protect is enabled If Dischg protect is disabled then this setting is not relevant The default value for this setting is 990mins 2 Batt Test Type Short Time Batte...

Страница 25: ...n modes 2 Inv Adjust the inverter output voltage the adjustable range is from 0V to 6 4V the default value is 0V It is only available in line battery converter mode 3 Chg Adjust the Charger output voltage the adjustable value is from 0V to 6 9V the default value is 0V It is only available in bypass line ECO converter mode Note Before making charger output voltage adjustment be sure to disconnect a...

Страница 26: ...f the UPS system does not operate correctly please solve the problem by referring to the table below Alarm type LCD display Possible cause Remedy Warning 01 Batt Open The battery connection is loose The battery protection device is open Tighten the battery connection Replace or restore the protection device Warning 07 Over Charge Battery numbers and its setting is not matching Charger voltage is t...

Страница 27: ... Protect Future Use Parallel cable is still not connected when restart after the parallel system is faulty because of parallel communication failure When this warning appears the UPS can not start up it is protection for parallel system If the system still needs to be oper ated in parallel mode please con nect the parallel cable and choose Para Unlock in control menu to remove the warning then the...

Страница 28: ... Fault 21 Batt SCR Short The internal battery SCR has failed shorted Contact the dealer for repair Fault 24 Inv Rly Short The internal inverter relay is stuck in the shorted position or the SCR of STS Static Transfer Switch is shorted Contact the dealer for repair Fault 35 Para Comm Fail Parallel cable for communication is not connected in the parallel system Connect the parallel cable Fault 36 OP...

Страница 29: ...re storing charge the UPS batteries for at least 7 hours Store the UPS covered and upright in a cool dry loca tion During storage recharge the battery in accordance with the following table Storage Temperature Recharge Frequency Charging Duration 25 C 40 C Every 3 months 1 2 hours 40 C 45 C Every 2 months 1 2 hours ...

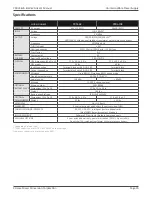
Страница 30: ...al block ENVIRONMENT Efficiency Up to 98 ECO mode and 92 online mode Operating temperature 32 104 F 0 40 C Audible noise 58dBA 60dBA Altitude 11 500 ft above sea level OPTIONAL Model number P90L BP240 BATTERY PACKS Dimensions W x D x H 17 3 x 25 1 x 5 3 in Weight 165 lbs Battery quantity type 20 12V9AH 240V OPTIONAL Dimensions W x D x H 17 3 x 28 7 x 3 5 in 17 3 x 31 8 x 5 2 TRANSFORMER Weight 99 ...

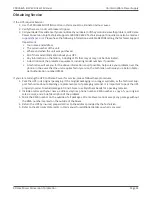
Страница 31: ... will ask you for the above information and if possible help solve your problem over the phone In the event that the unit requires factory service the technician will issue you a Return Mate rial Authorization number RMA If you are returning the UPS to Xtreme Power for service please follow these procedures 1 Pack the UPS in its original packaging If the original packaging is no longer available a...

Страница 32: ...f a the equipment is repaired or modified by anyone other than XPC Corporation or a XPC Corporation approved third party b the equipment is damaged by the customer is improperly used or stored is subjected to an adverse operating environment or is operated outside the limits of its electrical specifi cations or c the equipment has been used or stored in a manner contrary to the equipment s operati...

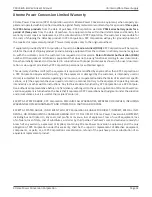
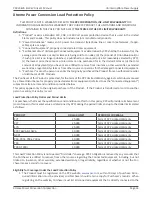
Страница 33: ... the XPC Limited Warranty against certain losses caused by a Power Disturbance for properly connected electronic equipment referred to as the Connected Equipment subject to certain terms and conditions provided below This policy applies only to the original purchaser of the Product If the Product is transferred or sold to another person or entity this policy is void Load Protection Policy Dollar a...

Страница 34: ...he Load Protection Policy The following damage is not covered by this Policy 1 Restoration of lost data and reinstallation of software 2 Damage from a cause other than AC power line transients except for damage due to telephone line Local Area Network or CATV transients which is covered only if the Product offers such protection 3 DAMAGE CAUSED BY FAILURE TO PROVIDE A SUITABLE INSTALLATION ENVIRON...

Страница 35: ...n issue payment to the Purchaser for either the cost of repair of the Connected Equipment or the Fair Market Value of the damaged Connected Equipment up to the dollar limits stated above XPC reserves the right to require the Purchaser to transfer title and deliver the Connected Equipment to XPC if it chooses to reimburse the Purchaser for the fair market value of the Connected Equipment XPCs maxim...

Страница 36: ...e battery will discharge naturally if the system is unused for a period of time It should be recharged every 2 3 months if unused If this is not done then the warranty will be null and void During normal operation the batteries will be automatically remained in charged condition Servicing of batteries should be performed or supervised by trained personnel with knowledge of batter ies and the requi...

Страница 37: ... Ear x 2 screw x 8 Extended stand Selecting Installation Position 1 It is necessary to select a proper environment to install the unit in order to minimize the possibility of damage to the battery box and extend the life of the batteries Please follow the instructions below 2 Keep at least 20cm 8 inches clearance from the rear panel of the unit from the wall or other obstructions 3 Do not block th...

Страница 38: ... If the battery service life 3 5 years at 25 C ambient temperature has been exceeded the batteries must be replaced In this case please contact your dealer Storage Before storing charge the unit 4 hours Store the unit covered and upright in a cool dry location During storage recharge the battery in accordance with the following table Storage Temperature Recharge Frequency Charging Duration 25 C 40...

Страница 39: ...er Supply Appendix B P90L RAIL Installation Guide Package Contents Right rail slider x 1 Left rail slider x 1 Nut M6 x 6 Screw M6 x 14 Assembly Steps Step 1 Use 4 screws to mount right and left rail sliders in front See chart below Nut M6 Screw M6 Right rail slider Screw driver Left rail slider ...

Страница 40: ...ion P90L 6kVA 10kVA User s Manual Page 40 Uninterruptible Power Supply Step 2 Use 4 screws to mount rail sliders in back See chart below Step 3 According to UPS height put nuts on proper location Step 4 Put UPS on the rail support Nut ...

Страница 41: ...Xtreme Power Conversion Corporation P90L 6kVA 10kVA User s Manual Page 41 Uninterruptible Power Supply Step 5 Fix the UPS in position with screws Step 6 Assembly complete ...

Страница 42: ...rks smoke or gas Make sure the unit is installed within a proper environment as specified a Keep it in the place of 0 40 C and 30 90 non condensing humidity b Keep away from direct sunlight c Keep away from the objects that give off excessive heat and areas that are excessively wet d Keep away from the environment that generates ARCs e Keep away from dusty corrosive and salty environments f Instal...

Страница 43: ... Supply Rear Panel Explanation 6kVA 10kVA A RJ 45 Communication port B Input Output Terminal Block C For UPS Input 6kVA only D Maintenance Bypass Switch E Air Ventilation Openings 6kVA only F Thermal breaker for the protection of Load in abnormal condition CB3 10kVA only G Cooling Fan 10kVA only ...

Страница 44: ... Position It is necessary to select a proper environment to install the unit in order to minimize the possibility of damage to the unit and extend the life of the unit Please follow the advice below Keep at least 30 cm 12 inches clearance from the rear panel of the unit to the wall Do not block the air flow to the ventilation openings of the unit Also check the installation site to avoid over heat...

Страница 45: ...MB P90L EBP240 2 1 6 3 4 5 1 Hardwired input from Utility Input 2 L6 30P cord from UPS input connectes to L6 30R on P90L ISO6MB UPS Input 3 L6 30R cord from UPS connects with L6 30P on P90L ISO6MB UPS Output 4 Hardwired TR Output to load 5 RJ45 on P90L ISO6MB to Molex connector on P90L 6K for static bypass interlock 6 Battery connection Anderson to Anderson ...

Страница 46: ...red input from utility 2 Hardwired input cord with ring terminals connects to utility input terminals on P90L ISO10MB terminal block 3 Hardwired output cord with ring terminals connets to UPS output terminals on P90L ISO10MB terminal block 4 Hardwired output to load 5 RJ45 on transformer to Molex connector on UPS for static bypass interlock 6 Battery connection Anderson to Anderson ...

Страница 47: ...terminals as Utility Input G1 Input Ground L2 N2 Connect to UPS Output Terminal G2 Connect to UPS Output Ground Terminal L11 L12 N11 L22 N22 the Output Terminals of the Unit G3 The Output Ground Terminals of the Unit Output Wiring Explanation The maximum output current for each terminal is 30A 6K or 50A 10K If the input of L2 N2 from UPS OUTPUT block is 208Vac the output voltage shall be 240Vac 12...

Страница 48: ... internally for 6kVA only 10kVA jumpers are to be made in the field shown below Contact Technical Support for additional voltage configurations if needed P90L ISO6MB Internal Jumper P90L ISO10MB Internal Jumper Connect Maintenance Bypass Switch communication cable C1 from RJ45 port on P90L ISO6MB or P90L ISO10MB to green molex connector on UPS This prevents UPS damage should it not be in bypass pr...

Страница 49: ...ge Unit w o Bypass Switch 160 280Vac 1Φ Unit w Bypass Switch INV 160 280Vac 1Φ 184 280Vac 1Φ BYPASS Current N A 30A max 50A max Frequency N A 50Hz 60Hz 5Hz Output Terminal Voltage N A 184 280Vac 1Φ Current N A 30A max 50A max Frequency N A 50Hz 60Hz 3Hz Maintenance Bypass Switch Transfer Time 0 100 Load 2ms Communication Bypass Detection For Unit w Maintenance Bypass Switch RJ 45 connector Overvie...

Отзывы: