background image

15

Xterra FS5.5e / 5.7e Elliptical

Operation of Your Elliptical

The Elliptical is supplied with an external power supply. When power is connected to the  

elliptical, the console will automatically power up. If there is no input to the console for 30  

minutes the console will go to stand-by mode to save energy. To turn the console on press 

any key.


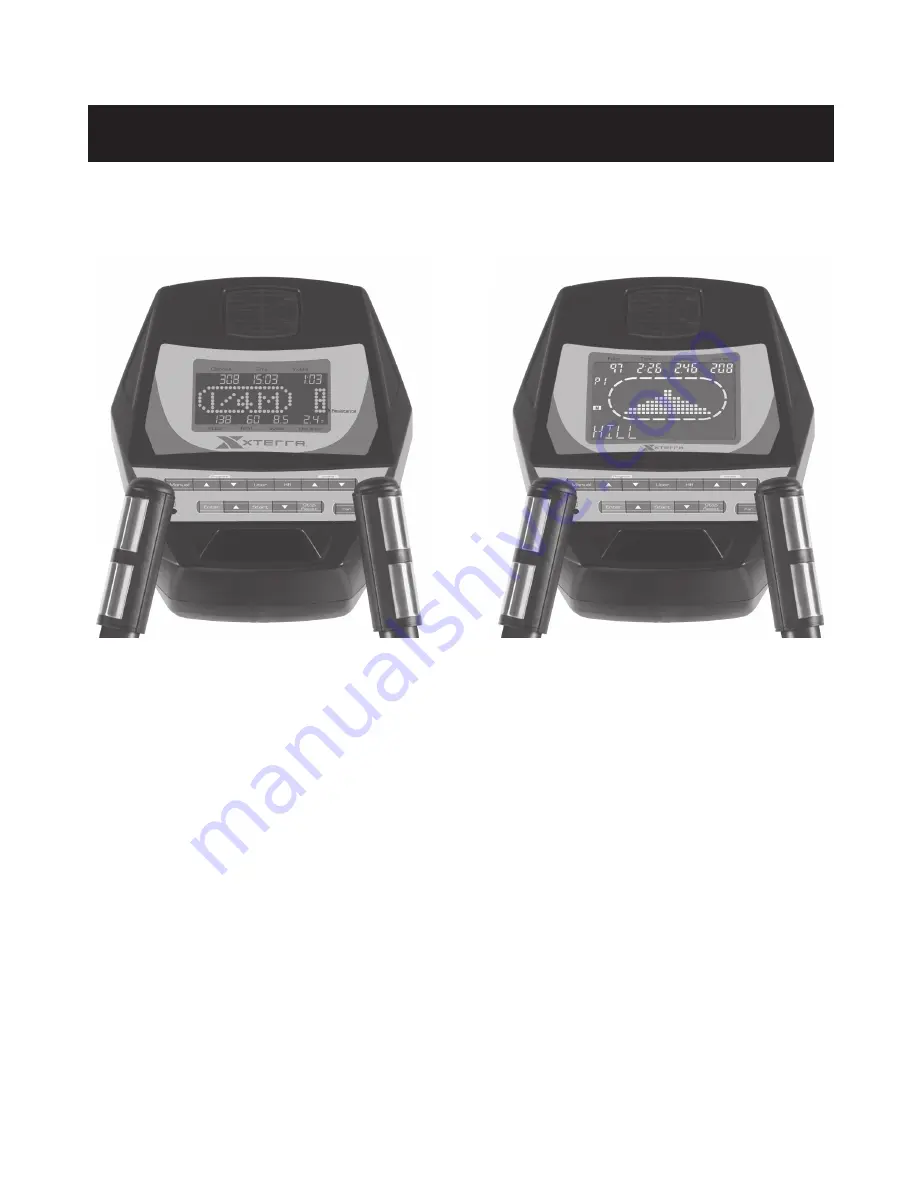
When initially powered on the console will perform an internal self-test. During this time  

all the lights will turn on. When the lights go off the dot matrix display will show a software  

version (i.e.: VER 1.0) and the time and distance windows will display an odometer reading. 

The odometer reading displays how many hours the elliptical has been used and how many 

virtual miles the elliptical has gone.


The odometer will remain displayed for only a few seconds then the console will go to the 

start up display. The dot matrix display will be scrolling through the different workout profiles 

of the programs and operating instructions. You may now begin to use the console.

Transportation

FS5.5e

FS5.7e

Содержание FS5.5e

Страница 1: ...OWNER S MANUAL FS5 5e 5 7e ...

Страница 2: ...fety Instructions Important Electrical Instructions Important Operation Instructions Assembly Instructions Features Operation of Your New Elliptical Maintenance Manufacturer s Limited Warranty Serial Number Sticker Location Front Floor Support Tube Table of Contents ...

Страница 3: ... name of the store their telephone number and the date of purchase for easy contact in the future We appreciate your confidence in Xterra and we will always remember that you are the reason that we are in business Please complete and mail your registration card today and enjoy your new elliptical Yours in Health The folks at Xterra Fitness CONGRATULATIONS ON YOUR NEW ELLIPTICAL AND WELCOME TO THE ...

Страница 4: ...e cord away from heated surfaces Do not operate where aerosol spray products are being used or where oxygen is being administered Sparks from the motor may ignite a highly gaseous environment Never drop or insert any object into any openings Do not use outdoors To disconnect turn all controls to the off position then remove the plug from the outlet Do not attempt to use your elliptical for any pur...

Страница 5: ...r Understand that changes in resistance do not occur immediately Set your desired level on the computer console and release the adjustment key The computer will obey the command gradually NEVER use your elliptical during an electrical storm Surges may occur in your household power supply that could damage elliptical components Use caution while participating in other activities while using your el...

Страница 6: ...cs 146 5 16 x 23 x 1 5T Flat Washer 4pcs 123 M5 x 10mm Phillips Head Screw 4pcs 155 3 8 x2T Split Washer 1pc 110 5 16 x 2 1 4 Hex Head Bolt 4pcs 111 3 8 x 3 4 Hex Head Bolt 2pcs 154 5 16 x1 5T Split Washer 4pcs 156 5 16 Star Washer 4pcs 139 3 8 x7T Nyloc Nut 2pcs 113 3 8 x 2 1 4 Hex Head Bolt 1pc 153 3 8 x 23 x 2T Curved Washer 2pcs ...

Страница 7: ...52 17mm Wave Washer 2pcs 125 3 5 x 12mm Sheet Metal Screw 6pcs 125 3 5 x 12mm Sheet Metal Screw 8pcs 124 M5 x 15mm Phillips Head Screw 18pcs 109 5 16 x 1 1 4 Hex Head Bolt 2pcs 136 5 16 x7T Nyloc Nut 2pcs 146 5 16 x 23 x 1 5T Flat Washer 2pcs 164 M6 x 10mm Phillips Head Screw 4pcs Step 2 Step 3 Step 4 ...

Страница 8: ...7 Xterra FS5 5e 5 7e Elliptical 162 Phillips Head Screw Driver 1 pc 163 12 14mm Wrench 1pc 160 13 14mm Wrench 1pc 161 Short Phillips Head Screw Driver 1 pc Tools ...

Страница 9: ...attached to the Computer Cables 47 59 through the bottom of the Console Mast 12 until it exits the top of the steel tube Secure the Console Mast 12 by loosely threading two 3 8 x3 4 Hex Head Bolts 111 from the front and two 3 8 23 2 5T Curved Washers 156 first Then secure the mast from the side by loosely threading a 3 8 2 1 4 Hex Head Bolt 113 and a 3 8 2T Split Washer 155 NOTE there is one bolt ...

Страница 10: ...9 Xterra FS5 5e 5 7e Elliptical ...

Страница 11: ...25 Tighten with the Phillips Head Screw Driver 162 2 Place one of Ø17 Wave Washer 152 onto the left and right Console Mast shafts Slide the left swing arm 10 onto the shaft all the way Secure the arm with a 5 16 15mm Hex Head Bolt 107 and one 5 16 23 1 5T Flat Washer 146 tighten with the 12mm Wrench 163 Repeat this process on the right side with the right swing arm 11 Note make sure the arms are p...

Страница 12: ...each swing arm connect the left Swing Arm 10 with the left Connecting Arm 8 and secure with a 5 16 1 1 4 Hex Head Bolt 109 Rod End Sleeve 22 a 5 16 23x 1 5T Flat Washer 146 and a 5 16 7T Nyloc Nut 136 Tighten using 13 14 mm 160 and 12mm 163 Wrenches Repeat the process for the Right Connecting Arm 9 and Right Swing Arm 11 ...

Страница 13: ...hillips Head Screw 124 on each side Secure with the Phillips Head Screw Driver 162 5 Attach a Z bracket 20 to the rear stabilizer tube on the left and rights sides with the hole facing the rear and secure them with two M6 10mm Phillips Head Screws 164 on the left and right sides Secure using the Phillips Head Screw Driver 162 6 Attach the front Rear Stabilizer Cover 96 to the rear stabilizer tube ...

Страница 14: ...13 Xterra FS5 5e 5 7e Elliptical ...

Страница 15: ...This causes stress on the outer part of the foot and throws off the natural alignment of the joints The solution was to add a 2 degree inward angle to the footpads This might sound simple but what it does is straighten the user s joints back into a neutral alignment This eases the over stressing of the ankles knees and hips The Xterra FS5 5e and FS5 7e have an exciting electronic incline feature t...

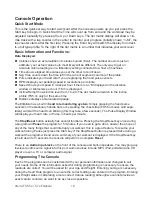
Страница 16: ...ring this time all the lights will turn on When the lights go off the dot matrix display will show a software version i e VER 1 0 and the time and distance windows will display an odometer reading The odometer reading displays how many hours the elliptical has been used and how many virtual miles the elliptical has gone The odometer will remain displayed for only a few seconds then the console wil...

Страница 17: ...accumulated mileage The Elliptical has a built in heart rate monitoring system Simply grasping the hand pulse sensors on the stationary handle bars or by wearing the chest strap FS5 5e model sold sepa rately will start the heart Icon blinking this may take a few seconds The Pulse Display Window will display your heart rate or Pulse in beats per minute The Stop Reset button actually has several fun...

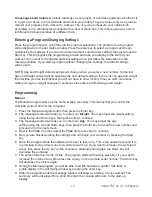
Страница 18: ...e enters a different age and weight Programming Manual The Manual program works as the name implies manually This means that you control the workload yourself and not the computer 1 Press the Manual program button then press the Enter key 2 The message window will ask you to enter your Weight You may adjust the weight setting using the Up and Down keys then press enter to continue 3 The message wi...

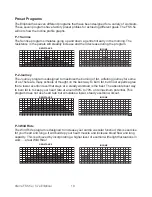
Страница 19: ... journey for some of us There are many schools of thought on the best way to burn fat but most experts agree that a lower exertion level that stays at a steady workload is the best The absolute best way to burn fat is to keep your heart rate at around 60 to 70 of its maximum potential This program does not use heart rate but simulates a lower steady exertion workout P 3 Wild Ride The Wild Ride pro...

Страница 20: ...ll The Thrill Hill program combines a few types of workout in one with variations of cardio and strength portions to give you a thrill P 7 X Country The X Country program simulates a cross country run across uneven terrain P 4 Xtreme The Xtreme program is designed to increase muscular strength in your lower body with extreme resistance This program will steadily increase in resistance to a high le...

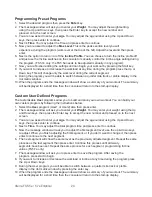
Страница 21: ...g Preset Programs The customizable User programs allow you to build and save your own workout You can build your own custom program by following the instructions below 1 Select the User program User1 or User2 also then press enter 2 The message window will ask you to enter your Weight You may enter your weight using the Up and Down keys then press the Enter key to accept the new number and proceed...

Страница 22: ...ter your weight using the Up and Down keys then press the Enter key to accept the new number and proceed 3 You are now asked to enter your Age You may adjust the age number using the Up and Down keys 4 Next is Time You may adjust the Time and press enter to continue 5 You are now asked to select the Target heart rate Level This is the heart rate level you will experience during the program Adjust ...

Страница 23: ...o stay in for maximum benefit For someone who is 40 years old their target heart rate zone is calculated 220 40 180 maximum heart rate 180 x 6 108 beats per minute 60 of maximum 180 X 8 144 beats per minute 80 of maximum So for a 40 year old the training zone would be 108 to 144 beats per minute If you enter your age during programming the console will perform this calculation automatically After ...

Страница 24: ...Minimal 7 Very very light 8 Very very light 9 Very light 10 Very light 11 Fairly light 12 Comfortable 13 Somewhat hard 14 Somewhat hard 15 Hard 16 Hard 17 Very hard 18 Very hard 19 Very very hard 20 Maximal You can get an approximate heart rate level for each rating by simply adding a zero to each rating For example a rating of 12 will result in an approximate heart rate of 120 beats per minute Yo...

Страница 25: ...on bare skin assures you of proper operation If you wish you may wear the transmitter over a shirt To do so wet the areas of the shirt that the electrodes will rest upon Note The transmitter is automatically activated when it detects activity from the user s heart Additionally it automatically deactivates when it does not receive any activity Although the transmitter is water resistant moisture ca...

Страница 26: ...ises persist check that the unit is properly leveled before calling the service department Engineering Mode The console has built in maintenance diagnostic software The software will allow you to change the console settings from English to Metric and turn off the beeping of the speaker when a key is pressed for example To enter the Maintenance menu may be called Engineering mode depending on versi...

Страница 27: ...nt improper maintenance inadequate power supply or acts of God 4 Products with original serial numbers that have been removed or altered 5 Products that have been sold transferred bartered or given to a third party 6 Products that are used as store display models 7 Products that do not have a warranty registration on file at Xterra Fitness inc Xterra Fitness reserve the right to request proof of p...

Отзывы: