10
Installation of XL-RAID-SATA2-USB
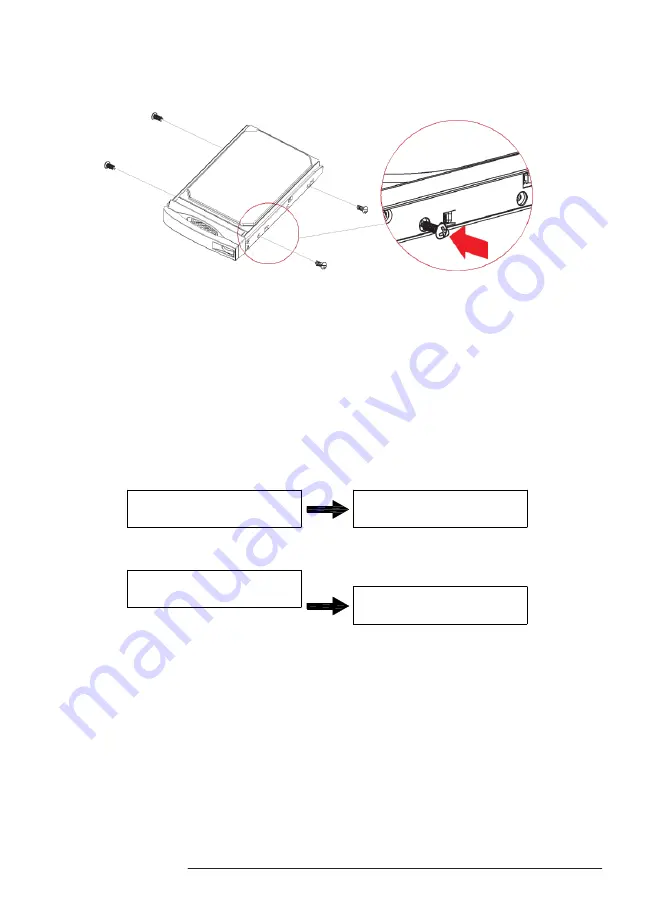
2. Install two brand new SATA hard disks in the hard disk trays and secure each of them with screws at
four positions as indicated in the diagram using the screw pack provided. Finally, insert the hard disk
trays into XL-RAID-SATA2-USB.
3.2 Product connection and booting
1. Connect AC power cord to your power outlet and XL-RAID-SATA2-USB.
2. Choose the interface (USB & eSATA & 1394b) that you want, and hook up your computer with the
connecting cable.
※
Choose only one type of interface to hook up with your computer.
3. Switch on the power of XL-RAID-SATA2-USB, when the LCD displays Pri HDD: OK and Sec HDD: OK
after about
20~30 seconds, it indicates that XL-RAID-SATA2-USB has been booted.
※
The factory default value of XL-RAID-SATA2-USB is RAID 1 mode.
XL-RAID-SATA2-
USB RAID - 1
V100.0812
Pri HDD : OK
Sec HDD : OK
XL-RAID-SATA2-
USB-2S-WBS2
RAID - 1 V100.0812
Pri HDD : OK
Sec HDD : OK
3.3 Hard disk formatting and disk drive establishing
※
The teaching model adopted by this operation manual is two 500GB hard disks.


