


Step 3 Once you have made the change, please press the “ENT” button. The following message will
be shown “PASSWORD:XXXX YES NO”.
Step 4 Please press the “ENT” button again. The message “SETUP PASSWORD OK” will be shown,
indicating that you have successfully set a new password.
3.4 Firmware
Update
You can update firmware through the RAIDGuide software via RS232 connection. Insert the CD, click
on "Management Software" and then click "RAIDGuide 1.28.1.14" to begin installation or open the
"RAIDGuide v1.28.1.14" file in the "Management Software" file and click "setup.exe" to begin installation.
Note : 1. If your hardware is functioning normally, it is recommended not to try and update the firmware to avoid any incompatibility
from occurring which may result in data loss!
2. When updating firmware becomes necessary, please be sure to backup all information on the HDDs to avoid possible
accident(s) during the update, which may result in data loss!
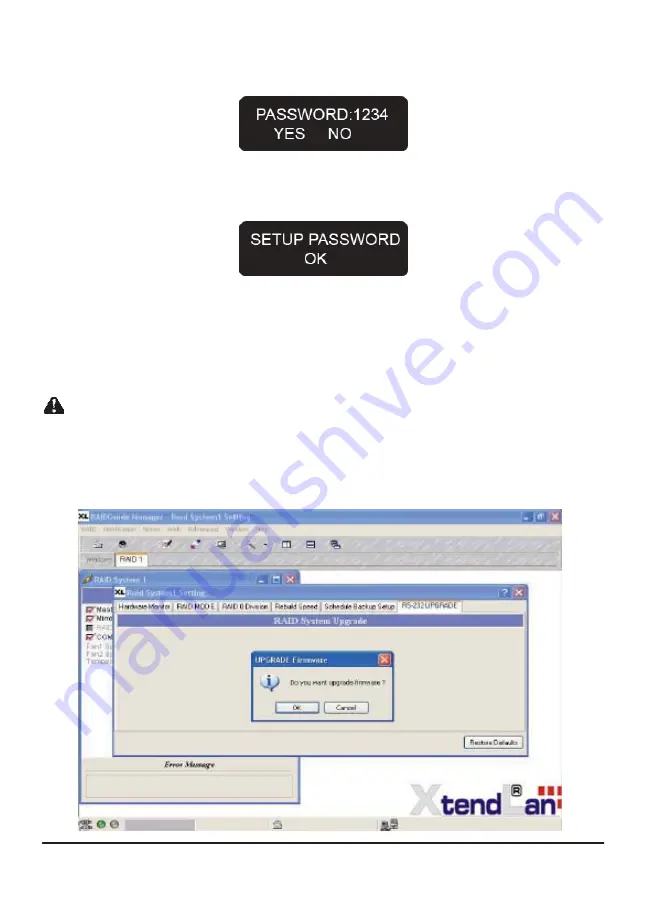
Run RAIDGuide GUI and open the window, select RAID System 1 Setting under “Advanced” in the tool
bar above, and the Setting window will appear. Click the RS232 UPGRADE button. The system will
pop up the following window and prompt “Do you want upgrade firmware?”, click “OK” to start updating
Firmware.
Instructions
15
Содержание XL-RAID-SATA-USB
Страница 1: ...XL RAID SATA USB Data Backup System User s Guide ...
Страница 4: ......
Страница 9: ...7 Product Outline ...
Страница 20: ......


