background image

Dear Customer

Thank you for purchasing the BH100 Bluetooth wireless 

headphones. Please read this manual carefully and 

follow the intructions in order to optimize the use of your 

new headphones and enjoy your music wherever you like.

Includes

BH100 Bluetooth Headphones

3.5 mm stereo cable

USB cable

Technical Data

• Impedance: 32 Ohm

• Frequency: 100Hz-9000Hz

• Performance: 200 mW

• Maximum input power: 1000 mW

• Bluetooth Version: 4.0

• Range: up to 10m

• Battery: 3.7V, 250 mAh Li-ion battery

• Play/Talk time: Up to 8 h

5. Voice Call

Press the power button to answer a phone call, press 

the power button again to end the call. Press the power 

button twice to call the last number in your phone call 

records. To reject a call, press and hold the power button 

for 1-2 seconds.

6. Power indication

When the BH100 is running low on power, you may experi-

ence lagged transmission. Three short „beeps“ will notify 

you if your battery is running low.

While charging the LED is red. When fully charged, the 

LED is blue.

7. Charging

Charge BH100 whenever it is needed: plug into computer 

via the USB cable. The BH100 may also be charged via a 

power-to-USB adapter (not included). 

Remark: fully charge your BH100 at least once a month 

for optimal user experience.

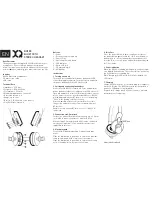
Adjustable headband

Buttons

1 - Power

2 - Previous song / Volume up

3 - Pause / Play

4 - Next song / Volume down

5 - LED indicator

6 - Micro USB jack

7 - 3.5 mm audio jack

8 - Microphone

Instructions

1. Turning on and off

To turn on, press and hold the power button until LED 

starts flashing blue and red. To turn off, press and hold 

the power button until the LED flashes red. 

2. Pairing and connecting the headset

Make sure that BH100 is turned off. Press and hold the 

power button for about 3 seconds until the LED starts to 

flash red and blue. Activate the Bluteooth feature on your 

device and set it to search for Bluetooth devices. BH100 

will be displayed on your BT device, select it for pairing. 

“0000” is the pairing code if necessary.

Remark: pairing steps are only needed for first-time 

connection; automatic connection is allowed on most 

BT devices.

Double check with your BT device to see if “BH100” is 

connected.

3. Connection via 3.5 mm jack

For devices without Bluetooth functionality use a 3.5 mm 

jack cable to connect your device with the BH100. 

When using a 3.5 mm jack the BH100 can be controlled 

only by your input device. The handsfree mode is not 

supported in this case.

4. Music playback

Press the dial button in position 3 to pause and play 

music.

Slide the dial button to position 2 to switch to a previous 

song or switch and hold it to increase the volume.

Slide the dial button to position 4 to switch to next song 

or switch and hold it to decrease the volume.

EN

BH100

BLUETOOTH

STEREO HEADSET

Содержание BH100

Страница 1: ...wer 2 Previous song Volume up 3 Pause Play 4 Next song Volume down 5 LED indicator 6 Micro USB jack 7 3 5 mm audio jack 8 Microphone Instructions 1 Turning on and off To turn on press and hold the pow...

Страница 2: ...cleaning the Xqisit BH100 Set up the device in such a way that the mains plug is always easily accessible and you can unplug it quickly in the event of an emergency Automobile Accident Hazard Do not...

Страница 3: ...r t 2 Chanson pr c dente Augmenter le volume 3 Pause Lecture 4 Chanson suivante Baisser le volume 5 Voyant LED 6 Prise micro USB 7 Prise audio 3 5 mm 8 Microphone Instructions 1 Mise en marche et arr...

Страница 4: ...isit BH100 Positionnez l appareil de sorte ce que la fiche secteur soit toujours facilement accessible et puisse tre rapidement d branch e en cas d urgence Risque d accident automobile Ne laissez ou n...

Страница 5: ...schluss 7 3 5 mm Audioanschluss 8 Mikrofon Anleitung 1 Ein und Ausschalten Zum Einschalten die Ein Aus Taste dr cken und gedr ckt halten bis die LED blau und rot zu blinken beginnt Zum Ausschalten die...

Страница 6: ...ngs Trennen Sie die xqisit BH100 vor dem Reinigen immer zuerst vom Stromnetz Stellen Sie das Ger t so auf dass der Netzstecker immer gut zug nglich ist und Sie ihn im Notfall rasch vom Netz trennen k...

Страница 7: ...rano successivo Diminuzione di volume 5 Indicatore LED 6 Jack micro USB 7 Jack audio da 3 5 mm 8 Microfono Istruzioni 1 Accensione e spegnimento Per accendere le cuffie tenere premuto il pulsante di a...

Страница 8: ...sit BH100 quando il dispositivo in carica Scollegare il caricabatterie prima di pulire Xqisit BH100 Posizionate l apparecchio in modo che la spina sia sempre ben accessibile e possiate quindi staccarl...

Страница 9: ...e afspelen 4 Volgend nummer volume omlaag 5 Led indicatielampje 6 Micro USB aansluiting 7 3 5 mm audio aansluiting 8 Microfoon Instructies 1 In en uitschakelen Om het apparaat in te schakelen drukt u...

Страница 10: ...ats het apparaat zodanig dat de netstekker altijd goed bereikbaar is en u deze in noodgevallen snel uit het stopcontact kunt verwijderen Gevaar voor ongevallen in de auto Plaats of bewaar de xqisit BH...

Страница 11: ...olumen 5 Indicador LED 6 Conector micro USB 7 Conector de audio de 3 5 mm 8 Micr fono Instrucciones 1 Encendido y apagado Para encender mantenga pulsado el bot n de encendido hasta que el LED comience...

Страница 12: ...oque el dispositivo de tal modo que siempre se pueda acceder al enchufe con facilidad y en caso de emergencia pueda desconectarse r pidamente de la red Peligro de accidente de coche No deje o guarde n...

Страница 13: ...y pa k Przyciski 1 Przycisk Power zasilanie 2 Poprzedni utw r G o niej 3 Pauza Odtwarzanie 4 Nast pny utw r Ciszej 5 Wska nik LED 6 Gniazdo micro USB 7 Gniazdo s uchawkowe 3 5 mm 8 Mikrofon Instrukcja...

Страница 14: ...ia xqisit BH100 w trakcie adowania Przed czyszczeniem zawsze nale y najpierw od czy adowark Urz dzenie ustawi w ten spos b aby wtyczka do sieci by a atwo dost pna i mog a w razie potrzeby by szybko wy...

Страница 15: ...4 N sta l t s nk volym 5 LED lampa 6 Micro USB uttag 7 3 5 mm ljudutg ng 8 Mikrofon Instruktioner 1 S tta p och st nga av F r att s tta p tryck och h ll nere startknappen tills LED lampan blinkar bl...

Страница 16: ...a t elkontakten och snabbt dra ut den vid n dfall Risk vid bilolycka L gg inte xqisit BH100 eller n gra av tillbeh ren i n rhe ten av eller p bilens krockkudde eftersom det kan leda till allvarliga sk...

Отзывы: