background image


Aggregation - Bind 

 
In order to bind two NetDisk, each NetDisk has to be 

unplugged 

and have a 

Write Key

.  Detailed explanation of unplugging and Write Key are listed in the 

steps below. 
 
The purpose of Aggregation is to enable multiple NetDisk units to be 
recognized as a single large disk drive.  This function is extremely useful 
where a large storage device is needed. 
 

NOTE:

  You cannot unplug a NetDisk that is currently being used by 

someone else.  Occupied NetDisk will be indicated by 

white

 colored NetDisk. 


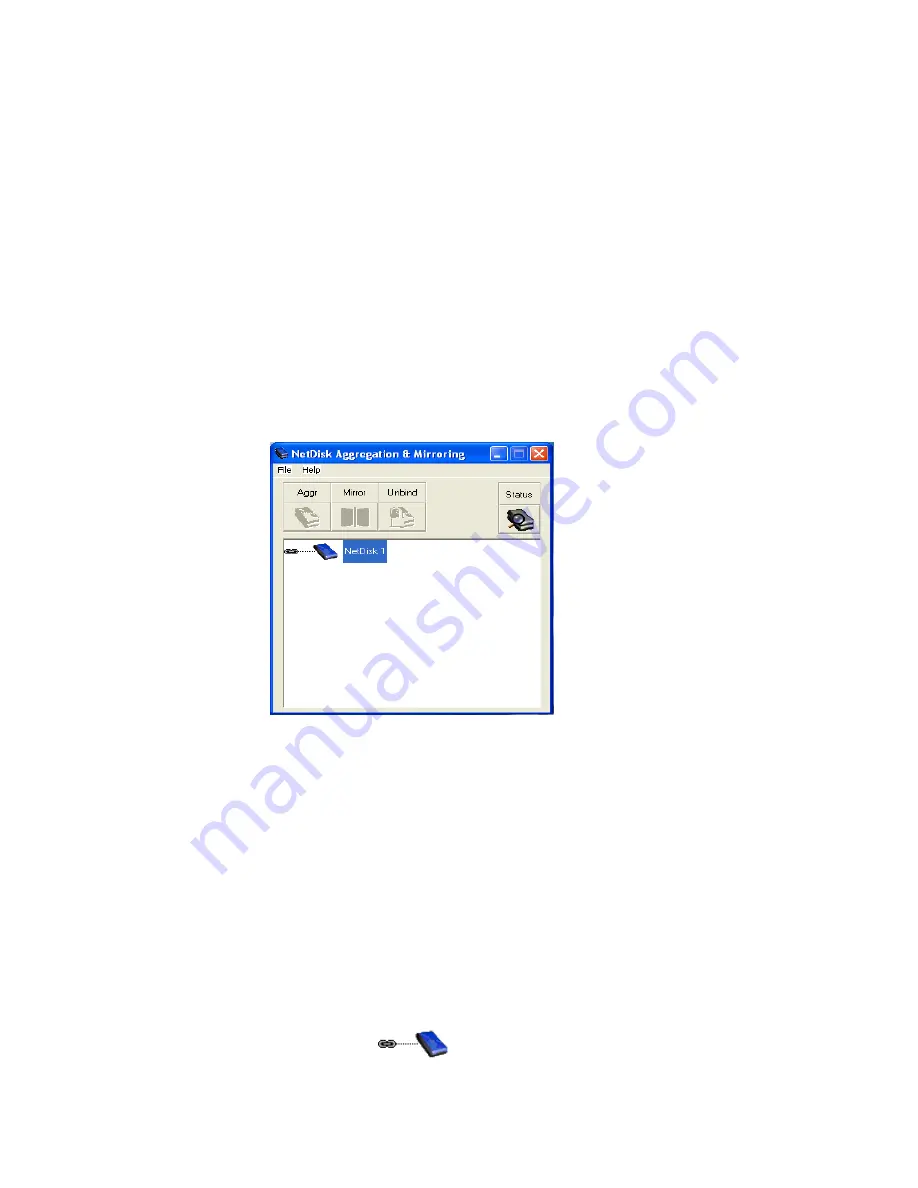
1.  Click 

Start


> Program > NetDisk > NetDisk Aggregation & Mirroring 


NetDisk Aggregation & Mirroring

 window displays all the NetDisk 

installed and registered in your computer. 


Binding can proceed only if two or more NetDisk are registered in the 
computer. 


NOTE:

  Only two NetDisk can be bound at a time. 


If two or more NetDisk are listed on the 

NetDisk Aggregation & 

Mirroring 

window, continue to the next step.  Otherwise, go to 

Add 

NetDisk

 on 28 to add more NetDisk. 


NOTE:

 Different color NetDisk indicates different mode. 


Blue Disk: 


 Read/Write 

 34

Содержание NetDisk NDU10-80

Страница 1: ...NetDisk TM Installation Guide...

Страница 2: ...ested and found to comply with the limits of a Class B digital device pursuant to Part 15 of the FCC Rules These limits are designed to provide reasonable protection against harmful interference in a...

Страница 3: ...ware described in this document is furnished under a license agreement The software may be used only in accordance with the terms of the license agreement All trademarks are the property of their resp...

Страница 4: ...NetDisk on their PC s and network The NetDisk Installation Guide assumes a basic understanding of PC s and networks Please follow these instructions to setup your NetDisk on your network so you can b...

Страница 5: ...sers 7 Installation for USB Users 8 Software Installation 9 NetDisk Registration 12 NetDisk Mode Read Write RW 15 Read Only RO 20 Installation of New NetDisk 26 Add NetDisk 28 Change READ ONLY to READ...

Страница 6: ...Users Wi Fi WLAN 802 11a or 802 11g 54 Mbps or higher is recommended for best data transfer rate USB Users USB 2 0 or higher is recommended for best data transfer rate Software Requirement NetDisk so...

Страница 7: ...nect one end of the Ethernet LAN Cable into Hub or Router the other end into NetDisk LAN Interface RJ45Jjack 3 Once the NetDisk is connected to the LAN the LED will light up indicating power and data...

Страница 8: ...k and plug Power Cord into the power outlet 2 Connect one end of the Cross wire Cable into the PC s Ethernet port and the other end into the NetDisk Ethernet port 3 Toggle switch on NetDisk should be...

Страница 9: ...g Power Cord into the power outlet 2 Connect one end of the USB Cable into the PC s USB port and the other end into the NetDisk USB port 3 Toggle switch on NetDisk should be on USB Toggle Switch is lo...

Страница 10: ...on CD ROM included in the box into the CD ROM drive B Welcome to the InstallShield Wizard for NetDisk will appear on the screen Click Next C License Agreement will appear on the screen Select I accept...

Страница 11: ...D Setup Type a General Users Select Complete and then click Next b Advanced Users Select Custom and then click Next E Ready to Install the Program will appear on the screen Click Install 11...

Страница 12: ...F InstallShield Wizard is being installed G Installation is completed Click Finish H You must restart your computer for the changes to take effect Click Yes 12...

Страница 13: ...ess to NetDisk Read Write allows users to write and read to and from NetDisk Add button will be enabled only when the right NetDisk ID is entered Click Add 4 NetDisk Administrator window will appear c...

Страница 14: ...new NetDisk Found New Hardware Wizard will appear See Installation of New NetDisk on 26 and follow the instructions If you are re registering a NetDisk that has been removed before Found Hardware Wiza...

Страница 15: ...ii NetDisk with Read Only mode 15...

Страница 16: ...ng used by someone else A White NetDisk has same functionalities as a Gray NetDisk A NetDisk Place the cursor on the word NetDisk to view the functions i Plug in Read Only Enables you to change NetDis...

Страница 17: ...d by Gray Circle a Once a NetDisk is unplugged NetDisk can be enabled back to Read Only or Read Write by selecting Plug in Read Only or Plug in Read Write NOTE If you are enabling Read Write and did n...

Страница 18: ...NetDisk click OK To check whether the NetDisk has been removed click NetDisk Administrator Tool The removed NetDisk will be no longer visible The word No NetDisk indicates that there is no NetDisk reg...

Страница 19: ...ou remove the Black NetDisk and re register C New NetDisk Registers new NetDisk to your computer Enter NetDisk ID if you want to just read from NetDisk Enter both NetDisk ID and Write Key if you want...

Страница 20: ...r See Installation of New NetDisk on 26 to complete the registration D About Displays NetDisk Administrator version E Exit Exit NetDisk Administrator Click Yes if you want to exit Otherwise click No N...

Страница 21: ...lace the cursor on the word NetDisk to view the functions i Plug in Read Write Enables you to change NetDisk mode from Read Only to Read Write ii Refresh Updates the NetDisk s data you are reading You...

Страница 22: ...cannot unplug after several attempts reboot your computer This may occur when unseen programs are still using the NetDisk Unplugged NetDisk is indicated by Gray Circle a Once a NetDisk is unplugged Ne...

Страница 23: ...et Disk click Ok To check whether the NetDisk has been removed click NetDisk Administrator Tool The removed NetDisk will be no longer visible The word No NetDisk indicates that there is no NetDisk reg...

Страница 24: ...rations of other NetDisk to be slowed down We recommend you remove the Black NetDisk and re register C New NetDisk Registers new NetDisk to your computer Enter NetDisk ID if you want to just read from...

Страница 25: ...If you are registering a new NetDisk Found New Hardware Wizard will appear See Installation of New NetDisk on 26 to complete the registration D About Displays NetDisk Administrator version F Exit Exit...

Страница 26: ...by now you know that you can only write to NetDisk if you are in Read Write mode If you are writing to the NetDisk with Read Only mode you are not actually writing the data to the NetDisk but writing...

Страница 27: ...nd New Hardware Wizard will appear Select Install the software automatically and click next B Searching for the new NetDisk C Hardware Installation warning will appear Click Continue Anyway D Installa...

Страница 28: ...E New NetDisk has been added to your computer To view it click My Computer and see under Hard Disk Drive 28...

Страница 29: ...Name is optional Write Key is needed to write on NetDisk Click Add i If the Write Key was entered the NetDisk is registered as Read Write ii If the Write Key was not entered the NetDisk is registered...

Страница 30: ...See Installation of New NetDisk on 26 2 Go to the NetDisk Aggregation Mirroring window If you do not see all the NetDisk you registered click Refresh 30...

Страница 31: ...t to change NOTE Green Circle indicates Read Only and Blue Circle indicates Read Write B Click Plug in Read Write If Write Key has not been entered during the registration warning window will appear N...

Страница 32: ...will be enabled D If another user has already registered NetDisk as Read Write their write privilege will be taken away from him her and given to you Click Ok if you want to access write privilege E C...

Страница 33: ...istrator Tool A Select a NetDisk you want to change NOTE Green Circle indicates Read Only and Blue Circle indicates Read Write B Click Plug in Read Only C Click NetDisk Administrator Tool to view the...

Страница 34: ...being used by someone else Occupied NetDisk will be indicated by white colored NetDisk 1 Click Start Program NetDisk NetDisk Aggregation Mirroring NetDisk Aggregation Mirroring window displays all th...

Страница 35: ...and Mirroring 2 Before binding the NetDisk the NetDisk must be unplugged NOTE Only two NetDisk can be bound at a time Therefore unplug the two NetDisk you want to bind To unplug NetDisk click NetDisk...

Страница 36: ...Mirroring NOTE Both NetDisk are unplugged Indicated by the Gray colored NetDisk If the color of the NetDisk has not been changed to Gray click Status If the color of the disk is still Green or Blue r...

Страница 37: ...will not be enabled 9 Click bind button i If NetDisk you choose does not have a Write Key the following message will appear NOTE Remember NetDisk has to be unplugged and have a Write Key Click Ok then...

Страница 38: ...u can choose from to bind with the first NetDisk 10 Select a NetDisk from the NetDisk Available box that you want to bind 11 Then click button A If NetDisk you selected from NetDisks Available box doe...

Страница 39: ...word Aggr Master NetDisk 1 The NetDisk from the NetDisks bound box becomes the Master NetDisk and the NetDisk from the NetDisks available box becomes the Slave NetDisk The slave gets added to the mas...

Страница 40: ...Only 15 Go to NetDisk Aggregation Mirroring window You will notice the change in the color of the master NetDisk NOTE Blue NetDisk is Read Write and Green NetDisk is Read Only 16 Before you can use th...

Страница 41: ...l appear NOTE If the NetDisk is being used by any applications NetDisk will not be unplugged In this case wait until all the applications are finished using NetDisk Then try unplugging it again Click...

Страница 42: ...5 Select a NetDisk you want to unbind and click unbind button 6 The bound NetDisk will unbind into the two original NetDisk Two unbound NetDisk is also visible from NetDisk Administrator Tool 42...

Страница 43: ...or Plug in Read Only Repeat this step for the second unbound NetDisk 8 Right click My Computer Management Disk Management If any of the unbound NetDisk are not initialized indicated by go to Initiali...

Страница 44: ...han the NetDisk you are copying the data from This must always hold true Otherwise the NetDisk you are saving the data to may run out of space 1 Click Start Program NetDisk NetDisk Aggregation Mirrori...

Страница 45: ...Aggregation and Mirroring 2 Before mirroring the NetDisk the NetDisk must be unplugged NOTE Unplug both NetDisk you want to mirror from and mirror to To unplug NetDisk click NetDisk Administrator Tool...

Страница 46: ...sk If the color of the NetDisk has not been changed to Gray click Status If the color of the disk is still Green or Blue repeat steps 2 and 3 for every NetDisk that has not been unplugged 7 Once two N...

Страница 47: ...will not be enabled 10 Click mirror button A If NetDisk you choose does not have a Write Key the following message will appear NOTE Remember NetDisk has to be unplugged and have a Write Key Click Ok G...

Страница 48: ...o be mirror to 10 Click button A If NetDisk you selected from NetDisks Available box does not have a Write Key the message window will appear Click Ok Click cancel on the Bind window Go to page 30 and...

Страница 49: ...it from warning window will appear Click Ok Click Cancel from the Bind window and repeat from step 8 again 11 Mirroring of NetDisk can proceed Click Ok 12 AggrMirUI will appear Click Ok then go to Pa...

Страница 50: ...le box becomes the Slave NetDisk The master NetDisk is mirrored to slave NetDisk 14 Click NetDisk Administrator Tool NOTE NetDisk 1 is unplugged master NetDisk and NetDisk 2 is slave NetDisk 15 Plug i...

Страница 51: ...16 Go to NetDisk Aggregation Mirroring window You will notice the change in the color of the master NetDisk NOTE Blue NetDisk is Read Write and Green NetDisk is Read Only 17 Mirroring is completed 51...

Страница 52: ...Undo Mirroring Please follow the Aggregation Unbind on 39 to undo Mirroring 52...

Страница 53: ...t click My Computer and select Manage 2 Computer Management will appear Click Disk Management under Storage 3 The plugged disk will be shown on the Computer Management 4 Right click on the box and sel...

Страница 54: ...hen you delete partition all the data on the disk will be last Click Yes if you want to continue partitioning Otherwise click No 6 Partition has been deleted indicated by the word Unallocated 7 Right...

Страница 55: ...Partition Wizard Click next 9 Select Partition Type Select Primary partition and click Next 10 Specify Partition Size Click Next NOTE The partition size is automatically set No need to change the siz...

Страница 56: ...se the name of the drive from the driver letter then click Next 12 Format Partition Select Format this partition with the following Settings and Perform a quick format Recommended Click next 13 Partit...

Страница 57: ...14 You can see the partitioned disk 57...

Страница 58: ...omputer Management window will appear Click Disk Management under Storage 3 Computer Management window will list all the disks in the computer Find NetDisk you want to format and right click NOTE NetD...

Страница 59: ...k window will appear Select the right disk and click Ok 5 NetDisk will be automatically initialized NOTE Unknown becomes Basic 6 Right click Unallocated box then select New Partition Go to Partition N...

Страница 60: ...Explorer must be closed There are two different ways in which you can uninstall NetDisk 1 Click Start All Programs NetDisk Uninstall NetDisk Windows Installer will appear Click Yes if you want to cont...

Страница 61: ...nistrator input NetDisk ID and Write Key NetDisk Administrator is located on bottom right icon tray look for an icon that looks like a disk Click on it and NetDisk popup menu will appear Question NetD...

Страница 62: ...estion Can t change to Read Write Mode even after Write Key is entered Answer Someone else is currently using NetDisk in Read Write Mode A screen will appear asking if you would like to take over Read...

Страница 63: ...ogy Inc for technical support please have the following information available Product name model serial number and software version number Technical Support on the Internet For the latest information...

Отзывы: