background image

Tran

sm

itt
ing

27

3

3.4

Dialing

The machine allows the following five dialing methods (fax numbers/mail addresses):

Keypad Dialing

Speed Dialing

One Touch Dialing

Group Dialing

Using the Address Book

You can dial multiple locations (Broadcast Send) at a time by one or more of the above
methods. These methods can also be used in combination. 

Several pending documents can be sent to one destination with a single phone call. This
function is referred to as -batch send. 
Note that Batch Send cannot be used together with Broadcast Send, Relay Broadcast Send,
Remote Mailbox, and Delayed Start before the specified time. Nor can transmissions to a
single destination from separate departments be batch processed when there are redialing,
resending or delayed start jobs.

Mail addresses are used with the Internet Fax (iFAX) function. A mail address can contain up to 128 characters.

For details on Broadcast Send, see “4.1 Transmitting to Multiple Destinations (Broadcast Send)” (P. 40).

Both iFAX and normal Fax destinations can be used in a Broadcast Send operation. When both type of destina-
tions are entered, mail is sent to iFAX destinations and normal fax transmissions are made to Fax destinations.

3.4.1

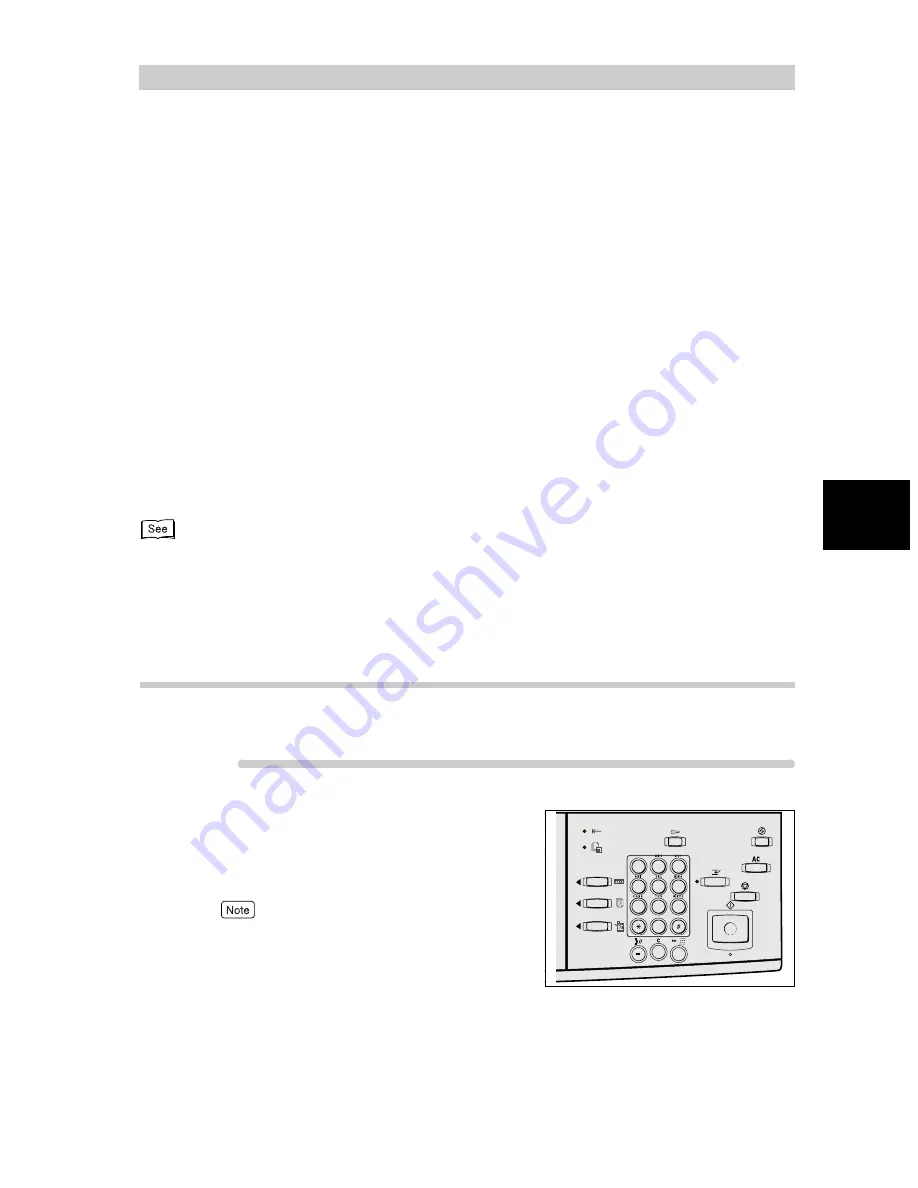
Numeric Keypad Dialing

You can use the 

numeric keypad to

 enter the fax number. 

Procedure

1

Enter the fax number using the
numeric keypad.

The Touch Panel Display displays the fax number 
entered.

Press the Clear button to correct incorrectly entered
numbers one by one.

1

2

3

4

5

6

8

9

0

7

Содержание WorkCentre M24 Color

Страница 1: ...WorkCentre M24 Fax Reference Guide This PDF file is best viewed using Acrobat Reader 5...

Страница 2: ...power is accidentally cut off in a manner not following the methods listed in manuals or other documentations Xerox is not responsible for such data loss and any consequence caused by such data loss...

Страница 3: ...lease read this guide carefully before use to obtain the best performance of your machine After reading it please keep this guide handy for quick reference should you encounter difficulties with the m...

Страница 4: ...lephone Company A plug and jack used to connect this equipment to the premises wiring and telephone network must comply with the applicable FCC Part 68 rules and requirements adopted by the ACTA A FCC...

Страница 5: ...the state public utility commission public service commission or corporation commission for information If your office has specially wired alarm equipment connected to the telephone line ensure the in...

Страница 6: ...s you should contact your local Xerox representative in the first instance This product has been tested to and is compliant with TBR21 a specification for terminal equipment for use on analogue switch...

Страница 7: ...005 008 006 009 001 004 007 010 Go to 001 500 011 012 002 003 Enter Number Group Address List ABCDE FGHIJ KLMNO PQRST UVWXYZ 0 9 Address Book Close Next Recipient Enter recipient s Fax No Memory 100...

Страница 8: ...0010 Fax Send Waiting 0123456789 1 1 Doc No Job Type Status Remote Terminal Contents Pages Stored Documents Current and Pending Jobs Print Waiting Jobs Specifying the size and reduc tion enlargement r...

Страница 9: ...s P 95 Scanning documents in vari ous sizes at a time 8 3 Scanning Documents in Various Sizes Mixed Size Originals P 90 Transmitting documents at a specified time 8 8 Transmitting Documents at a Progr...

Страница 10: ...ocuments with brief information date time and name 8 9 Transmitting Documents With Brief Information Send Header P 105 Making multiple copies at a remote machine 8 11 Remote Copy Recipient Print Sets...

Страница 11: ...ing received docu ments into mailboxes 8 15 Sorting Received Documents Into Mailbox Box Selector P 135 For Support For Support For A For Support Programming commands requests for mailbox 9 6 Creating...

Страница 12: ...between departments 9 6 Creating a Mailbox P 173 Direct Transmission of Faxes from a Computer Chapter 12 Direct Transmission of Faxes From a Computer P 237 Internet Facsimile Chapter 13 Using the Inte...

Страница 13: ...n Screen 6 1 5 Entering Text 8 1 5 1 Entry Method 8 Chapter 2 Loading Documents 2 1 Documents 10 2 1 1 Applicable Document Sizes 10 2 1 2 Automatically Detected Document Sizes 11 2 1 3 Document Handli...

Страница 14: ...ing Documents Through a Relay Station Relay Broadcast 43 4 2 1 Before Using the Relay Broadcast Send Feature 44 4 2 2 Fax Signal Method 45 4 2 3 DTMF Dual Tone Multi Frequency Method 46 4 2 4 F Code M...

Страница 15: ...s Mixed Size Originals 90 8 4 Scanning Documents at a Specified Size Ratio Reduce Enlarge 93 8 5 Transmitting Facing Pages on Separate Sheets Bound Originals 95 8 6 Merging Several Pages Onto One Shee...

Страница 16: ...Administration Mode Fax Functions 142 9 2 Entering Local Terminal Information 145 9 2 1 How to Enter and Change 146 9 3 Setting an Address Number 150 9 3 1 Entry Method 153 9 3 2 Changing Deleting En...

Страница 17: ...hooting 11 1 Troubleshooting 230 11 1 1 Problems With Transmission 230 11 1 2 Problems With Reception 231 11 1 3 Other Problems 231 11 2 Error Code List 234 Chapter 12 Direct Transmission of Faxes Fro...

Страница 18: ...Transmission 273 13 3 3 Receiving E mails 279 13 4 Useful Features 281 13 4 1 Sending E mails to Mailboxes Using E mail Addresses 281 13 4 2 Sending Faxes to Recipients as Relay Centers 284 13 4 3 Fo...

Страница 19: ...stem Organization of This Guide This Guide consists of the following chapters Chapter 1 Before Use This Chapter describes the operating precautions and basic operations such as text input when using t...

Страница 20: ...rocedures to customize these functions Chapter 10 Reports Lists This Chapter describes reports and list settings and how to print them Chapter 11 Troubleshooting This Chapter describes what to do when...

Страница 21: ...Saver Mode or found within double quotes Special marks characters used in this guide Double quotes indicate the following Messages that appear in the touch panel display and computer screens Character...

Страница 22: ...xix...

Страница 23: ...ns 3 1 2 1 Telephone Line Connection 3 1 2 2 Automatic Receive Mode 3 1 2 3 Making a Telephone Call 3 1 3 Telephone Line Connectors 4 1 4 Using the Touch Panel Display 5 1 4 1 Displaying Copy Scan and...

Страница 24: ...remote activity report The machine identifies itself to the remote machine when they communicate The local name can include alphanumeric characters and symbols 9 2 Entering Local Terminal Informa tion...

Страница 25: ...transmission speed is limited 3 Super G3 cannot be used The following communication errors may also occur These restrictions may occur because the multiplexing device restricts the band width to the m...

Страница 26: ...Canada Line 2 and 4 can be specified when an option is installed Europe Line 1 only 1 LINE 1 Connect the fax to a public switched telephone network PSTN An external telephone cannot be connected 2 TE...

Страница 27: ...h panel dis play when the power is turned on This default screen can be changed in the System Administration Mode Menu screen Use the buttons on the Menu screen to display the screen of the required f...

Страница 28: ...the features displayed on each screen see Chapter 3 Transmitting P 19 and Chapter 8 Using Additional Features P 83 Basic Features screen Scan Options Basic Scanning Image Quality File Format Menu Mai...

Страница 29: ...nt s Fax No Memory 100 Fax No Menu Basic Features Scan Options Send Options On Hook Others Cover Note Off Communication Mode G3 Auto Recipient Print Sets 1 Set s Priority Send Delayed Start Priority S...

Страница 30: ...s The follow ing describes how to enter text Entering symbols Select the Symbol button Entering spaces Select the Space button 1 Deleting characters Select the Backspace button This deletes one charac...

Страница 31: ...2 1 2 Automatically Detected Document Sizes 11 2 1 3 Document Handling 12 2 2 Loading Documents 14 2 2 1 Loading Documents on the Document Glass 14 2 2 2 Loading Documents in the Document Feeder 15 2...

Страница 32: ...low on the document glass or document feeder 1 Paper weight is expressed in grams per square meter gsm 2 This value applies when both sides of a two sided document is scanned and transmitted Document...

Страница 33: ...s sizes shown on the right US Canada Europe Document Glass A6 5 5 8 5 5 5 8 5 8 10 8 5 11 A4 8 5 11 8 5 14 11 17 A3 A6 B6 A5 B6 A5 8 10 B5 8 5 11 A4 B5 A4 8 5 11 8 5 13 B4 11 17 A3 Document Feeder 5 5...

Страница 34: ...h a document could damage the docu ment glass and the machine Documents placed in a photograph holder may not be scanned correctly if the film is severely creased For details on the scanning size func...

Страница 35: ...ded documents Torn creased perforated or excessively curled documents Glossy documents such as photo graphs Documents that are held together by clips staples or adhesive Documents to which pieces of o...

Страница 36: ...own align ing the corner with the upper left hand side corner of the document glass Place a sheet of white paper on top of transparencies and other highly transparent documents 3 Close the document co...

Страница 37: ...y paper clips or staples Extend the document tray extension when loading large documents 2 Place the document with the side to be sent facing up top side for a two sided document and slide it into the...

Страница 38: ...document feeder the orientation must be set to indicate the top of the document Select Flip on Short Edge or Flip on Long Edge under Originals in the 2 Sided Originals screen of the Scan Options The l...

Страница 39: ...of documents after the machine has finished scanning the first set When no operation is performed in the above screen during a certain period of time the machine assumes there are no more documents t...

Страница 40: ...ments 18 Loading Documents 2 4 When all documents have been scanned select Last Original Fax Store 0123456789 1 Stop Type Single Terminal Standard Next Original Last Original Doc No 00010 Pages Stop S...

Страница 41: ...Telephone Line 23 3 2 1 Transmitting by a Specified Telephone Line 23 3 2 2 Adding Lines 24 3 3 Selecting a Communication Mode Communication Mode 25 3 4 Dialing 27 3 4 1 Numeric Keypad Dialing 27 3 4...

Страница 42: ...4 mm Super fine 400 dpi For documents with extremely fine text and or images 400 400 dpi 25 4 mm Super fine 600 dpi For documents with extremely fine text and or images 600 600 dpi 25 4 mm The Resolu...

Страница 43: ...etc Text For documents with text Text Photo For documents including both text and photo images This setting automatically assesses text and photo areas to set the appropriate document quality per area...

Страница 44: ...ax No 2 Sided Originals 1 Sided Scan Size Auto Size Detect Mixed Size Originals Off Reduce Enlarge Auto Bound Originals Off Multiple Up Off Cover Note Off Communication Mode G3 Auto Recipient Print Se...

Страница 45: ...etails on how to register Local Information see 9 2 Entering Local Terminal Information P 145 Procedure 1 Load documents 2 2 Loading Documents P 14 2 Display the Fax screen 3 Select Keyboard to displa...

Страница 46: ...munication P 61 3 2 2 Adding Lines Lines can be increased by installing an optional FAX G3 NCU additional A FAX additional board kit must be installed to enable the installation of these options The f...

Страница 47: ...ils on how to change this default value see 9 8 Other Items P 181 The default factory setting is G3 Auto Communication Modes that can be Selected G3 Auto Select this mode if the remote terminal is G3...

Страница 48: ...dard Super fine 400dpi Super fine 600dpi Address Book Keyboard Resolution Original Type Lighter Darker Next Recipient Enter recipient s Fax No Memory 100 Fax No Menu Basic Features Scan Options Send O...

Страница 49: ...single destination from separate departments be batch processed when there are redialing resending or delayed start jobs Mail addresses are used with the Internet Fax iFAX function A mail address can...

Страница 50: ...tations from 100 to 109 can be specified by entering 10 Select all the Address Numbers Enter to select all the Address Numbers You cannot use two wildcard characters such as 1 1 or 1 For details on ho...

Страница 51: ...Press the desired one touch button Each one touch button corresponds to Address Num bers from 001 to 090 respectively Repeat this step to designate multiple destinations Turn the panel over to press t...

Страница 52: ...step1 for each additional number 3 4 5 Using the Address Book This section describes how to use the Address Book to enter numbers The Address Book shows the fax numbers and mail addresses stored in t...

Страница 53: ...een Defaults P 186 Menu Basic Features Scan Options Send Options On Hook Others A B C Text Photo Text Photo Fine Standard Super fine 400dpi Super fine 600dpi Address Book Keyboard Resolution Original...

Страница 54: ...o display the previous screen and press the button to dis play the next screen For details on how to register group dial numbers see 9 4 Setting a Group Dial P 169 Xerox Akira Endo 005 008 006 009 001...

Страница 55: ...a password has been set transmission will only start if the password matches the ID number on the remote terminal 1 Select the Keyboard button in the Basic Fea tures screen to display the keyboard 2 S...

Страница 56: ...dministration Mode For details on how to change this num ber see 9 8 2 Audio Tones P 182 The default factory setting is Normal Procedure 1 Load documents 2 2 Loading Documents P 14 2 Display the Fax s...

Страница 57: ...Alphanumeric Symbol Send Receive Manual Send Manual Receive Memory 100 Address Press Start to begin Receive operation 3 Shift A B C D E F G H I J K L M N O P Q R S V W X 1 2 3 4 5 6 7 8 9 0 Y Z T U Of...

Страница 58: ...ou hear the facsimile tone then press Start Scanning and transmission begins 5 If you have transmitted documents with the handset picked up place the handset back on the cradle after ending the transm...

Страница 59: ...called redial ECM Error Correction Mode ECM is the error correction method defined by ITU T for G3 communication Terminals with ECM mutually check whether the transmis sion is successful If not the t...

Страница 60: ...3 6 Transmission Failure 38 Transmitting 3...

Страница 61: ...he F code screen Check the password of the receiving machine in advance Note For details how to set Machine Password on your machine see section 9 2 Entering Local Terminal Information Note Machine Pa...

Страница 62: ...Leaving F code blank select Next E Enter the password on the numeric keypad then select 38B...

Страница 63: ...tion Relay Broadcast 43 4 2 1 Before Using the Relay Broadcast Send Feature 44 4 2 2 Fax Signal Method 45 4 2 3 DTMF Dual Tone Multi Frequency Method 46 4 2 4 F Code Method 49 4 3 Transmitting Documen...

Страница 64: ...er of remote machines that you can designate at a time is as follows The numeric keypad dialing 50 locations Speed dialing 500 locations Using the numeric keypad in combination with speed dialing 549...

Страница 65: ...4 1 Transmitting to Multiple Destinations Broadcast Send 41 Broadcast Send 4 The Broadcast Send feature enables you to transmit to all the destinations at one time...

Страница 66: ...ransmission Scanning and transmission begins For details on how to dial a number see 3 4 Dialing P 27 For details on how to confirm and cancel the transmission of a document see Chapter 5 Confirm ing...

Страница 67: ...e Relay Broadcast operations can be made simultaneously This is referred to as Multiple Relay Broadcast There are two types of Relay Broadcast Send operations Fax signal method Unique signal method on...

Страница 68: ...thod G3 F Code method No programming is required The dialing format can be programmed in speed dialing Relay station Fax Signal Method Assign the initiating station to an Address Number from 001 to 09...

Страница 69: ...ignate multiple relay stations Scanning and transmission begins For details on how to dial a number see 3 4 Dialing P 27 For details on how to confirm and cancel the transmission of a document see Cha...

Страница 70: ...l transmis sion Password A two digit number programmed beforehand The factory set default is none For setting Password contact our Customer Support Center If a password has not been programmed you do...

Страница 71: ...t Select the Next Recipient button for multiple Relay Broadcast jobs Use the keyboard on the touch panel display to enter symbols like or For details on how to enter symbols see 1 5 Entering Text P 8...

Страница 72: ...anual Send Relay station telephone number Confirm the facsimile tone Confirm the continuous short high pitched tone Password Relay station ID Address Number The continuous short high pitched tone soun...

Страница 73: ...do Relay Broadcast Send trans mit the F Code sub address to the initiating station and the necessary pass words When doing Relay Broadcast Send with the F Code method to use the password set the recei...

Страница 74: ...cast Send when the relay station ID is set The initiating station is not notified of the results of the Relay Broadcast Send when the relay station ID is 00 or 000 Address Number The Address Number as...

Страница 75: ...ord is displayed You can enter up to 20 digits for an F Code Menu Basic Features Scan Options Send Options On Hook Others Store for Polling Off Polling Off On hook Manual Send Receive F Code Off Remot...

Страница 76: ...ct Save 8 Specify the destination and press start Scanning and transmission begins For details on how to dial a number see 3 4 Dialing P 27 For details on how to confirm and cancel the transmission of...

Страница 77: ...e used as first and second relay stations for Remote Relay Broad cast see Appendix E Models Providing Relay Broadcast and Recipient Print Set Function P 305 for details on which models are provided wi...

Страница 78: ...station which is already programmed at the first relay station as a relay broadcast receiver Firstrelay station Assign the initiating station to an Address Number from 001 to 099 and set Relay Statio...

Страница 79: ...ansmis sion Password A two digit number programmed beforehand The factory set default is none For setting Password contact our Customer Support Center If a password has not been programmed you do not...

Страница 80: ...he second relay station to an Address Number from 001 to 500 Program the two last digits of the Address Number of the first relay station which is already programmed at the second relay station as a r...

Страница 81: ...ually picking up the handset or leaving the handset on hook The dialing format is as follows This method is available for transmission only between machines of this model The above dialing format can...

Страница 82: ...P 8 Destinations for up to 20 relay stations can be specified 5 Press Start Scanning and transmission begins Menu Basic Features Scan Options Send Options On Hook Others Store for Polling Off Polling...

Страница 83: ...station Assign the initiating station either an Address Number from 001 to 500 when the specification method for the initiating station is 3 digits in F Code or 001 to 099 when the spec ification met...

Страница 84: ...rinting at the first relay station 1 Activate printing at the first relay station 0 Deactivate printing at the first relay station First relay station ID The Address Number of the initiating station t...

Страница 85: ...5Confirming and Canceling a Communication 5 1 Canceling Jobs 62 5 2 Confirming Job Status 64 5 2 1 Checking Jobs in Progress and Pending Jobs 64 5 2 2 Confirming Completed Jobs 65...

Страница 86: ...ructions in Canceling a Pending Jobs The machine pauses and the screen shown below appears 2 Select Stop on the screen or press Clear on the control panel Transmission stops To continue transmission s...

Страница 87: ...display the next screen Job status is shown 3 Select Stop Job processing is terminated 4 Select Close To cancel other jobs select the jobs you want to cancel in the screen at step 2 and select the Sto...

Страница 88: ...current and pending jobs is displayed Select the button to display the previous screen and select the button to display the next screen When a job is selected the screen shown below is displayed to pr...

Страница 89: ...u want to check in the screen at step 2 Job Status Completed Jobs Current and Pending Jobs Stored Documents Secure Print Sample Print Private Mailbox Public Mailbox Delayed Print Page 1 10 Completed J...

Страница 90: ...5 2 Confirming Job Status 66 Confirming and Canceling a Communication 5...

Страница 91: ...Printing Received Documents 71 6 2 1 Tray Mode and User Mode 71 6 2 2 Printing the Same Size Images 72 6 2 3 Printing the Same Size Images With Margins 73 6 2 4 Reducing Images at the Sender Side 74...

Страница 92: ...one The Fax Receiving Mode default value can be changed in the System Administration Mode For details on how to change this default value see 9 8 7 Fax Control P 192 The default factory setting is Aut...

Страница 93: ...default factory setting is 0 time 6 1 3 Manual Reception In the Manual Receive mode pick up the handset external telephone or select the On hook button in the screen that appears when the phone rings...

Страница 94: ...nswer it If the incoming call is from a fax machine you hear a facsimile tone If On hook is selected you will hear the sound from the machine speaker However you cannot speak to the other party 3 Pres...

Страница 95: ...ng the size of paper closest to that of the original documents If the receiving machine has only paper that is smaller than the documents being sent it informs the sending machine accordingly The send...

Страница 96: ...the tray and reproduces the same size images on paper If the same size of paper is loaded but in a different orientation for exam ple the document is A4 while paper orientation is A4 the machine autom...

Страница 97: ...rger paper size is loaded in one of the paper trays the machine prints the same size images with margins on the larger paper size User Mode If the same size of paper as the documents is not specified...

Страница 98: ...ing machine The images are reduced by a sending machine in the following cases Tray Mode When all the loaded paper sizes are smaller than the documents The receiving machine automatically selects the...

Страница 99: ...hin the value programmed in the Border Limit feature and Auto Reduce on Receipt is set to On The way documents are output when Auto Reduce on Receipt and Border Limit are combined is shown below For d...

Страница 100: ...his default value see 9 8 7 Fax Control P 192 The following shows the difference when the 2 Up on Receipt feature is on and off 6 2 7 Using the 2 Sided Printing Feature Using the 2 Sided Printing feat...

Страница 101: ...7Making and Receiving Telephone Calls 7 1 Making a Telephone Call 78 7 1 1 Off hook Dialing 78 7 1 2 On hook Dialing 79 7 2 Receiving a Telephone Call 82...

Страница 102: ...ng the handset Off hook dialing Procedure 1 Pick up the handset Or lift the handset of your telephone if you are using your own telephone In power saving you cannot make telephone call with the receiv...

Страница 103: ...ty 5 Place the handset back on the cradle after hanging up Be sure to replace the handset properly as the line will otherwise not be disconnected and the tele phone will remain busy 6 Press Close 7 1...

Страница 104: ...n Options Send Options On Hook Others A B C Text Photo Text Photo Fine Standard Super fine 400dpi Super fine 600dpi Address Book Keyboard Resolution Original Type Lighter Darker Next Recipient Enter r...

Страница 105: ...one call whether the handset is on or off hook 5 Lift the handset to take the call when the other party answers 6 Cancel on hook 7 Place the handset back on the cradle after ending the call Be sure to...

Страница 106: ...lue see 9 8 7 Fax Control P 192 The default factory setting is 0 time The ringing tone is available either with or without a handset When the machine is set to ring you can take a call while the telep...

Страница 107: ...reparing to Be Polled Store for Polling 112 8 12 1 Store the Document to Be Polled 112 8 12 2 Checking Documents to Be Polled 113 8 13 Retrieving a Document From Remote Machine s Polling 116 8 14 Usin...

Страница 108: ...not be changed The 2 Sided Originals feature is canceled if the document glass is used while transmitting 2 Sided Originals If you select the 2 Sided First Page 1 Sided button in the 2 Sided Originals...

Страница 109: ...document to be recognized as a cover page and the second side of this page is not scanned Do not exceed the capacity of the document feeder Originals is indicated on the right side of the screen Menu...

Страница 110: ...from that of side 1 6 Select Save 7 Dial a remote party then press Start Scanning and transmission begins For details on how to dial a number see 3 4 Dialing P 27 For details on how to confirm and ca...

Страница 111: ...set default for buttons other than the Auto Size Detect button can be changed in the System Admin istration Mode For details on how to change this default value see 9 8 10 Setting Scan Size Defaults P...

Страница 112: ...tions On Hook Others A B C Text Photo Text Photo Fine Standard Super fine 400dpi Super fine 600dpi Address Book Keyboard Resolution Original Type Lighter Darker Next Recipient Enter recipient s Fax No...

Страница 113: ...l Features 8 6 Dial a remote party then press Start Scanning and transmission begins For details on how to dial a number see 3 4 Dialing P 27 For details on how to confirm and cancel the transmission...

Страница 114: ...rs This function cannot be used with Multiple Up Procedure 1 Place the document so that it faces left aligning the top left corner of sides A and B Remove any paper clips or staples The document may n...

Страница 115: ...ptions On Hook Others A B C Text Photo Text Photo Fine Standard Super fine 400dpi Super fine 600dpi Address Book Keyboard Resolution Original Type Lighter Darker Next Recipient Enter recipient s Fax N...

Страница 116: ...ins For details on how to dial a number see 3 4 Dialing P 27 For details on how to confirm and cancel the transmission of a document see Chapter 5 Confirm ing and Canceling a Communication P 61 Save C...

Страница 117: ...and the Auto button the scanning ratios for Preset can be changed in the System Administration Mode For details on how to change these values see 9 8 9 Reduce Enlarge Presets P 200 The default factory...

Страница 118: ...smission begins For details on how to dial a number see 3 4 Dialing P 27 For details on how to confirm and cancel the transmission of a document see Chapter 5 Confirm ing and Canceling a Communication...

Страница 119: ...Fax screen 3 Select Bound Originals in the Scan Options screen The Bound Originals screen is displayed Stored image Document How to place document Menu Basic Features Scan Options Send Options On Hook...

Страница 120: ...pages of the bound document will be printed onto separate sheets For details on how to dial a number see 3 4 Dialing P 27 For details on how to confirm and cancel the transmission of a document see C...

Страница 121: ...d page is too long it will be divided at the receiving machine Two to nine pages can be merged into one page If the actual number of document is less than the one specified the machine transmits only...

Страница 122: ...Book Keyboard Resolution Original Type Lighter Darker Next Recipient Enter recipient s Fax No Memory 100 Fax No Menu Basic Features Scan Options Send Options On Hook Others 2 Sided Originals 1 Sided S...

Страница 123: ...s 8 6 Select Save 7 Dial a remote party then press Start Scanning and transmission begins For details on how to dial a number see 3 4 Dialing P 27 For details on how to confirm and cancel the transmis...

Страница 124: ...e 5 2 1 Checking Jobs in Progress and Pending Jobs P 64 Procedure 1 Load documents 2 2 Loading Documents P 14 2 Display the Fax screen 3 Select Priority Send Delayed Start in the Send Options screen T...

Страница 125: ...ing and transmission begins For details on how to dial a number see 3 4 Dialing P 27 For details on how to confirm and cancel the transmission of a document see Chapter 5 Confirm ing and Canceling a C...

Страница 126: ...for Delayed Start is 9 00 PM This default value varies with our Customer Engineering setup If a power failure occurs or the power is turned off while the Delayed Start feature is set the setting is d...

Страница 127: ...and the PM button are not displayed 7 Select Save repeatedly until the Fax screen is displayed Save Cancel Priority Send Delayed Start On Off Priority Send Off Delayed Start On Next Recipient Enter re...

Страница 128: ...nd transmission begins When pressing the Start button after the specified time the stored document will be transmitted at the specified time the next day For details on how to dial a number see 3 4 Di...

Страница 129: ...eivers Start of transmission is printed in the format set on the machine 12 or 24 hour clock For details on Send Header G3 ID see 9 2 Entering Local Terminal Information P 145 The field of the remote...

Страница 130: ...smission of a document see Chapter 5 Confirm ing and Canceling a Communication P 61 Menu Basic Features Scan Options Send Options On Hook Others Cover Note Off Communication Mode G3 Auto Recipient Pri...

Страница 131: ...Number For details on how to register Address Numbers see 9 3 Setting an Address Number P 150 When Send Header is set to On the Send Header is not printed on the Cover Note You cannot use the Cover N...

Страница 132: ...Address Book Keyboard Resolution Original Type Lighter Darker Next Recipient Enter recipient s Fax No Memory 100 Fax No Menu Basic Features Scan Options Send Options On Hook Others Cover Note Off Com...

Страница 133: ...egins For details on how to dial a number see 3 4 Dialing P 27 For details on how to confirm and cancel the transmission of a document see Chapter 5 Confirm ing and Canceling a Communication P 61 Save...

Страница 134: ...ets screen is displayed 4 Select Multiple Sets Menu Basic Features Scan Options Send Options On Hook Others A B C Text Photo Text Photo Fine Standard Super fine 400dpi Super fine 600dpi Address Book K...

Страница 135: ...Save 7 Dial a remote party then press Start Scanning and transmission begins For details on how to dial a number see 3 4 Dialing P 27 For details on how to confirm and cancel the transmission of a do...

Страница 136: ...this default value see 9 8 7 Fax Control P 192 8 12 1 Store the Document to Be Polled Procedure 1 Load documents 2 2 Loading Documents P 14 2 Display the Fax screen L o c a l m a c h i n e Sending Sto...

Страница 137: ...1 Display the Fax screen Menu Basic Features Scan Options Send Options On Hook Others Store for Polling Off Polling Off On hook Manual Send Receive F Code Off Remote Mailbox Off Next Recipient Enter...

Страница 138: ...Off Remote Mailbox Off Next Recipient Enter recipient s Fax No Memory 100 Fax No Save Cancel Store for Polling Public Mailbox Off Private Mailbox Select where you want to save the documents Next Reci...

Страница 139: ...ect Close repeatedly until the Fax screen is displayed Close Refresh Public Mailbox Document List Number Doc No Type Stored Date Pages 1 2 3 4 5 00001 Store for Polling 00025 Store for Polling 00105 S...

Страница 140: ...ne the Delayed Start feature with Polling in the Send Options screen you can retrieve a docu ment at a set time This process is known as delayed polling For details on the Facsimile Service see Facsim...

Страница 141: ...tails on how to dial a number see 3 4 Dialing P 27 For details on how to confirm and cancel the transmission of a document see Chapter 5 Confirm ing and Canceling a Communication P 61 Menu Basic Featu...

Страница 142: ...achine Retrieve from Mailbox Retrieves a document stored in a mailbox on the remote terminal Your machine can print it out Private Mailbox Stores a document into a mailbox on your machine The document...

Страница 143: ...of machines that have the F Code function The G3 mode is available 8 14 1 Send to Mailbox Fax Signal Method Use one of the two following methods to perform a Send to Mailbox operation To perform a rem...

Страница 144: ...t Photo Fine Standard Super fine 400dpi Super fine 600dpi Address Book Keyboard Resolution Original Type Lighter Darker Next Recipient Enter recipient s Fax No Memory 100 Fax No Menu Basic Features Sc...

Страница 145: ...u must know the mailbox number of the remote machine This refers to the mailbox number programmed on the remote machine There are two methods of sending to mailbox by DTMP as follows Sending to mailbo...

Страница 146: ...bols like or For details on how to enter symbols see 1 5 Entering Text P 8 Input the password when required 4 Press Start Scanning and transmission begins 8 14 3 Send to Mailbox F Code Method When the...

Страница 147: ...Select F Code on the On Hook Others screen The F Code screen is displayed 4 Select On Menu Basic Features Scan Options Send Options On Hook Others A B C Text Photo Text Photo Fine Standard Super fine...

Страница 148: ...up to 20 digits for a password 7 Select Save 8 Specify the destination and press start Scanning and transmission begins For details on how to dial a number see 3 4 Dialing P 27 For details on how to c...

Страница 149: ...or details on how on the report print setting see 9 8 4 Reports P 184 For details on the Mailbox Documents Report see 10 11 Mailbox Documents Report P 226 For details on how to print out documents rec...

Страница 150: ...yboard Resolution Original Type Lighter Darker Next Recipient Enter recipient s Fax No Memory 100 Fax No Menu Basic Features Scan Options Send Options On Hook Others Store for Polling Off Polling Off...

Страница 151: ...rty then press Start Retrieve from Mailbox starts For details on how to dial a number see 3 4 Dialing P 27 For details on how to confirm and cancel the transmission of a document see Chapter 5 Confirm...

Страница 152: ...ered in Address Number to enable a Retrieve from Mailbox operation using an Address Number For details on how to register Address Numbers see 9 3 Set ting an Address Number P 150 Procedure 1 Display t...

Страница 153: ...ook Others screen The Polling screen is displayed 4 Select On and Save 5 Press Start Retrieve from Mailbox starts Telephone number of remote machine Mailbox number of remote machine Password for mailb...

Страница 154: ...sub address 0 Display F Code transmission and the mail box where mail collects Password when necessary Password of the mailbox where mail collects When retrieving mail with this kind of machine we re...

Страница 155: ...n F Code 5 If necessary enter the password on the numeric keypad then select Next You can enter up to 20 digits for a password 6 Select Save Save Cancel F Code On Off Enter recipient s Fax No Memory 1...

Страница 156: ...ox The Private Mailbox feature allows you to store a document in the mailbox on your machine You can also check print and delete documents processed by the Private Mailbox feature For details on opera...

Страница 157: ...Standard Super fine 400dpi Super fine 600dpi Address Book Keyboard Resolution Original Type Lighter Darker Next Recipient Enter recipient s Fax No Memory 100 Fax No Menu Basic Features Scan Options S...

Страница 158: ...lbox documents stored for polling are stored in the specified Mailbox For details on how to confirm and cancel the transmission of a document see Chapter 5 Confirm ing and Canceling a Communication P...

Страница 159: ...e the Box Selector function For details on how to change this default value see 9 8 7 Fax Control P 192 The default factory setting is Off For details on programming the box selector see 9 7 Programmi...

Страница 160: ...ked printed or deleted Select the button to display the previous screen and select the button to display the next screen You can directly access a Mailbox by entering a three digit mailbox number in t...

Страница 161: ...n the Delete button is selected Document printing starts when the Save button is selected For details on how to register a Mailbox see 9 6 Creating a Mailbox P 173 Mailbox Close 001 200 Go to No of Do...

Страница 162: ...rmation and select Yes Select the No button to return to step 1 6 Select Close repeatedly until the Job Status screen is displayed 2 Mailbox 001 No Close Documents will be deleted after printing Do yo...

Страница 163: ...anies must be registered entered Set the password whenever it is necessary 8 17 2 Functions Used with F Code Transmis sion You can use the following functions with F Code transmissions Relay Broadcast...

Страница 164: ...set ting the F Code and necessary passwords For details about receiving to the mailbox see 8 14 4 Receive in Mailbox P 125 Retrieve from Mailbox You can retrieve documents from a mailbox by setting t...

Страница 165: ...Numbers 166 9 4 Setting a Group Dial 169 9 5 Setting a Comment 171 9 6 Creating a Mailbox 173 9 7 Programming Sort to Mailbox Box Selector Entry 178 9 7 1 Documents Sorted by Incoming Line 178 9 8 Oth...

Страница 166: ...values default values at the factory before shipping Some of these values can be changed by the customer Customize frequently used func tions so that you will not have to change them each time you us...

Страница 167: ...Internet Fax iFax function 9 8 3 Printing Priority P 183 Reports Sets print settings for fax function reports 9 8 4 Reports P 184 Close System Settings Close Common Settings Audio Tones Screen Default...

Страница 168: ...ratio displayed in Reduce Enlarge in the Scan Options screen 9 8 9 Reduce Enlarge Presets P 200 Scan Size Defaults Select the size displayed in Scan Size in the Scan Options screen 9 8 10 Setting Sca...

Страница 169: ...the local terminal name When sending a fax the local name is displayed on the remote machine and recorded in the Activity Report of that machine Note The remote machine must support this feature to w...

Страница 170: ...een appears when System Settings is selected after entering a password 2 Select System Settings The System Settings screen is displayed 3 Select Fax Mode Settings The Fax Mode Settings screen is displ...

Страница 171: ...tings 1 3 1 Local Name 2 Company Logo 3 Machine Password 4 G3 Line 0 Ext Fax ID 5 G3 Line 0 Ext Dial Type Not Set Tone Not Set Not Set Not Set Close Local Terminal Information Items Current Settings 2...

Страница 172: ...1 will be used in the description 4 G3 Line 1 Fax ID Use the keyboard on the screen and the numeric keypad to enter a fax number of up to 20 digits and select Save 5 G3 Line 1 Dial Type Select Tone or...

Страница 173: ...G3 Line 1 Line Type Select PSTN and select Save 6 When all settings are completed select Close repeatedly until the Sys tem Settings screen is displayed 7 Select Exit The machine is restarted and the...

Страница 174: ...ers of up to 128 digits can be entered Not Set 2 Recipient Name Names of up to 18 characters can be entered Not Entered 3 Index Enter a alphanumeric character as an Index a key word that you can use i...

Страница 175: ...r the remote machine as dictated by its maximum receiving docu ment size A3 11 10 Delayed Start Determines whether or not a Delayed Start is to be made Enter the start of transmission when this functi...

Страница 176: ...in the Com munication Mode it is not possible to change the communica tion mode in the Fax screen The Communication Mode is set as the Communication Mode between the fax destination and Fax Gateway F...

Страница 177: ...ssword has not been set press the Password System Settings button to display the System Settings screen If the System Administrator Password Entry screen is displayed enter the password The System Set...

Страница 178: ...ettings 6 Select the items to enter and select Change Settings Select the button to display the previous screen and select the button to display next screen Create Delete Close Address Book Address No...

Страница 179: ...the keyboard on the screen and the numeric keypad to enter one character and select Save 5 Relay Station Setup Select Off or On and select Save 1 Save Cancel Backspace Space Shift Tone Alphanumeric Sy...

Страница 180: ...600dpi and select Save 8 Cover Note Select Off or On and select Save To attach a Cover Note select On then Comment The 8 Cover Note Comment screen is displayed 1 Save Cancel G3 Auto F4800 4 Communicat...

Страница 181: ...s 3 and 4 9 Maximum Image Size Select A3 11 A4 8 5 or B4 and select Save 10 Delayed Start Select Off or On and select Save 3 Save Cancel 8 Cover Note Comment Recipient s Comment The following comments...

Страница 182: ...me with then select Save When the 24 hour clock is used the AM button and the PM button are not displayed 11 Remote Mailbox Select Off or On Select On when Remote Mailbox is to be used 2 Save Cancel 9...

Страница 183: ...d and select Next If a password has not been entered you do not need to use one Then select the Save button without entering a password Select On 11 F Code Select either Off or On To do F Code transmi...

Страница 184: ...20 digits for an F Code If necessary enter the password on the numeric keypad then select Next You can enter up to 20 digits for a password Select Save 13 Relay Broadcast Select Off or On Select On wh...

Страница 185: ...nd Group Numbers from 01 to 09 can be entered To delete destinations use the numeric keypad to select Address Numbers or Group Numbers that are to be deleted and select the Delete button If you want t...

Страница 186: ...System Administrator pass word has been set If a password has not been set press the Password System Settings button to display the System Settings screen If the System Administrator Password Entry sc...

Страница 187: ...button to display the next screen 1 E mail Address Use the keyboard on the screen and the numeric keypad to enter a E mail address of up to 128 characters and select Save Create Delete Close Address...

Страница 188: ...nation and the Fax Gateway for the Internet FAX iFAX function Faxes are transmitted through G3 Auto until the Fax Gateway For information on the Fax Gateway function see 13 4 2 Sending Faxes to Recipi...

Страница 189: ...gs screen is displayed 8 Select Close to complete The machine is restarted and the screen displayed prior to the operation appears 1 Save Cancel A3 A4 B4 6 Maximum Image Size 1 Save Cancel 7 iFAX Prof...

Страница 190: ...ry screen is displayed when a System Administrator pass word has been set If a password has not been set press the Password System Settings button to display the System Settings screen If the System A...

Страница 191: ...try Select the items to change and select Change Settings Select the button to display the previous screen and select the button to display the next screen For details on how to make this setting see...

Страница 192: ...edly until the System Settings screen is displayed 8 Select Close The machine is restarted and the screen displayed prior to the operation appears 1 Change Settings Close Address Number 001 Create Del...

Страница 193: ...displayed The System Administrator Password Entry screen is displayed when a System Administrator pass word has been set If a password has not been set press the Password System Settings button to di...

Страница 194: ...f the screen Repeat this procedure for each Address Number to be added To delete Recipients use the numeric keypad to select Address Numbers that are to be deleted and select the Delete button You can...

Страница 195: ...em Administrator pass word has been set If a password has not been set press the Password System Settings button to display the System Settings screen If the System Administrator Password Entry screen...

Страница 196: ...n the screen and the numeric keypad to enter a Comment and select Save A comment can contain up to 18 characters For details on how to enter characters see 1 5 Entering Text P 8 6 Select Close repeate...

Страница 197: ...on the mail forward ing function see 13 4 3 Forwarding a Fax as E mail From Mailbox P 287 In the following examples we will use the touch panel to describe operating procedures Procedure 1 Press Passw...

Страница 198: ...nu The Setup Menu screen is displayed 3 Select Mailbox The Mailbox screen is displayed 4 Select the Mailbox to enter and select Create Delete Select the button to display the previous screen and selec...

Страница 199: ...te Delete screen is displayed XXX indicates entered Mailbox Number When a password is not to be entered Select Off and select Save The Mailbox XXX Create Delete screen is displayed XXX indicates enter...

Страница 200: ...Mailbox Saves documents Print Prints documents automatically To store Private Polling documents set the Save button for 5 Delete Save Documents Forward Forwards documents to the specified recipient o...

Страница 201: ...ther or not Mailbox documents are to be deleted after retriev ing or printing Save Saves documents Delete Deletes documents 7 Check the entries made in the Create Delete screen and select Close The Ma...

Страница 202: ...ed by incoming line Procedure 1 Press Password System Settings The System Settings screen or System Administrator Password Entry screen is displayed The System Administrator Password Entry screen is d...

Страница 203: ...the next screen Line 2 and 4 can be specified when an option is installed The NN Line 1 File Destination screen is displayed NN indicates a line Common Settings Network Settings Print Mode Settings Co...

Страница 204: ...keypad 9 Select Save 10 Select Close repeatedly until the System Settings screen is displayed 11 To activate the File Destination Line Setup function see 9 8 7 Fax Control P 192 12 Select Exit The mac...

Страница 205: ...P 145 for details on File Destination Line Setup in the Output Destination File Destination screen see 9 7 Programming Sort to Mailbox Box Selector Entry P 178 9 8 1 Setup Method Procedure 1 Press Pa...

Страница 206: ...e is restarted and the screen displayed prior to the operation appears 9 8 2 Audio Tones This function sets fax feature tones This section describes the following fax features 9 Line Monitor Volume 10...

Страница 207: ...ernal telephone the ringing tone volume can be adjusted by using the volume control on the handset 9 8 3 Printing Priority Sets the print priority of fax received documents and documents which is rece...

Страница 208: ...ry 50 print operations Referring to the table below use the numeric keypad to enter the desired value The default values 0 is Off Setting value Description 18 Take priority 28 Second in order of prior...

Страница 209: ...numeric keypad to enter the desired value The default values 0 is Off 4 Transmission Report Canceled You can determine whether or not a Transmission Report Canceled is to be printed out automati cally...

Страница 210: ...t prints to both sides Referring to the table below use the numeric keypad to enter the desired value The default values 0 is Off 9 Recipient on Activity Report You can determine how many digits of ot...

Страница 211: ...when the Address Book is opened Use the numeric keypad to enter the desired value The default value is 001 For details on the Address Book see 3 4 5 Using the Address Book P 30 3 Transmission Screen S...

Страница 212: ...mmands 1 Resolution This function allows you to set the default value for Resolution in the Basic Features screen Referring to the table below use the numeric keypad to enter the desired value The def...

Страница 213: ...able below use the numeric keypad to enter the desired value The default value 3 is Normal For details on Lighter Darker see 3 1 3 Lighter Darker P 21 4 Mixed Size Originals This function allows you t...

Страница 214: ...set the default value of the Send Header in the Send Options screen can be set use the numeric keypad to enter the desired value The default value 1 is On For details on Send Header see 8 9 Transmitt...

Страница 215: ...s used The default value of the iFAX Profile can be set in the On Hook Others screen Use the numeric keypad to enter values as shown in the table below The default value 0 is TIFF S For details on iFA...

Страница 216: ...ngs Close Fax Control Items Current Settings 2 5 6 Redial Attempt 7 Redial Interval 8 Transmission Interval 9 Batch Send 10 Auto Switch Time 1 5 0 8 1 Change Settings Close Fax Control Items Current S...

Страница 217: ...n Store for Polling see 8 12 Preparing to Be Polled Store for Polling P 112 4 Rotate 90 You can set the image to rotate automatically so that the image can be transmitted without reducing the image si...

Страница 218: ...nsmission Interval the longer the total time spent for operations like Broadcast Send but the machine can receive faxes during the standby time Use the numeric keypad to enter the desired value A valu...

Страница 219: ...ceiving Mode Referring to the table below use the numeric keypad to enter the desired value The default value 0 is Auto Receive For details on the Fax Receiving Mode see 6 1 Reception Mode P 68 12 Bor...

Страница 220: ...ote sending machine of the paper size Select Tray Mode or User Mode The default value is Tray Mode In the User Mode the following paper sizes can be selected A3 A4 A4 A5 B4 B5 8 5 11 and Select All Th...

Страница 221: ...documents see Chapter 2 Loading Documents P 9 18 Reduce 8 5 11 Original to A4 When Reduce Enlarge in the Scan Options screen is set to Auto it is possible to select whether or not a received 8 5 11 i...

Страница 222: ...Procedure This function determines what to do when the machine runs out of hard disk space while scanning a fax document Referring to the table below use the numeric keypad to enter the desired value...

Страница 223: ...e Output Destination Line Setup set tings Line 2 and 4 can be specified when an option is installed Referring to the table below use the numeric keypad to enter the desired value The default value 0 i...

Страница 224: ...esets 1 to 7 Referring to the table below use the numeric keypad to enter the desired value The default values starting from R E Preset 1 are 3 is 50 0 7 is 70 7 8 is 81 6 9 is 86 6 10 is 115 4 11 is...

Страница 225: ...s Select and set the button The default values starting from 1 Scan Size 1 is as follows A3 A4 A4 A5 B4 B5 B5 11 17 8 5 14 8 5 11 8 5 11 A B Series Size A3 A4 A4 A5 A5 A6 A6 B4 B5 B5 B6 B6 Inch Size 1...

Страница 226: ...9 8 Other Items 202 Setting up System Administration Mode Fax Functions 9...

Страница 227: ...cally 207 10 2 3 Printing a Transmission Report 208 10 3 Extended Features Settings List 210 10 4 Address Book 211 10 5 Comment List 212 10 6 Box Selector List 213 10 7 Activity Report 214 10 8 Transm...

Страница 228: ...s of trans missions with a thumbnail of the first page Printed automatically after the transmission is completed normally set ting required If a com munication ends abnormally a Fail to send Pass this...

Страница 229: ...ting is performed by our engineers For details on print methods see 10 2 Printing Reports and Lists P 206 For details on setting up report printing see 10 2 2 Printing Reports and Lists Automatically...

Страница 230: ...and the Fax Mode Settings button in the Print Report List screen 10 2 1 Guide Print Operation Procedure 1 Press Machine Status The Machine Status screen is displayed Button name Printed report list J...

Страница 231: ...an be set to print automatically For details on printing a Transmission Report see 10 2 3 Printing a Transmis sion Report P 208 For details on printing reports other than the transmission report see 9...

Страница 232: ...enters P 284 For details on Transmission Report see 10 8 Transmission Report P 217 Procedure 1 Display the Fax screen 2 Select Transmission Report in the Send Options screen The Transmission Report sc...

Страница 233: ...ports Lists 3 Select On 4 Select Save Save Cancel Transmission Report On Off This feature automatically prints a report after each fax transmission indicating the transmission result Next Recipient En...

Страница 234: ...items that can be checked are listed below Fax Screen Defaults Fax Features Defaults Fax Control Received Document File Destination Reduce Enlarge Presets Scan Size Defaults For details on each item s...

Страница 235: ...Group and Sub dial List are printed When all stations are selected the Address Book the Relay Station List and Group and Sub dial List for all Address Numbers are printed This report can be printed ma...

Страница 236: ...ually For details on how to print see 10 2 1 Guide Print Operation P 206 For details on Cover Note see 8 10 Transmitting Documents With a Cover Page Cover Note P 107 for details on entering comments s...

Страница 237: ...ly For details on how to print see 10 2 1 Guide Print Operation P 206 For details on the sorting function see 8 15 Sorting Received Documents Into Mailbox Box Selector P 135 Box Selector by Line Type...

Страница 238: ...ile waiting to be transmitted or redialed System errors or power outages that occurred during transmission The Activity Report can be printed in two ways Automatic printing The Activity Report is prin...

Страница 239: ...ing up see 9 8 4 Reports P 184 The factory set default displays the first 40 digits Start Time The date and time that the communication began are shown In Batch Send the start time of the transmission...

Страница 240: ...specified at transmission Status The result of the operation is indicated here Normal The operation ended normally Busy The recipient is busy or did not answer Auto resend The document is being resen...

Страница 241: ...e not printed for communications that are waiting to be transmitted or redialed Transmission Reports indicating failed transmission are not printed for communications that were canceled while waiting...

Страница 242: ...Communication mode EC or G3 SG3 Transmitting when all digits are dialed Remote terminal name G3 ID including spaces Tel No Communication mode EC or G3 SG3 Receiving Remote terminal name G3 ID includin...

Страница 243: ...printed when Relay Broadcast and Relay Broadcast Assignment are both specified at transmission Status The result of the operation is indicated here Normal The operation ended normally Busy The recipi...

Страница 244: ...ation of the other party is recorded Document No Job numbers that the machine automatically assigned to documents when the documents were received Result Either of the following is recorded depending...

Страница 245: ...pera tion For details on settings see 10 2 2 Printing Reports and Lists Automatically P 207 The Broadcast Report and the Multi Poll Report are not identical They are printed separately Both the size a...

Страница 246: ...3 Start Time The date and time that the communication began are shown In Batch Send the start time of the transmission for each document is recorded Duration The communication length is indicated In B...

Страница 247: ...cast and Relay Broadcast Assignment are both specified at transmission Status The result of the operation is indicated here Normal The operation ended normally Busy The recipient is busy or did not an...

Страница 248: ...te terminal name G3 ID including spaces Tel No Communication mode EC or G3 SG3 Transmitting when all digits are dialed Remote terminal name G3 ID including spaces Tel No Communication mode EC or G3 SG...

Страница 249: ...box XXX Transmitting telephone number box XXX XXX indicates the Mailbox number Relay Broadcast is printed when Relay Broadcast and Relay Broadcast Assignment are both specified at transmission Status...

Страница 250: ...tically it is automatically printed when documents are stored in the Mailbox For details on settings see 10 2 2 Printing Reports and Lists Automatically P 207 To automatically output the Mailbox Docum...

Страница 251: ...the transmitted document was stored into the mem ory or the document was received is indicated The time a report was made is also indicated For other oper ations such as a Multi Poll the time the oper...

Страница 252: ...t Pending job Print document in Mailbox Scan Document imported by scanning Network transmission Document to be sent from Mailbox via network Work document Document created by the machine for internal...

Страница 253: ...11Troubleshooting 11 1 Troubleshooting 230 11 1 1 Problems With Transmission 230 11 1 2 Problems With Reception 231 11 1 3 Other Problems 231 11 2 Error Code List 234...

Страница 254: ...4 Phone line settings Print an Expanded Features Settings List to check that the dial is appropriate Correct the settings if necessary 9 2 Entering Local Terminal Information P 145 Phone number of re...

Страница 255: ...Mode on The machine cannot receive documents in the System Administration Mode Exit the System Administration Mode Is telephone line connec tion right Check that the phone line is connected correctly...

Страница 256: ...e settings 9 8 7 Fax Control P 192 Is the System Administration Mode on The machine cannot receive documents in the System Administration Mode Exit the System Administration Mode Received data is not...

Страница 257: ...dge damaged Make a copy to check the condition of the drum car tridge Replace the drum cartridge if necessary Is the scanner of the remote machine clean Ask the remote station Poor output quality may...

Страница 258: ...TP server does not support confirmation of mail distribution DSN Send mail without setting confirmation of mail distribution DSN 020 501 020 79 795 Is the telephone line modular jack correctly connect...

Страница 259: ...hing wrong with the remote fax Call the other party to make sure Out of paper Paper jam Memory full The remote machine does not support G3 reception When specifying features such as a Relay Broadcast...

Страница 260: ...11 2 Error Code List 236 Troubleshooting 11...

Страница 261: ...iew 238 12 2 Direct Faxing 239 12 3 Entering Recipient List 243 12 3 1 Entering Fax Recipient Information Directly 243 12 3 2 Importing From Fax Recipient Data 245 12 3 3 Importing From Fax Phonebook...

Страница 262: ...the same way you would print a document This is known as the direct faxing To send extremely high resolution A3 sized document 600 600 dpi you need to install the 128MB Memory Kit option Report Report...

Страница 263: ...wing describes the operating procedures using Windows 98 WordPad The operations performed in the Property screen depend on the application See the instructions in respective application Functions not...

Страница 264: ...y list of fax recipients enter the respective information of each fax recipient at Name and Fax Number and then click To You can also enter the recipient by clicking Import To List to import from a fa...

Страница 265: ...ompany fax number telephone number e mail address This button will not be available for fax recipients whose particulars are entered directly on the Fax Recipient dialog box Comm Settings Click to dis...

Страница 266: ...Job Confirmation dialog box appears Check that the Recipient Information is correct and then click OK to send the fax job To cancel the job click Abort If you wish to send the fax at a later time chec...

Страница 267: ...k entries Fax recipients can be individuals or groups to whom the fax is to be sent This section describes operating procedures using Windows 98 12 3 1 Entering Fax Recipient Information Directly The...

Страница 268: ...letters will be translated into numbers as follows 1 ABC 2 DEF 3 GHI 4 JKL 5 MNO 6 PQRS 7 TUV 8 WXYZ 9 You may enter an Address Number instead of a fax number Click the check box Input Address Number...

Страница 269: ...V proceed to step 4 Address Number Data EWS CSV proceed to step 5 3 When Windows Address Book WAB has been selected for Data Type Selecting Windows Address Book WAB on the Import Fax Recipient dialog...

Страница 270: ...alog box will display a check box Auto Search for CSV Data Fields on it By default the check box is not selected to allow you to select a CSV data file to be imported A CSV Import dialog box will be d...

Страница 271: ...V file has been opened the import dialog box will display the Address Number fields of the file as entries for your selection From this dialog box select the required entry and then click To to enter...

Страница 272: ...he list is not dis played click Open Phonebook to open the recipient list To add new recipients to the Phonebook click New 3 Select the required entry in the list box on the left and then click To to...

Страница 273: ...or Host name in the browser address field and press the Enter key The Internet Services screen is displayed 3 Click the Properties tab and select Address Book in the left frame of the screen that is...

Страница 274: ...umber From a PC 250 Direct Transmission of Faxes From a Computer 12 5 Make the required entries and click Apply New Settings at the bottom of the right frame The setting is transferred to the machine...

Страница 275: ...3 Receiving and Sending E mails 270 13 3 1 Sending E mails 270 13 3 2 Settings That are Configurable During an Outgoing iFax Transmission 273 13 3 3 Receiving E mails 279 13 4 Useful Features 281 13 4...

Страница 276: ...nfiguration and characteristics of the iFax of this machine System Configuration of iFax iFax performs its transmission via the Intranet or Internet unlike normal faxes that transmit via a public tele...

Страница 277: ...ed by the machine to the iFax installed machines or computers as E mail attachments in TIFF format This feature helps you to save on telephone bills as it transmits via existing Intranet or Internet D...

Страница 278: ...ive E mails The TIFF file formats and profiles that can be used for receiving E mails are as follows File format TIFF FX RFC2301 Profile TIFF S TIFF F TIFF J TIFF C If the received profile is not comp...

Страница 279: ...lbox by the Box selector function can be forwarded automatically as E mails As you can forward a fax document to a specified computer and display the fax image on the screen you do not have to collect...

Страница 280: ...cted to the network via the Internet When faxes are received the iFax installed machine converts them into faxes and forwards them to the specified facsimile This feature is useful to save on transmis...

Страница 281: ...atus screen the Transmission Report and the Job His tory Report of this machine indicate that the document has reached the SMTP server that was set for transmission on this machine The E mails may not...

Страница 282: ...e processed vary Confirm the profile that can be processed by the recipient s machine equipped with iFax before specifying the profile When the specified profile is not compatible If the received prof...

Страница 283: ...ed the iFax installed machine fax gateway converts them into faxes and forwards them to the specified facsimile This feature is useful to save on transmission cost if the sender and recipient of the f...

Страница 284: ...ginal document as a TIFF file attachment to the E mail As the attachment can be delivered to the computer you can save pro cess or edit the file If TIFF J is configured as the profile the file may not...

Страница 285: ...profile which is not corresponding is received Moreover if a TIFF C format is received it will be printed by black and white E mail forwarding Facsimile forwarding RFC2304 RFC2305 DSN function RFC189...

Страница 286: ...the Activate the port For details on setting operation see 13 2 3 Setup the Environment P 266 Use Internet Services to set up the E mail and the TCP IP environment See Setting Information P 263 in 13...

Страница 287: ...l environment that you are using E mail received in POP3 format can not be received in the Mailbox Also faxes can not be sent using the fax gateway feature Set the method of receiving E mails To recei...

Страница 288: ...e computer and set up with the Internet Services 4 Host name dcc400 If the sender has specified the IP address the settings for host name are not nec essary 5 DNS server address xxx xxx xxx xxx You ca...

Страница 289: ...xxx Set the following settings as required Start up the computer and set up with the Internet Services 4 SMTP server address xxx xxx xxx xxx Set the IP address for the outgoing mail server 5 Machine...

Страница 290: ...IP address using the Control Panel or the TCP IP in Protocol Settings on the Property screen in CenterWare Internet Services It is necessary to set Sub net Mask and Gateway Address depending on the ne...

Страница 291: ...for the reception protocol SMTP POP3 Host name Set the host name for this machine Alphanumeric characters and less than 32 bytes Method to get the DNS server address Set the method to get the DNS ser...

Страница 292: ...annot be sent because of an error Enable Disable Split size of outgoing mail Set the number of pages to split the manuscript into while the machine is scanning it when sending E mail Set the number of...

Страница 293: ...server address Set the SMTP server address Up to 128 charac ters can be entered including and Domain filter To limit the domains that E mail can receive check Valid in the checkbox then set the domain...

Страница 294: ...ue to the problems on the trans mission route of the Internet The machine will not be notified when this problem occurs It is rec ommended to confirm the successful transmission of the E mail with the...

Страница 295: ...ail address using Speed Dialing One Touch Dialing Group Dialing Num ber Address Book See 3 4 Dialing P 27 for details Menu Basic Features Scan Options Send Options On Hook Others A B C Text Photo Text...

Страница 296: ...scanned a screen will be displayed to prompt the user to determine whether the job is to be sent up to the stored pages or aborted Choose either one of the processes If the printer memory becomes full...

Страница 297: ...1 2 Original Type P 21 Lighter Darker 3 1 3 Lighter Darker P 21 Scan Options 2 Sided Originals 8 1 Transmitting Two sided Origi nals 2 Sided Originals P 84 Scan Size 8 2 Specifying Document Size for T...

Страница 298: ...By using the DSN feature you can check the mail delivery only to the mail server that supports the Delivery Status Notification feature Also you cannot check whether mail is delivered if any of the m...

Страница 299: ...Basic Features Scan Options Send Options On Hook Others Cover Note Off Communication Mode G3 Auto Recipient Print Sets 1 Set s Priority Send Delayed Start Priority Send Off Delayed Start Off Transmis...

Страница 300: ...e System Administration Mode See 9 8 6 Feature Defaults P 188 for details on entering text The default factory setting is TIFF S Select one of the following three profiles TIFF S Standard specificatio...

Страница 301: ...i Super fine 600dpi iFax Fax Address Book Keyboard Resolution Original Type Lighter Darker Next Recipient Enter recipient s Fax No Memory 100 Fax No Menu Basic Features Scan Options Send Options On Ho...

Страница 302: ...he direction in which it is loaded and displayed on the monitor of the computer that receives it Split Size of Outgoing Mails If originals scanned by the machine are split and sent according to the Sp...

Страница 303: ...e Internet Services you will receive E mails only from allowed domains See 9 6 Creating a Mailbox P 173 for details on Mailbox and Box command Printing size Received E mails will be printed in the sam...

Страница 304: ...e of the problem through the Job History Report When the Mailbox overflows When printing an E mail from a Mailbox memory the page that is being printed will be deleted at the point when the facsimile...

Страница 305: ...box Documents Report This section describes the procedure assuming the iFax feature is installed on the machine This feature is available only when the Mailbox receives E mails via SMTP To use this fe...

Страница 306: ...ails on configurable items Menu Basic Features Scan Options Send Options On Hook Others A B C Text Photo Text Photo Fine Standard Super fine 400dpi Super fine 600dpi iFax Fax Address Book Keyboard Res...

Страница 307: ...memory becomes full while an original is being scanned a screen will be displayed to prompt the user to determine whether the job is to be sent up to the stored pages or aborted Choose either one of t...

Страница 308: ...on cost if the sender and recipient of the fax transmission are in the local call area This feature is available only when the method of receiving E mail of the machine equipped with iFax fax gateway...

Страница 309: ...P 273 for details on configurable items Menu Basic Features Scan Options Send Options On Hook Others A B C Text Photo Text Photo Fine Standard Super fine 400dpi Super fine 600dpi iFax Fax Address Boo...

Страница 310: ...Problems With Transmission P 291 if you cannot send the E mail See Chapter 5 Confirming and Canceling a Communication P 61 for details on how to con firm and cancel the transmission of a document If...

Страница 311: ...h the Box Selector function can be forwarded as E mails The following only describes the operations to set up the forward function of a mailbox and the overview of the Send to Mailbox E mail cannot be...

Страница 312: ...chine Moreover the fax documents can be displayed on the computer screen and thus helps to cut down paper usage The document can be forwarded to only one recipient How to forward E mails The following...

Страница 313: ...the documents will be deleted You can forward the mail to only one recipient If the images in the received fax use JBIG compression format when the destination s IFAX pro file is TIFF C or TIFF F the...

Страница 314: ...st You can check the registering status of the domains that are approved for receiving This report can be manually printed See 13 3 3 Receiving E mails P 279 for details on Approved Domain See 10 2 1...

Страница 315: ...ress of your machine Machine Mail Address and SMTP Server Address has been correctly set up Is the E mail address of the recipient correctly specified Check the E mail address of the recipient as disp...

Страница 316: ...ress has been correctly set up Is the method for receiving E mail appropriate for your environment Depending on your environment the settings for the method of receiving E mails SMTP or POP differ Che...

Страница 317: ...ion When you want to send the number of the pages in the E mail confirm the system environment of the sender and recipient respectively If the split size of outgoing mails for one page is too large re...

Страница 318: ...mail cannot be sent to the recipient correctly after it is converted into a fax the E mail received in the receiving machine will be deleted Configuring the Forward Function of the Mailbox Do not sen...

Страница 319: ...ils There is a feature in iFax that allows you to prevent a third party from sending unwanted mails to your E mail address This feature allows you to restrict the address of a sender by specifying the...

Страница 320: ...13 7 Precautions and Limitations 296 13 Using the Internet to Send and Receive Faxes...

Страница 321: ...1Appendix A Specifications 298 B Glossary 299...

Страница 322: ...ry 500 stations 001 to 090 are for one touch dialing Available telephone lines PSTN Scanning line density Super fine 600 dpi 600 600 dpi 25 4 mm Super fine 400 dpi 400 400 dpi 25 4 mm 16 15 4 lines mm...

Страница 323: ...used for sending and receiving mail Super G3 SG3 A G3 communication system conforming to ITU V 34 This system offers higher transmission speed 33 6 kbps than the normal G3 mode Remote terminal A term...

Страница 324: ...to specify the use of fixed paper sizes for fax receptions The receiving machine informs the sending machine of the paper sizes available Job The term Job refers to document reception and transmission...

Страница 325: ...ying a profile Header The Send Header printed on the first line of received documents Polling A feature that allows you to retrieve a document from a remote machine Sender A terminal from which a comm...

Страница 326: ...B Glossary 302 Appendix...

Страница 327: ...pression 298 Delayed start 102 151 Delete save documents 173 DNS domain name 264 DNS server address 264 Document size 10 87 298 Document weight 10 E E mail Address 152 Error code 234 Extended features...

Страница 328: ...ook dialing 78 On hook other screen 7 One touch dialing 29 On hook dialing 78 Original type 21 Output destination line setup 181 P Password 173 Polling 116 POP user name 265 POP user password 265 POP3...

Страница 329: ...taneous broadcast send 40 SMTP server address 264 265 Speed dialing 28 Store for polling 112 118 Stored documents list 227 Subnet mask 264 265 Symbols 33 System administration mode 142 System settings...

Страница 330: ......

Страница 331: ...WorkCentre 24 User Guide Facsimile July 2003...

Страница 332: ......

Отзывы: