background image

CLEANING

6-6

XEROX DOCUPRINT 96/4635/180 IPS GUIDE TO PERFORMING ROUTINE MAINTENANCE

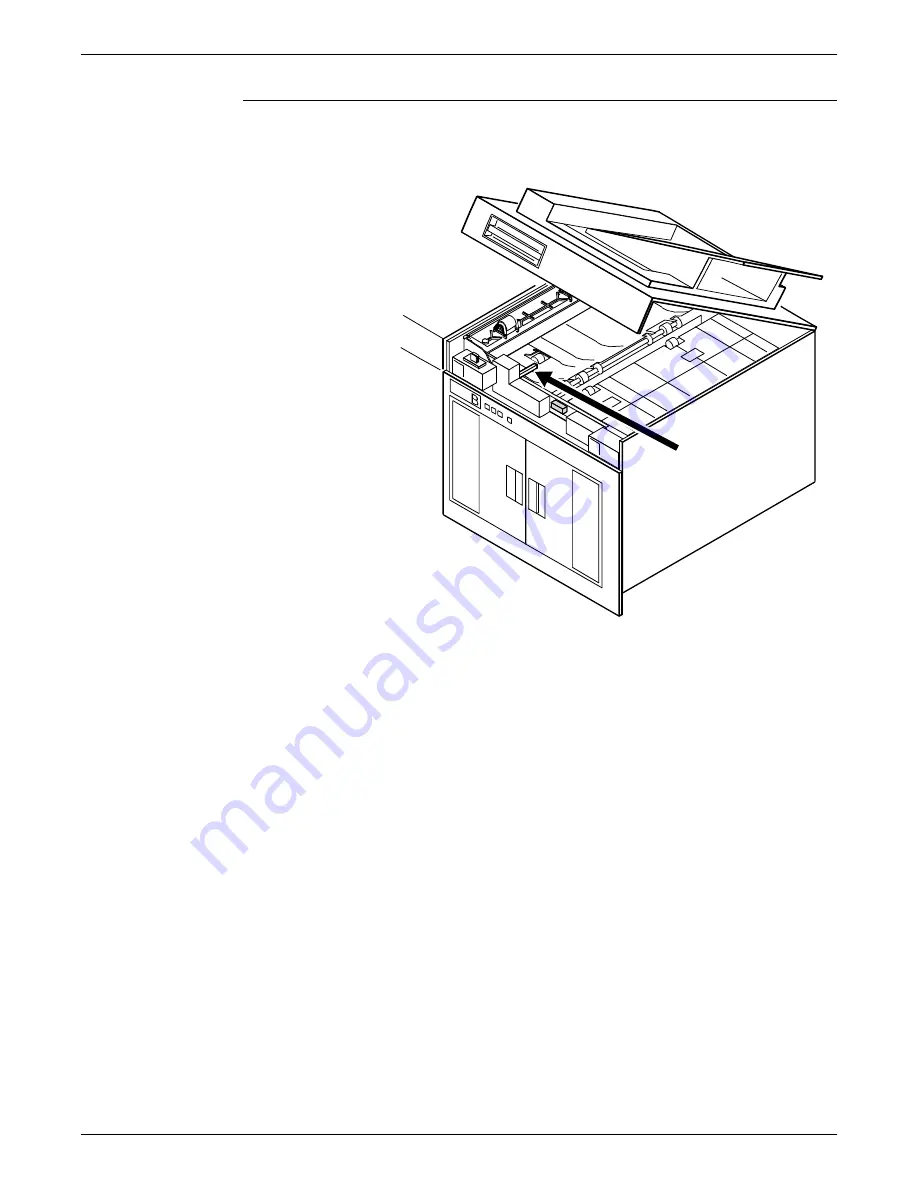
Sensor Q1164

Sensor Q1164 is on the last feeder/stacker module (the one 
containing the purge tray), as shown below. Clean the sensors gently 
with a cleaning pad.

Содержание DocuPrint 180

Страница 1: ...Xerox DocuPrint 96 4635 180 IPS Guide to Performing Routine Maintenance Version 7 1 August 2000 721P88160...

Страница 2: ...after granted including without limitation material generated from the software programs which are displayed on the screen such as icons screen displays looks etc Printed in the United States of Ameri...

Страница 3: ...is completely enclosed during all modes of customer operation The laser danger labels on the system are for Xerox service representatives and are on or near panels or shields that must be removed with...

Страница 4: ...erox equipment Use of unsuitable materials may result in poor performance and may create a hazardous situation Never move either the printer or the Printer Controller without first contacting Xerox fo...

Страница 5: ...1 7 2 Output trays and bins 2 1 Checking and unloading sample trays 2 1 Checking and unloading purge trays 2 1 Checking and unloading high capacity stacker HCS bins 2 2 3 Fuser lubricant 3 1 4 Adding...

Страница 6: ...MING ROUTINE MAINTENANCE 7 Maintenance and support services 7 1 Xerox Customer Services Support Center 7 1 Xerox Documentation and Software Services 7 2 Xerox Font Center 7 2 Operator Training 7 2 Xer...

Страница 7: ...Before using this guide become familiar with its contents and conventions Contents This section lists the contents of this guide Chapter 1 Feeder trays provides information on how to load feeder tray...

Страница 8: ...GUI window titles matches the titles as they appear on the screen In cases where a window does not have a title it is referenced using all lower case For example At the graphical user interface use th...

Страница 9: ...pful Facts About Paper Installation Planning Guide Master Index Messages Guide Solutions Guide System Overview Guide Troubleshooting Guide Xerox Standard Font Library Font User Guide The documentation...

Страница 10: ...INTRODUCTION x XEROX DOCUPRINT 96 4635 180 IPS GUIDE TO PERFORMING ROUTINE MAINTENANCE...

Страница 11: ...eder tray by examining the green lights on the door of the tray Each light represents 25 percent of a ream or about 125 sheets of 20 pound or 80 gsm grams per square meter paper Figure 1 1 Feeder tray...

Страница 12: ...rl is consistent Avoid fanning the paper unless the stock is predrilled Do not load the paper above the MAX line on the length guide Place any paper left in the bottom of the tray on top of the new pa...

Страница 13: ...rays 1 and 2 Follow these steps to load feeder trays 1 and 2 1 Select the tray you want to load by pressing the Tray Unlock button on the door of the paper tray or by touching the appropriate unlock i...

Страница 14: ...d discard it There will be some resistance 5 Squeeze the lever against the back of the length guide and slide the guide toward the back of the printer 6 Remove any paper remaining in the tray and set...

Страница 15: ...S XEROX DOCUPRINT 96 4635 180 IPS GUIDE TO PERFORMING ROUTINE MAINTENANCE 1 5 Caution Do not load above the MAX line shown on the paper guide 8 Pull the length guide forward to touch the back of the p...

Страница 16: ...n dot next to the green release lever until the assembly clicks into position 10 Push the tray in slowly but firmly until it latches Do not slam the tray closed This can cause improper latching or mac...

Страница 17: ...the paper tray or by touching the appropriate unlock icon on the printer console Note If the printer has stopped due to a low paper condition you do not need to press the Tray Unlock button 2 Wait unt...

Страница 18: ...e new paper 6 Load paper following the instructions on the label at the front of the feeder tray and carefully positioning the paper in the right front corner of the tray Note The way you load the pap...

Страница 19: ...the feeder trays a message displays asking you to make sure the printer is warmed up ready and loaded with the proper media The message displays the media defined for the tray as well as the paper cur...

Страница 20: ...FEEDER TRAYS 1 10 XEROX DOCUPRINT 96 4635 180 IPS GUIDE TO PERFORMING ROUTINE MAINTENANCE...

Страница 21: ...a paper jam can occur if the tray is allowed to overfill empty the sample tray regularly if it is in use To empty the sample tray simply remove the printed pages Note Since the sample tray can receive...

Страница 22: ...l out and unload any bin not currently in use without interrupting printing as long as another HCS is ready to receive paper If you select a bin that is in use the printer begins stacking in the next...

Страница 23: ...nearby table or paper cart Caution Always use both hands to lift the paper stack out of the bin 3 Firmly push the platform back to its original position and close the bin doors The bin elevator rises...

Страница 24: ...OUTPUT TRAYS AND BINS 2 4 XEROX DOCUPRINT 96 4635 180 IPS GUIDE TO PERFORMING ROUTINE MAINTENANCE...

Страница 25: ...int image to the paper with heat It is critical that the fuser be kept lubricated with fuser agent and that its reservoir be kept full This chapter describes the procedure for adding fuser lubricant i...

Страница 26: ...NE MAINTENANCE 3 Grasp the green handle on the fuser drawer and pull it out until it stops 4 Put on gloves Warning Fuser agent contains silicone which can cause irritation upon contact with the eyes B...

Страница 27: ...AINTENANCE 3 3 5 Locate the fuser agent reservoir pull it out until it stops and remove the reservoir cap by turning it counterclockwise 6 Remove the cap from a new bottle of fuser agent and carefully...

Страница 28: ...reservoir in until it stops 8 Push the fuser drawer in until it latches in place 9 Dispose of the dropcloth and any empty agent bottles in a trash receptacle If there is any agent left in the bottle c...

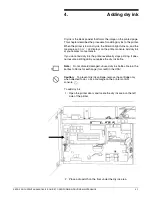
Страница 29: ...ry ink at your earliest convenience If you do not add dry ink the printer eventually stops printing It does not resume printing until you replace the dry ink bottle Note Do not discard damaged unused...

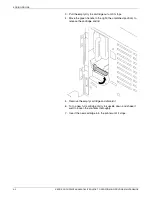
Страница 30: ...dge out until it stops 4 Move the green handle to the right the unlatched position to release the cartridge and lid 5 Remove the empty cartridge and discard it 6 Turn a new full cartridge of dry ink u...

Страница 31: ...he seal along with the dropcloth 11 Close the printer doors Caution If any dry ink gets on your hands wash them with soap and cold water If any dry ink gets on your clothes brush them with a dry paper...

Страница 32: ...ADDING DRY INK 4 4 XEROX DOCUPRINT 96 4635 180 IPS GUIDE TO PERFORMING ROUTINE MAINTENANCE...

Страница 33: ...nside the printer that does not fuse to paper during printing This container must be replaced when full To replace the dry ink waster container 1 Open the right and left printer doors and locate the d...

Страница 34: ...IDE TO PERFORMING ROUTINE MAINTENANCE 3 Pull the full waste container out of the printer 4 Remove the cap from the top of the full container and screw the cap onto the mouth of the container 5 Discard...

Страница 35: ...r 7 Close the printer doors 8 Dispose of the dropcloth Caution If any dry ink gets on your hands wash them with soap and cold water Heat sets the ink permanently If any dry ink gets on your clothes br...

Страница 36: ...REPLACING THE DRY INK WASTE CONTAINER 5 4 XEROX DOCUPRINT 96 4635 180 IPS GUIDE TO PERFORMING ROUTINE MAINTENANCE...

Страница 37: ...to anything electrical or mechanical For the same reason never spray or pour the cleaner directly onto the keyboard or the exterior surfaces of the system Cleaning the sensors and the reflective surfa...

Страница 38: ...g the Q850 sensor To clean the Q850 sensor 1 Open the printer right and left doors and locate area 4 2 Raise the area 4 green handle until it locks into place 3 Locate the Q850 sensor and gently wipe...

Страница 39: ...the Q1011 sensor and mirror To clean the Q1011 sensor and mirror 1 Open the right and left doors of the printer and locate the Q1011 sensor 2 Apply a small amount of lens and mirror cleaner to a clea...

Страница 40: ...leaning additional sensors Open the top cover of the high capacity stacker Locate and clean the following sensors with a cleaning pad Sensor Q1107 Sensor Q1107 is at the right front corner of the stac...

Страница 41: ...OCUPRINT 96 4635 180 IPS GUIDE TO PERFORMING ROUTINE MAINTENANCE 6 5 Q1106 and Q1166 Raise the platform by lifting the green handle Sensors Q1106 and Q1166 are shown below Clean the sensors gently wit...

Страница 42: ...CUPRINT 96 4635 180 IPS GUIDE TO PERFORMING ROUTINE MAINTENANCE Sensor Q1164 Sensor Q1164 is on the last feeder stacker module the one containing the purge tray as shown below Clean the sensors gently...

Страница 43: ...audio devices as these can damage your tape drive To clean the tape drive 1 Insert the cleaning cartridge into the tape drive as you would a regular tape cartridge 2 Observe the green LED blinking slo...

Страница 44: ...CLEANING 6 8 XEROX DOCUPRINT 96 4635 180 IPS GUIDE TO PERFORMING ROUTINE MAINTENANCE...

Страница 45: ...resentative Xerox Customer Services Support Center Before calling your Customer Service Support Center make sure you have tried the corrective actions described in the Xerox DocuPrint 96 4635 180 Trou...

Страница 46: ...rating company can send you samples and catalogs of the fonts available for your printer To receive font samples obtain price information obtain technical support or order licensed or custom fonts cal...

Страница 47: ...ed the serial number for your system The serial number is located behind the narrow door to the far left on the front of the printer If you are reporting meters for other Xerox printers during the sam...

Страница 48: ...cannot be cleared or reset This recording is reported by the customer Meter C counts all sheets fed into the paper path from trays 1 2 3 or 4 It is a user meter and can be cleared by the controller Me...

Страница 49: ...1166 6 5 Q850 6 2 customer education 7 3 D danger labels iii documentation other ix dry ink adding 4 1 4 3 stains 4 3 E education customer 7 3 F feeder trays 1 1 1 9 friction type feeders 1 2 fuser ag...

Страница 50: ...6 Q1166 sensor cleaning 6 5 Q850 sensor cleaning 6 2 R Ready to Open indicator 1 3 Ready to Unload indicator 2 2 reflective surfaces cleaning 6 1 Reporting billing meters 7 3 S safety hotline iv preca...

Страница 51: ...r cgm 1 8 IPS LPS Graphics dpc0706 eps 2 2 IPS LPS Graphics dpc0708 eps 2 2 IPS LPS Graphics qtc0244 clr cgm 3 1 IPS LPS Graphics qtc0245 clr cgm 3 2 IPS LPS Graphics qtc0246 clr cgm 3 3 IPS LPS Graph...

Отзывы: