


The Scanner’s Web Interface
Xerox
®
D70n Scanner
User Guide
9-7
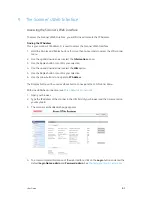
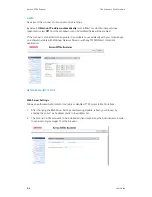
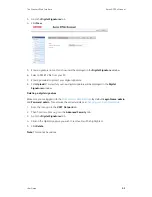
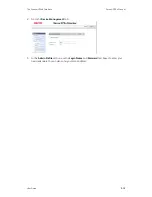
1. From the menu go to the
VAST Network
tab.
2. Then from its sub menu, go to the
Local
tab.
3. In the
Scanner Description
field. enter the desired scanner display name.
4. Click
Update
.
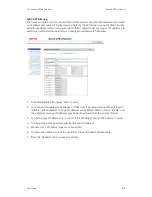
5. A prompt message will appear confirming that the request was successfully processed.
6. Click
OK
.
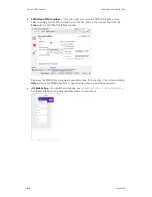
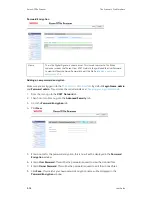
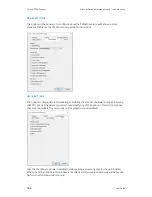
CLOUD
Registering a new scanner to the VAST Network Cloud
Make sure you are logged in to the
. By default:
Login Name: admin
and
Password: admin
. To customize these credentials, see
Changing your Login Credentials
.
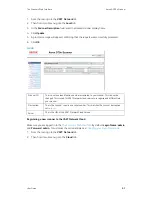
1. From the menu go to the
VAST Network
tab.
2. Then from its sub menu, go to the
Cloud
tab.
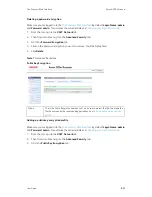
Scanner ID
This is a unique identification number associated to your scanner. This cannot be
changed. This is used for VAST Network cloud service to recognize and differentiate
your scanner.
Description
This is the scanner’s name and serial number. This matches the scanner description
set in
.
Server
This is the URL of the VAST Network Cloud Service.
Содержание D70n
Страница 1: ...Xerox D70n Scanner Scanner User Guide for Microsoft Windows FEBRUARY 2021 05 0999 000...
Страница 6: ...Xerox D70n Scanner Table of Contents vi User Guide...
Страница 18: ...Xerox D70n Scanner Scanner Setup 3 4 User Guide...
Страница 22: ...Xerox D70n Scanner The Scanner s LCD 4 4 User Guide...
Страница 34: ...Xerox D70n Scanner Wired Network Connection 6 4 User Guide...
Страница 36: ...Xerox D70n Scanner Installation for Use on Your Mobile Device 7 2 User Guide...
Страница 44: ...Xerox D70n Scanner Loading Documents to Scan 8 8 User Guide...
Страница 58: ...Xerox D70n Scanner The Scanner s Web Interface 9 14 User Guide...
Страница 82: ...Xerox D70n Scanner Scanner Options Maintenance and Troubleshooting 10 24 User Guide...