background image

1.  Setting up the DocuColor 2006

Printing the Test Page

1-70

Xerox DocuColor 2006

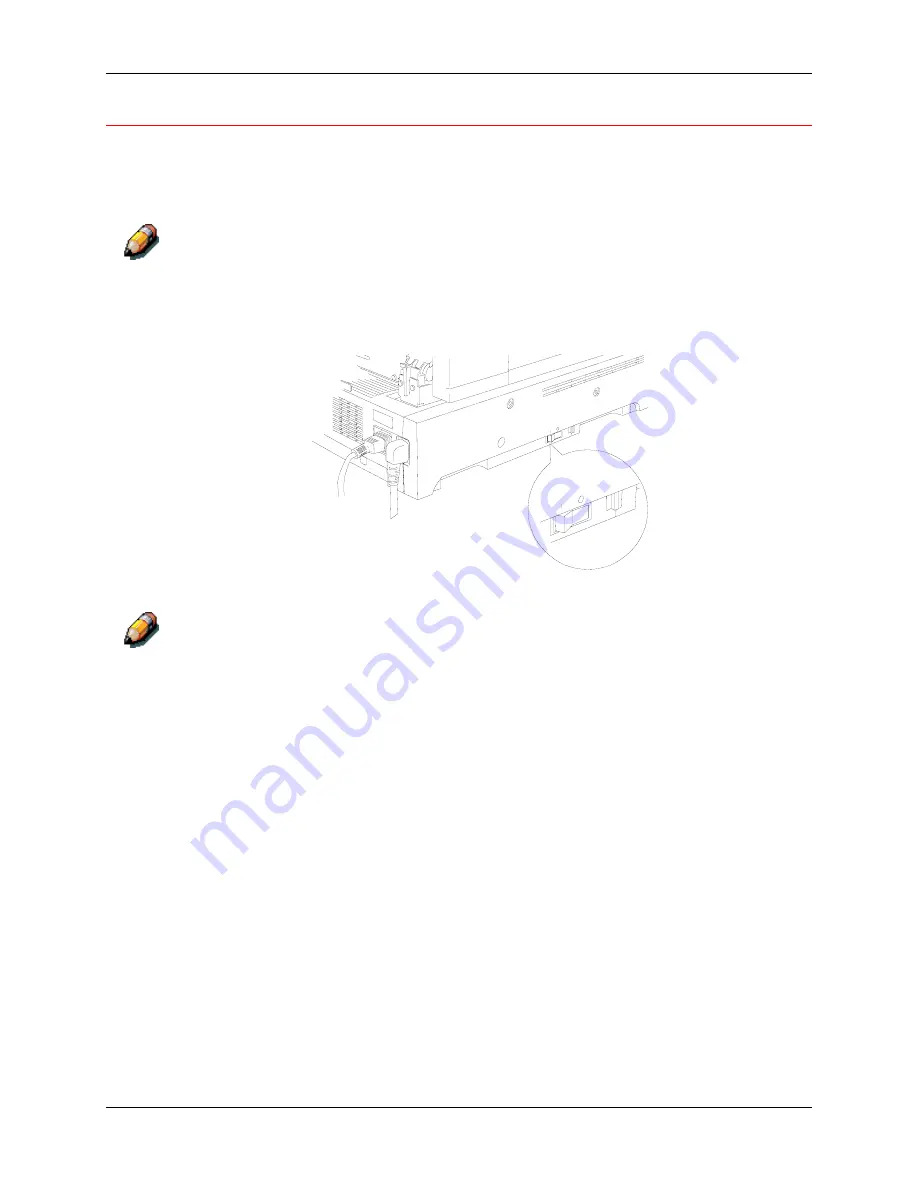
Switching off the power

1. 

Ensure that the READY message is displayed on the two Control
Panels.

Do not switch off the power if any other message is displayed.  There may
be a problem, or if the DocuColor 2006 is networked, it may be receiving
data.

2. Press 

the 

0

 on the ON/OFF button on the Scanner only.

301086

The Scanner controls the power for the Printer, therefore it is not necessary
to switch off the power on the Printer.

Содержание Copier

Страница 1: ...DocuColor 2006 Getting Started The Document Company XEROX...

Страница 2: ...plates icons screen displays looks etc Xerox The Document Company the digital X and all Xerox product names and product numbers mentioned in this publication are registered trademarks of Xerox Corpora...

Страница 3: ...carefully before operating the DocuColor 2006 Failure to follow the recommendations in this section may result in personal injury or rescinding of the machine maintenance agreement WARNING An improper...

Страница 4: ...ctly at the exposure lamps The exposure lamps are not harmful but they are very bright and may cause discomfort It is recommended that the Scanner Cover be closed when the DocuColor 2006 is in use Nev...

Страница 5: ...l operation The ozone produced is heavier than air and the quantity is dependent on the copy print volume Providing the correct environmental parameters as specified in Xerox installation procedures e...

Страница 6: ...Operation of this equipment in a residential area is likely to cause harmful interference in which case the user will be required to correct the interference at his own expense Changes or modification...

Страница 7: ...y Hertfordshire AL7 1HE ENGLAND Tel Number 44 0 1707 353434 WARNING This product is certified manufactured and tested in compliance with strict safety and radio frequency interference regulations Any...

Страница 8: ...x Corporation Environmental Health and Safety may void the user s authority to operate this equipment Shielded cables must be used with this equipment to maintain compliance with the Radio Communicati...

Страница 9: ...rinter 1 9 Printer installation 1 19 Installing the Duplex Tray 1 27 Loading paper in the paper tray 1 35 Installing the Scanner Stand 1 39 Installing the Scanner 1 45 Installing the Document Feeder 1...

Страница 10: ...dows 95 98 3 5 Before you begin 3 5 Installing the print driver 3 5 Windows 2000 3 7 Before you begin 3 7 Installing the print driver 3 7 Windows NT 4 0 3 9 Before you begin 3 9 Installing the print d...

Страница 11: ...lts It must also be protected for at least 15 amps for 115 volts or 8 amps for 240 volts If you are in doubt about a power source ensure that a qualified electrician checks the outlet Do not connect a...

Страница 12: ...6 and 1 2 inches 165 mm from the wall Obstructing the grilles could present a fire hazard Using the space requirements illustrated below ensures that the Printer has the ventilation it requires It al...

Страница 13: ...h the optional Sorter Stacker The following illustration shows the dimensions for the largest configuration of the copier printer which includes a Duplex Module and Sorter Stacker 67 inches 1702 mm 23...

Страница 14: ...rder to perform the installation of the DocuColor 2006 Following the instructions ensures that the DocuColor 2006 components are installed in the following order 1 2 Tray Module if ordered 2 Printer 3...

Страница 15: ...t least two people to remove it from the carton 1 Open the 2 Tray Module carton 2 Remove the styrofoam and the plastic wrap from the top of the 2 Tray Module 3 With a person on each side of the box gr...

Страница 16: ...top paper tray open until it stops and remove the packing shown below 0301008a 8 Close the top tray and repeat step 7 for the lower paper tray 9 Open both the paper trays WARNING Use care when removin...

Страница 17: ...r 2006 1 7 12 Remove the tape from the paper feed area access door and then open the door 301010B WOL 0 13 Remove the cardboard packing shown below 301011B WOL 0 14 Close the paper feed area access do...

Страница 18: ...1 Setting up the DocuColor 2006 Installing the 2 Tray Module 1 8 Xerox DocuColor 2006...

Страница 19: ...Copy Print Cartridge box Four Dry Ink boxes Yellow Cyan Magenta and Black CD package containing two CDs Getting Started Guide Recommended Materials List Power cord Output Tray 3 Pull the plastic wrap...

Страница 20: ...other area The Printer could fall and cause injuries 5 With a person at each corner place your hands inside the plastic wrap in the positions shown below CAUTION DO NOT lift or support the Printer by...

Страница 21: ...2 Tray Module with the corresponding holes in the Printer Aligning the left rear covers of the two devices will assist you in aligning the pins Aligning the pins and the left rear covers is shown bel...

Страница 22: ...ing up the DocuColor 2006 Unpacking the Printer 1 12 Xerox DocuColor 2006 9 Remove all the tape from the exterior of the Printer a Left side b Right Side 301018A WOL 0 c Inside the Front Cover 301019B...

Страница 23: ...1 13 10 Remove all the internal packing from the Printer by performing steps a through m a Remove the spacer labeled B 301025B WOL 0 b Remove the cardboard collar from the knob shown below 301245A WOL...

Страница 24: ...mbers 0 301027C WOL e Turn the knob in the direction of the arrow until it stops The next strip labeled G is visible 0 301028C WOL f Repeat steps c through e until all four of the strips labeled G are...

Страница 25: ...user area open and remove the spacers labeled A and J 301022C WOL 0 j Close the Fuser area k Open the Bypass Tray and remove the spacer labeled F 301020B WOL 0 l Gently pull the Bypass Tray in order t...

Страница 26: ...do not have a 2 Tray Module go to the next procedure Printer Installation If you installed the Printer on the 2 Tray Module perform the following steps a Remove the small cover from the rear of the P...

Страница 27: ...DocuColor 2006 Xerox DocuColor 2006 1 17 c While holding the cover on the 2 Tray Module closed align the small cover to the plastic rails and slide it into the Printer 301136A WOL 0 The next step Go...

Страница 28: ...1 Setting up the DocuColor 2006 Unpacking the Printer 1 18 Xerox DocuColor 2006...

Страница 29: ...the original packing go to the Unpacking the Printer procedure 1 Locate the Output Tray in the cardboard tray removed from the top of the printer Install the tray by performing steps a through c a Sta...

Страница 30: ...hand arm of the tray into the corresponding hole as shown 301033B WOL 0 301033b 2 Install the Copy Print Cartridge a Open the Front Cover of the Printer 301034B WOL 0 301034b b Rotate the yellow leve...

Страница 31: ...with the Unlocked symbol 301035B WOL 0 301035b 4 Install the Copy Print Cartridge a Remove the Copy Print Cartridge from the box b Tear open the notched end of the silver protective bag and remove the...

Страница 32: ...g the cartridge level remove the foam wrapper 301036c d Holding the cartridge by the handle align the guide with the Printer rail 0301037C W O L e Push the cartridge all the way into the Printer until...

Страница 33: ...ll the Dry Ink Cartridges Each Dry Ink Cartridge chamber is designated by a specific color Ensure that the correct Dry Ink Cartridge is installed into the corresponding color on the chamber The Dry In...

Страница 34: ...inter as far as it will go 301041c e Use the handle on the end of the cartridge to rotate the cartridge in the direction of the arrow Ensure that the dot on the cartridge is aligned with the Locked sy...

Страница 35: ...27c g Rotate the knob in the direction of the arrow until it stops at the next chamber 0 301028C WOL 301038c If the Dry Ink Cartridge is not in the Printer all the way the knob will not rotate 6 Repea...

Страница 36: ...1 26 Xerox DocuColor 2006 7 Close the Printer Front Cover 301077b The next step If you have ordered the optional Duplex Tray go to the Installing the Duplex Tray procedure If you do not have a Duplex...

Страница 37: ...print two sided output 1 Open the Duplex Tray box and remove the contents Duplex Tray Upper Inverter Lower Inverter Two Thumb Screws Small Connector Cover with cutout Special Tool 2 Remove the Duplex...

Страница 38: ...ewdriver remove the screw shown below 301050B WOL 0 301050b 5 To remove the cover shift it to the right then pull it away from the Printer Discard the cover 301051b 6 Install the Duplex Tray a Align t...

Страница 39: ...s of the Output Tray toward each other in order to remove the tray from the Printer 301053B WOL 0 301053b c Using a screwdriver remove the two screws from lower left hand cover of the Printer as shown...

Страница 40: ...rter Tray and Paper Tray 1 8 Using the Special Tool from the contents of the Printer carton remove the two small covers from the left hand side of the Printer Discard the two covers 301204a 9 Remove t...

Страница 41: ...and cable on the left hand side of the Lower Inverter are pulled back out of the way 10 Install the Lower Inverter as shown below 301057B WOL 0 301057b The Lower Inverter does not install flush with t...

Страница 42: ...mall connector from the Lower Inverter to the small jack located at the rear of the left hand side of the Printer 301059A WOL 0 f Reinstall the small Access Cover 301060B WOL 0 11 Install the Upper In...

Страница 43: ...Inverter to the small jack in the access hole as shown below 301132A WOL 0 301062b g Install the new Connector Cover with the cutout into the access hole guiding the wires through the cutout in the c...

Страница 44: ...e Duplex Tray 1 34 Xerox DocuColor 2006 12 Reinstall the Output Tray 301064B WOL 0 301064b 13 Connect the power cord to the Printer and the wall outlet 301071B WOL 0 0301070b The next step Go to the L...

Страница 45: ...e paper requirements for the DocuColor 2006 1 From the front of the Printer pull the paper tray out of the Printer as far as it will go 301128A WOL 0 301128a If you are loading paper in the 2 Tray Fee...

Страница 46: ...L 0 301067b 4 Place the right edge of the paper stack against the right metal edge and under the front right hand side paper tab as shown below 5 Ensure that the paper stack does not cover the MAX gui...

Страница 47: ...e appropriate paper size mark on the bottom of the tray Automatic paper size detection cannot occur if the vertical Paper Guide is out of position 8 Push the paper tray firmly into the Printer 301065b...

Страница 48: ...1 Setting up the DocuColor 2006 Loading paper in the paper tray 1 38 Xerox DocuColor 2006...

Страница 49: ...nstallation 1 Open the Scanner Stand carton 2 Ensure that the following parts are included in the carton 1 Right Leg 6 Rear Bottom Plate with casters 2 Left Leg 7 Spacer Bar 3 Right Support 8 2 Braces...

Страница 50: ...and Right Leg to the Rear Bottom Plate using eight screws as shown below 301143a 4 Install the Spacer Bar between the tops of the two legs using four screws You have just completed the Lower Assembly...

Страница 51: ...e table top face down on the floor a Place the Left Support and the Right Support into the table top and install the two screws This is the Upper Assembly 301202 b Install four screws through the supp...

Страница 52: ...lor 2006 8 Turn the Upper Assembly over and slide it into the legs of the Lower Assembly until it stops 301140a 9 Attach the two assemblies together using eight Allen Screws and the Allen Wrench 30113...

Страница 53: ...Installing the Scanner Stand 1 Setting up the DocuColor 2006 Xerox DocuColor 2006 1 43 11 Move the Scanner Table around the Printer as shown 301152a...

Страница 54: ...1 Setting up the DocuColor 2006 Installing the Scanner Stand 1 44 Xerox DocuColor 2006 The next step Go to the Installing the Scanner procedure...

Страница 55: ...le Power cable 3 Remove the plastic from the top of the Scanner and push it down the side of the carton away from the Scanner 4 With a person on each side of the box place your hands inside the plasti...

Страница 56: ...n order to secure the Scanner to the stand 301046a 8 Remove the three screws from the right hand side of the Scanner 301132a Please store these screws in a safe place or tape them to the rear of the S...

Страница 57: ...47 9 Connect the Scanner cables by performing the following steps a Install one end of the Interface Cable to the rear of the Scanner and the other end to the left hand side of the Printer 301131a b...

Страница 58: ...ocuColor 2006 Installing the Scanner 1 48 Xerox DocuColor 2006 c Connect the Scanner power cord to the wall outlet and to the rear of the Scanner 301080 The next step Go to the Installing the Document...

Страница 59: ...o 30 originals of 75 gsm paper may be placed in the Document Feeder at a time WARNING The Document Feeder weighs 24 pounds 11kg Take extreme care when handling the feeder 1 Check the contents of the k...

Страница 60: ...ument Feeder 1 50 Xerox DocuColor 2006 4 Using both hands lift the cover straight up and remove This cover may be discarded 301222a 5 Use a screwdriver to loosen and remove the two small covers shown...

Страница 61: ...he following steps WARNING The Document Feeder weighs 24 pounds 11kg Use extreme care when handling the feeder a Remove the protective packing from the front edge of the Document Feeder 03301227A W O...

Страница 62: ...ng the Document Feeder 1 52 Xerox DocuColor 2006 c Using both hands push the Document Feeder toward the front of the Scanner This secures the Feeder to the posts 0301230A W O L d Install the two knobs...

Страница 63: ...the DocuColor 2006 Xerox DocuColor 2006 1 53 7 Connect the cable to the back of the Scanner and tighten the two screws 0301249A W O L 8 Install the Exit Tray 0301250A W O L 9 Reconnect the power cord...

Страница 64: ...006 Installing the Document Feeder 1 54 Xerox DocuColor 2006 The next step If you are installing the optional Sorter Stacker go to the Installing the Sorter Stacker procedure Otherwise go to the Print...

Страница 65: ...ice personnel or installation personnel or the customer may install it The Sorter Stacker functions are available to copy jobs only Sorting functions are not available to print jobs 1 Ensure that ther...

Страница 66: ...006 Installing the Sorter Stacker 1 56 Xerox DocuColor 2006 2 Review the Sorter Stacker components before installing the unit 1 Sorter bins 2 High capacity bin 3 Attachment plate 4 Jam clearance cover...

Страница 67: ...etting up the DocuColor 2006 Xerox DocuColor 2006 1 57 Unpacking the Sorter Stacker Read all the steps before performing this procedure 1 Open the box Remove the instruction sheet 2 Remove the plastic...

Страница 68: ...g the Sorter Stacker 1 58 Xerox DocuColor 2006 3 Remove the cardboard inserts that hold the unit in place Move any plastic away from the bottom wheels of the Sorter Stacker 4 Gently tip the box so the...

Страница 69: ...CAUTION When rolling an unattached Sorter Stacker hold the unit from the inboard side not the bins Do not press down on the attachment plate as this may cause the unit to tip 5 Carefully roll the Sor...

Страница 70: ...de of the Sorter Stacker 8 Remove the cardboard from the top of the Sorter Stacker Remove the cardboard protector and tape from the sorting bins Remove the strap around the high capacity bin Remove an...

Страница 71: ...astic tie wrap on the metal roller under the jam clearance cover The tie wrap holds a sensor wire out of the way as illustrated in the figure below 10 Remove the tape that is holding the connector cor...

Страница 72: ...rforming this procedure CAUTION Ensure that the power is off on the copier printer before you begin to install the Sorter Stacker 1 Switch off the copier printer 2 Remove the output tray from the copi...

Страница 73: ...the right near the vertical edge of the attachment plate No icon should be visible in the spacer plate cut out Proceed to step 5 If the DocuColor 2006 has the optional duplex tray remove the spacer pl...

Страница 74: ...er Stacker with the left side of the DocuColor 2006 so the thumbscrews on the plate align with the holes in the left cover of the copier printer The upper horizontal edges of the alignment plate shoul...

Страница 75: ...he DocuColor 2006 Xerox DocuColor 2006 1 65 7 Remove the connector cover that is below the power plug on the left side of the copier printer 8 Remove the protective plastic wrap from the Sorter Stacke...

Страница 76: ...areful not to squeeze or disconnect any of the wires or the connecting cord with the cover in the following step 10 Remove the new connector cover from its wrapping Holding the cord to the left cut ou...

Страница 77: ...Installing the Sorter Stacker 1 Setting up the DocuColor 2006 Xerox DocuColor 2006 1 67 11 Slide the Sorter Stacker to the right into position...

Страница 78: ...1 Setting up the DocuColor 2006 Installing the Sorter Stacker 1 68 Xerox DocuColor 2006 The next step Go to the Printing the Test Page procedure...

Страница 79: ...OFF button on the Printer 301072A WOL 0 2 Press the I on the ON OFF button on the left hand side of the Scanner 0301232A W O L The DocuColor 2006 performs a registration setup then after a few moment...

Страница 80: ...n the two Control Panels Do not switch off the power if any other message is displayed There may be a problem or if the DocuColor 2006 is networked it may be receiving data 2 Press the 0 on the ON OFF...

Страница 81: ...or 2006 chapter C 1010 0101 0010 301150a 1 Ensure that READY is displayed on the Printer Control Panel screen 2 Press the Printer Menu button repeatedly until the message PRINT PAGES FROM LIST is disp...

Страница 82: ...Press the Copy button to enter Copy mode 4 Press the Start button on the Scanner Control Panel After a moment the copy is delivered to the Output Tray on the top of the Printer 5 Remove the original f...

Страница 83: ...e anti static bag until you are ready to install it Handle the card by the top or side edges only Do not touch the card components or the gold connector edge Avoid placing the card near magnetic devic...

Страница 84: ...already installed The lower slot is empty 4 If you are replacing the 64MB memory card with one or two memory cards go to step 6 If you are adding another memory card to the existing 64MB memory perfo...

Страница 85: ...ides of the card slot with your thumbs b When the clips are pushed back remove the 64MB card 301212a c Remove the new memory card from the anti static bag d Place the 64 MB memory card in the anti sta...

Страница 86: ...memory to the Printer 1 76 Xerox DocuColor 2006 7 Insert the left hand side Printer panel into place as shown below 301215a 8 Press the panel closed and slide it to the left 301216 9 Reinstall the th...

Страница 87: ...rinter 1 Setting up the DocuColor 2006 Xerox DocuColor 2006 1 77 10 Switch ON the Printer and the Scanner power 301072A WOL 0 0301232A W O L 11 After a few moments READY is displayed on the control pa...

Страница 88: ...8 Xerox DocuColor 2006 The next step Perform one of the following steps If you are adding memory to the Scanner go to Adding memory to the Scanner procedure If you are not installing memory to the Sca...

Страница 89: ...tatic electricity by keeping it in the anti static bag until you are ready to install it Handle the card by the top or side edges only Do not touch the memory card components or the gold connector edg...

Страница 90: ...uColor 2006 3 Press the latch toward the right and remove the access cover from the Printer 301206 4 Remove the memory card from the anti static bag 301207 5 Align the card to the rails in the access...

Страница 91: ...2006 1 81 6 Align the screws on the end of the memory card to the holes in the rear Printer cover 7 Use a screw driver to tighten the screws 301209 8 Replace the access cover and switch ON the power...

Страница 92: ...1 Setting up the DocuColor 2006 Adding memory to the Scanner 1 82 Xerox DocuColor 2006 The next step Go to the Getting to know the Xerox DocuColor 2006 section...

Страница 93: ...to access the Printer menus and to view messages 5 Printer Output Top Tray the prints are delivered here 6 Paper Stop use to stop oversized prints from being pushed out of the Output Tray The Paper S...

Страница 94: ...provides power to the Scanner 12 Scanner interface connector provides interface to the Scanner 13 Area 4 access cover open to access paper jams 14 Printer Side Output Tray copies are delivered to thi...

Страница 95: ...applies heat to the Dry Ink in order to adhere it to the paper 19 Anti rotation button use to release the Dry Ink Carrousel in order to remove and replace the Dry Ink Cartridges 20 Lever B use to lock...

Страница 96: ...ough the Printer menus 4 Off line button use this button to change the system status from on line to off line and back again 5 Clear Stop button use this button to stop a procedure and to return the m...

Страница 97: ...through 6 1 Scanner Control Panel use to access the DocuColor 2006 features and options 2 Memory Expansion slot provided for the 1 to 2 Side Copy option 3 Document Input Tray place the originals to be...

Страница 98: ...lor 2006 2 6 Xerox DocuColor 2006 0301221A W O L 7 Document Cover without Document Feeder raise to access the Document Glass 8 Registration corner place the top right hand corner of your original here...

Страница 99: ...ing process 7 Number buttons use to enter copy quantity and passwords 8 Exit button use to return to the previously displayed screen message 9 Select button use to save the currently selected features...

Страница 100: ...to select one of the preset reduction or enlargement settings 17 Reduce Enlarge indicators indicates which setting is currently selected 18 Paper Supply indicators indicates which paper tray is curren...

Страница 101: ...up to 500 sheets in the high capacity bin The ADF option is required for full functionality 097S02509 Automatic Document Feeder ADF The ADF automatically feeds up to 30 documents at a time for greate...

Страница 102: ...upplies reorder numbers Number Description Number Description 006R90307 1Black Dry Ink Cartridge 006R90310 1 Yellow Dry Ink Cartridge 006R90308 1 Cyan Dry Ink Cartridge 013R90140 1 Print Copy Cartridg...

Страница 103: ...tting up a closed loop or Local Area Network LAN Token Ring Networks can be connected to other networks in local and remote locations You will need a phillips screwdriver to perform this procedure CAU...

Страница 104: ...ove the three screws from the right hand side panel of the Printer 301083 3 Slide the panel to the left and lift to remove 301210 301217 4 Remove the Token Ring card from the anti static bag 5 Install...

Страница 105: ...Network Setup Xerox DocuColor 2006 3 3 6 Insert the left hand side Printer panel into place as shown 301218a 7 Press the panel closed and slide it to the left 301216 8 Reinstall the three screws into...

Страница 106: ...3 Network Setup Token Ring Network Kit 3 4 Xerox DocuColor 2006 9 Connect the network cable 301254a 10 Switch ON the Printer power After a few moments READY is displayed on the control panel...

Страница 107: ...s the Item Enter again button in order to print the page Installing the print driver The following procedure provides the steps for installing the printer driver for parallel port printing For detaile...

Страница 108: ...9 In the Printers box select Xerox DocuColor 2006 and Next 10 Select LPT1 ECP Printer Port and Next 11 Using a maximum of 31 characters enter a name for the printer or leave the default name in the P...

Страница 109: ...s The following procedure provides the steps for installing the printer driver for parallel port printing For detailed information about setting up TCP IP IPX SPX SPM or SMB printing refer to the Inst...

Страница 110: ...river you are installing on the computer you are prompted to install additional files from the Windows 2000 CD Insert it into the CD ROM drive browse to the i386 folder and then select OK When install...

Страница 111: ...ss the Item Enter again button in order to print the page Installing the print drivers The following procedure provides the steps for installing the printer driver for parallel port printing For detai...

Страница 112: ...ou want the DocuColor 2006 to be the default printer select Yes if not select No Select Next 13 Indicate whether you want the printer installed as a shared printer If you select Shared enter a Share N...

Страница 113: ...s the Menu button until the message Print Pages from List is displayed on the Printer Control Panel c Press the Item Enter button in order to select Print Configuration Page d Press the Item Enter aga...

Страница 114: ...Setup button The Adobe PS printer driver automatically selects the correct PPD file for your DocuColor 2006 6 Perform one of the following steps If Desktop printing is on select the printer icon that...

Отзывы: