background image

www.xerox.com/office/support

2

3.1

3.2

3.3

1

2

3

4

5

6

7

8

9

*

0

#

(

)

-

123

1

2

3

4

5

6

7

8

9

0

(

)

Abc

.com

@

3

4

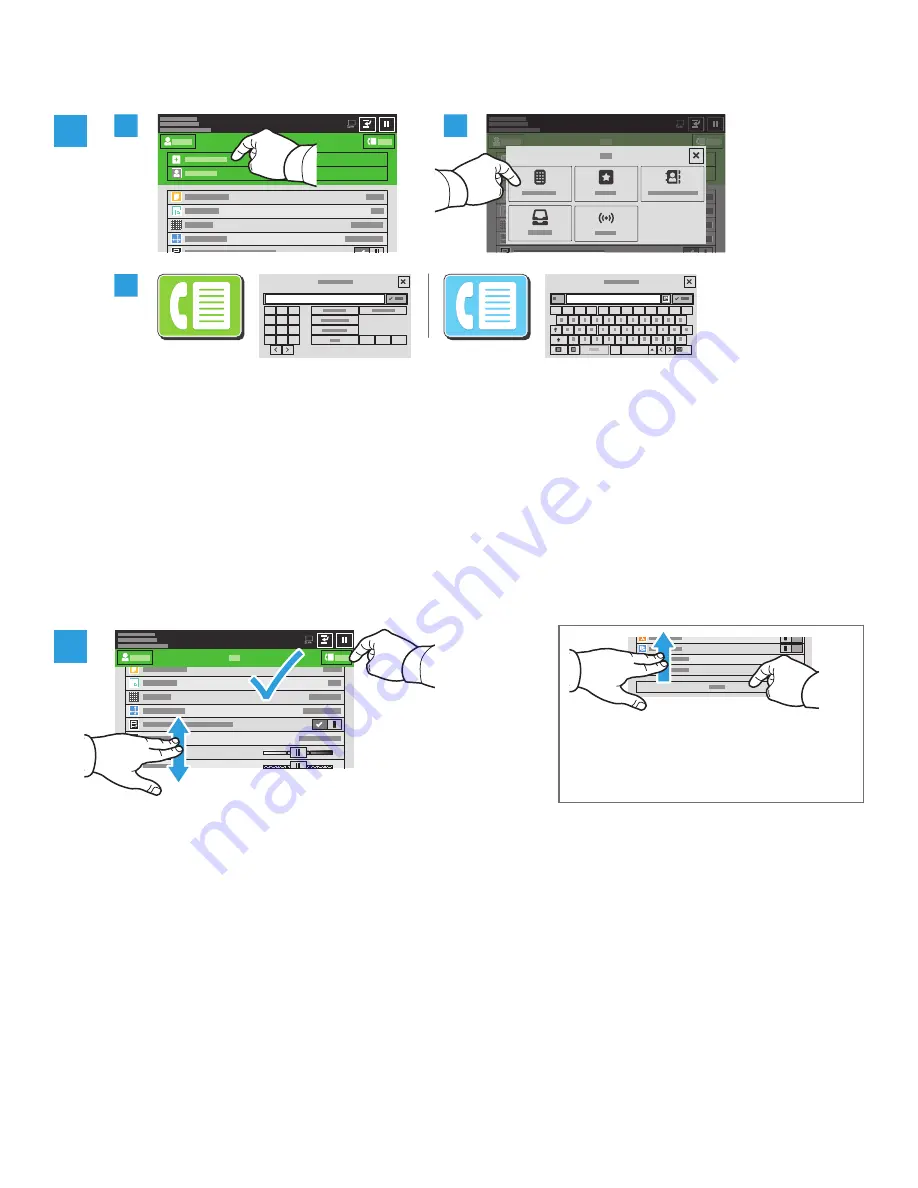
For fax numbers, touch 

Manual Entry

, then enter the fax number using the touch screen alphanumeric keys 

and special characters. Touch 

Add

. To add more fax numbers to the list, touch 

Add Recipient

.

For Internet Fax email addresses, touch 

Manual Entry

, then enter the email address using the touch screen 

keypad. Touch 

Add

. To add more email addresses to the list, touch 

Add Recipient

.

To select saved numbers, use the Device Address Book or Favorites. To select stored fax locations, use the 
Mailbox or Polling.

Change the settings as needed, then touch 

Send

.

Faxing

Note: Settings from previous users remain 
onscreen for a short time. To restore the 
default settings in an app, scroll to the 
bottom of the feature list, then touch 

Reset

.

Содержание C8130

Страница 1: ...he printer or provides options to sleep restart or power off the printer Reset restores settings to their default values in all apps Language provides choice of screen languages Log In provides specia...

Страница 2: ...nd password In the Device features menu to view basic impression counts touch Billing Usage To view detailed usage counts touch Usage Counters The list provides detailed impression count categories Xe...

Страница 3: ...ry power switch 1 At the printer control panel touch screen touch a selection Single Pass Duplex Automatic Document Feeder DADF USB Port Output Trays Left Tray Proximity Sensor Paper Trays Envelope Tr...

Страница 4: ...Letterhead Hole Punched Envelope Con rm or change size type and color settings if needed When printing select options in the print driver For the best results fan the edges of the paper Adjust the gu...

Страница 5: ...3 3 17 in Y 125 297 mm 4 9 11 7 in X 432 mm 17 in Y 297 mm 11 7 in For details refer to the User Guide Xerox AltaLink C8130 C8135 C8145 C8155 C8170 Color Multifunction Printer Note Settings from previ...

Страница 6: ...r to the User Guide For details about address book and work ow template setup refer to the System Administrator Guide Press Home then to email the scan touch Email To scan to the Default Public Mailbo...

Страница 7: ...ok or select from Favorites For Work ow Scanning touch Default Public Mailbox or insert your USB Flash Drive For Scan To touch a destination type then enter the appropriate information To add more tha...

Страница 8: ...p personal mailboxes and work ow scanning templates in the Embedded Web Server For details refer to the User Guide Scanning and Emailing Note the printer IP address on the touch screen If the IP Addre...

Страница 9: ...Default Public Mailbox then nd your scan in the list To download the scan click Go To refresh the list click Update View To save the le to your computer select Download To print the saved le again sel...

Страница 10: ...ectly to a fax machine Server Fax scans the document then sends it to a fax server which transmits the document to a fax machine Internet Fax scans the document then emails it to a recipient LAN Fax s...

Страница 11: ...email addresses touch Manual Entry then enter the email address using the touch screen keypad Touch Add To add more email addresses to the list touch Add Recipient To select saved numbers use the Devi...

Страница 12: ...en enter a number Select settings as needed then touch Print Touch Print From or insert your USB Flash Drive then choose Print From USB Do not remove USB Flash Drive during reading Files may be damage...

Страница 13: ...Secure Print type a passcode Click OK and print the job Touch Print From then touch Saved Jobs Select the Default Public Folder then select your print job Select settings from the list To select the...

Отзывы: