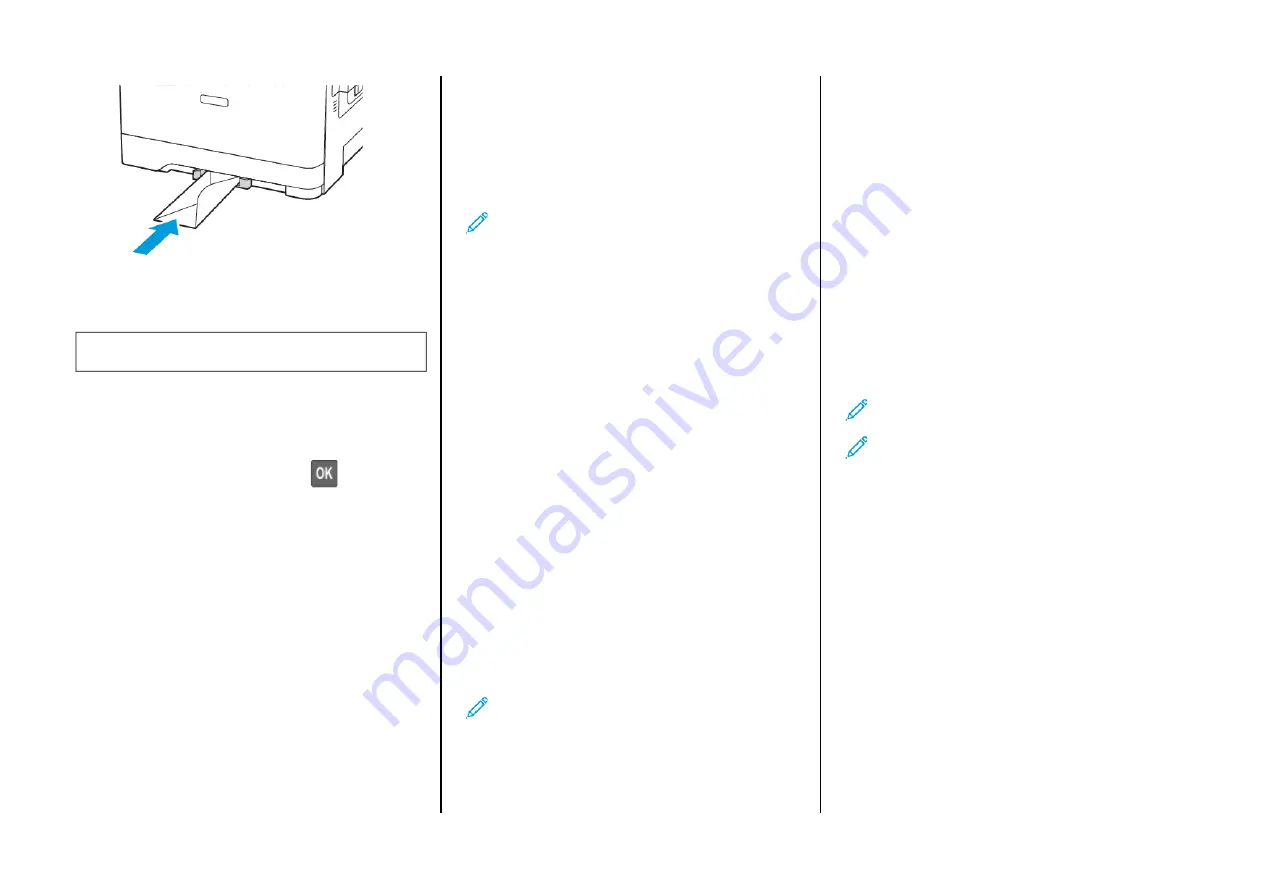
manualshive.com logo in svg
background image

3.

Feed the paper until its leading edge gets pulled in.

Warning—Potential Damage:

To avoid paper jams, do

not force paper into the manual feeder.

SSeettttiinngg tthhee PPaappeerr SSiizzee aanndd TTyyppee

1.

From the control panel, navigate to

Settings > Paper > Tray

Configuration > Paper Size/Type

, then select a paper source.

For non-touch-screen printer models, press

to navigate

through the settings.

2.

Set the paper size and type.

U

Uppddaattiinngg FFiirrm

mw

waarree

Some applications require a minimum device firmware level to
operate correctly.

For more information on updating the device firmware, contact your
customer service representative.

1.

Open a web browser, and then type the printer IP address in the
address field.

• View the printer IP address on the printer home screen. The IP

address appears as four sets of numbers separated by periods,
such as 123.123.123.123.

• If you are using a proxy server, then temporarily disable it to

load the web page correctly.

2.

Click

Settings > Device > Update Firmware

.

3.

Choose one of the following:

• Click

Check for updates > I agree, start update

.

• Upload the flash file. To upload the flash file, perform the

following steps.

To get the latest firmware, go to

www.xerox.com

, and search for

your printer model.

1. Browse to the flash file.

Note:

Make sure that you have extracted the

firmware zip file.

2. Click

Upload > Start

.

C

Coonnnneeccttiinngg tthhee PPrriinntteerr ttoo aa W

Wii--FFii N

Neettw

woorrkk

Before you begin, make sure that:

• Active Adapter is set to Auto. From the home screen, touch

Settings > Network/Ports > Network Overview > Active Adapter

.

• The Ethernet cable is not connected to the printer.

U

U ss ii nn gg tt hh ee W

W ii rr ee ll ee ss ss SS ee tt uu pp W

W ii zz aa rr dd ii nn tt hh ee PPrr ii nn tt ee rr

Before using the wizard, make sure that the printer firmware is
updated. For more information, refer to

Updating Firmware

.

1.

From the home screen, touch the

Wifi

button, then select

Set up

now

.

2.

Select a Wi-Fi network, and then type the network password.

3.

Touch

Done

.

U

U ss ii nn gg tt hh ee SS ee tt tt ii nn gg ss M

M ee nn uu ii nn tt hh ee PPrr ii nn tt ee rr

1.

From the home screen, touch

Settings > Network/Ports >

Wireless > Setup On Printer Panel > Choose Network

.

2.

Select a Wi-Fi network, then type the network password.

Note:

For Wi-Fi-network-ready printer models, a prompt to

set up the Wi-Fi network appears during initial setup.

C

Coonnffiigguurriinngg W

Wii--FFii D

Diirreecctt

Wi-Fi Direct is a Wi-Fi-based peer-to-peer technology that allows
wireless devices to connect directly to a Wi-Fi Direct-enabled printer
without using an access point (wireless router).

1.

From the home screen, touch

Settings

>

Network/Ports

>

Wi-Fi

Direct

.

2.

Configure the settings.

Enable Wi-Fi Direct

—Enables the printer to broadcast its own

Wi-Fi Direct network.

Wi-Fi Direct Name

—Assigns a name for the Wi-Fi Direct

network.

Wi-Fi Direct Password

—Assigns the password for negotiating

the wireless security when using the peer-to-peer connection.

Show Password on Setup Page

—Shows the password on the

Network Setup Page.

Auto-Accept Push Button Requests

—Lets the printer accept

connection requests automatically.

Note:

Accepting push-button requests automatically is

not secured.

Note:

Notes:

• By default, the Wi-Fi Direct network password is not visible on

the printer display. To show the password, enable the
password peek icon. From the home screen, touch

Settings

>

Security

>

Miscellaneous

>

Enable Password/PIN Reveal

.

• To know the password of the Wi-Fi Direct network without

showing it on the printer display, from the home screen touch

Settings

>

Reports

>

Network

>

Network Setup Page

.

C

Coonnnneeccttiinngg aa C

Coom

mppuutteerr ttoo tthhee PPrriinntteerr

Before connecting your computer, make sure that Wi-Fi Direct has
been configured. For more information, see

Configuring Wi-Fi Direct

.

FFoo rr W

W ii nn dd oo w

w ss U

U ss ee rr ss

1.

Open the printers folder.

2.

Select the printer you want to update, and then do either of the
following:

• For Windows 7 or later, select

Printer properties

.

• For earlier versions, select

Properties

.

12

Содержание C315

Страница 1: ...ur e mail service provider type your account password app password or authentication password For more information on the password refer to the list of Email Service Providers and then look for Device Password If your provider is not listed contact your provider and ask for the Primary SMTP Gateway Primary SMTP Gateway Port Use SSL TLS and SMTP Server Authentication settings 4 Touch OK U Us siin n...

Страница 2: ...curity page log in to your account and then click Generate app password Outlook Live These settings apply to outlook com and hotmail com email domains SETTING VALUE Primary SMTP Gateway smtp office365 com Primary SMTP Gateway Port 587 Use SSL TLS Required Require Trusted Certificate Disabled Reply Address Your email address SMTP Server Authentication Login Plain Device Initiated E mail Use Device ...

Страница 3: ...curity section click Generate Password Comcast Mail SETTING VALUE Primary SMTP Gateway smtp comcast net Primary SMTP Gateway Port 587 Use SSL TLS Required Require Trusted Certificate Disabled Reply Address Your email address SMTP Server Authentication Login Plain Device Initiated Email Use Device SMTP Credentials Device UserID Your email address Device Password Account password Mail com SETTING VA...

Страница 4: ...e QQ Mail home page click Settings Account then from the POP3 IMAP SMTP Exchange CardDAV CalDAV Service section click Generate authorization code NetEase Mail mail 163 com Note Make sure that the SMTP service is enabled on your account To enable the service from the NetEase Mail home page click Settings POP3 SMTP IMAP and then enable either IMAP SMTP service or POP3 SMTP service SETTING VALUE Prim...

Страница 5: ...P service is enabled on your account To enable the service from the Sohu Mail home page click Options Settings POP3 SMTP IMAP and then enable either IMAP SMTP service or POP3 SMTP service SETTING VALUE Primary SMTP Gateway smtp sohu com Primary SMTP Gateway Port 465 Use SSL TLS Required Require Trusted Certificate Disabled Reply Address Your email address SMTP Server Authentication Login Plain Dev...

Страница 6: ... change the scan settings 5 Scan the document F Fo or r M Ma ac ciin nt to os sh h U Us se er rs s Note Make sure that the printer is added to the computer For more information refer to the User Guide 1 Load an original document into the automatic document feeder or on the scanner glass 2 From the computer do either of the following a Open Image Capture b Open Image Capture c Open Printers Scanner...

Страница 7: ...rint 3 Select a printer and then adjust the settings if necessary 4 Print the document Maintain the Printer A At tt ta ac ch hiin ng g C Ca ab blle es s CAUTION SHOCK HAZARD To avoid the risk of electrical shock do not set up this product or make any electrical or cabling connections such as the power cord fax feature or telephone during a lightning storm Warning To avoid the risk of fire or elect...

Страница 8: ...arge touch any exposed metal frame of the printer before accessing or touching interior areas of the printer 2 Remove the used toner cartridge 3 Unpack the new toner cartridge 4 Insert the new toner cartridge 5 Close door B C Clle ea an niin ng g t th he e S Sc ca an nn ne er r 1 Open the scanner cover 2 Using a damp soft lint free cloth wipe the following areas a ADF glass pad 8 ...

Страница 9: ...sing a damp soft lint free cloth wipe the following areas a ADF glass pad in door C b ADF glass in door C 6 Close the door L Lo oa ad diin ng g T Tr ra ay ys s CAUTION TIPPING HAZARD To reduce the risk of equipment instability load each tray separately Keep all other trays closed until needed 1 Remove the tray Note To avoid paper jams do not remove trays while the printer is busy 9 ...

Страница 10: ...inting load letterhead facedown with the header toward the back of the tray Do not slide paper into the tray To avoid paper jams make sure that the stack height is below the maximum paper fill indicator 5 Insert the tray If necessary set the paper size and paper type from the control panel to match the paper loaded L Lo oa ad diin ng g t th he e M Mu ullt tiip pu ur rp po os se e F Fe ee ed de er ...

Страница 11: ...s coated linings or self stick adhesives 5 From the control panel set the paper size and paper type to match the paper loaded L Lo oa ad diin ng g t th he e M Ma an nu ua all F Fe ee ed de er r 1 Adjust the guide to match the size of the paper that you are loading 2 Load a sheet of paper with the printable side facedown Load letterhead with the printable side facedown and the top edge entering the...

Страница 12: ... then select Set up now 2 Select a Wi Fi network and then type the network password 3 Touch Done U Us siin ng g t th he e S Se et tt tiin ng gs s M Me en nu u iin n t th he e P Pr riin nt te er r 1 From the home screen touch Settings Network Ports Wireless Setup On Printer Panel Choose Network 2 Select a Wi Fi network then type the network password Note For Wi Fi network ready printer models a pro...

Страница 13: ...er Wi Fi Direct name Note The string DIRECT xy where x and y are two random characters is added before the Wi Fi Direct name 3 Enter the Wi Fi Direct password Clearing Jams A Av vo oiid diin ng g j ja am ms s L Lo oa ad d P Pa ap pe er r P Pr ro op pe er rlly y Make sure that the paper lies flat in the tray CORRECT LOADING OF PAPER INCORRECT LOADING OF PAPER Do not load or remove a tray while the ...

Страница 14: ...red Check your printed output for blank pages When Jam Recovery is set to On or Auto the printer reprints jammed pages 1 Automatic Document Feeder ADF 2 Standard Output Tray 3 Door A 4 Trays 5 Multipurpose Feeder 6 Manual Feeder P Pa ap pe er r J Ja am m iin n T Tr ra ay y 1 1 1 Remove the tray 2 Remove the jammed paper Note Make sure that all paper fragments are removed 3 Insert the tray 14 ...

Страница 15: ... interior areas of the printer 2 Remove the jammed paper Note Make sure that all paper fragments are removed 3 Close doors B and A P Pa ap pe er r J Ja am m iin n t th he e F Fu us se er r 1 Open doors A and B CAUTION HOT SURFACE The inside of the printer might be hot To reduce the risk of injury from a hot component allow the surface to cool before touching it Warning Potential Damage To prevent ...

Страница 16: ...ut t T Tr ra ay y 1 Open door B until it clicks into place and then remove the jammed paper Warning Potential Damage To prevent damage from electrostatic discharge touch any exposed metal frame of the printer before accessing or touching interior areas of the printer Note Make sure that all paper fragments are removed 2 Open door A CAUTION HOT SURFACE The inside of the printer might be hot To redu...

Страница 17: ...ray 2 Remove the jammed paper Note Make sure that all paper fragments are removed 3 Insert the tray P Pa ap pe er r J Ja am m iin n D Do oo or r C C 1 Remove all original documents from the ADF tray 2 Open door C Warning Potential Damage To prevent damage from electrostatic discharge touch any exposed metal frame of the printer before accessing or touching interior areas of the printer 3 Remove th...

Страница 18: ...e Cloud Print web printing service Gmail webmail service and Android mobile technology platform are trademarks of Google Inc Microsoft Windows Vista Windows Windows Server and OneDrive are registered trademarks of Microsoft Corporation in the United States and other countries Mopria is a trademark of the Mopria Alliance Wi Fi CERTIFIED Wi Fi Direct is a trademark of the Wi Fi Alliance All other tr...

Отзывы: