4.
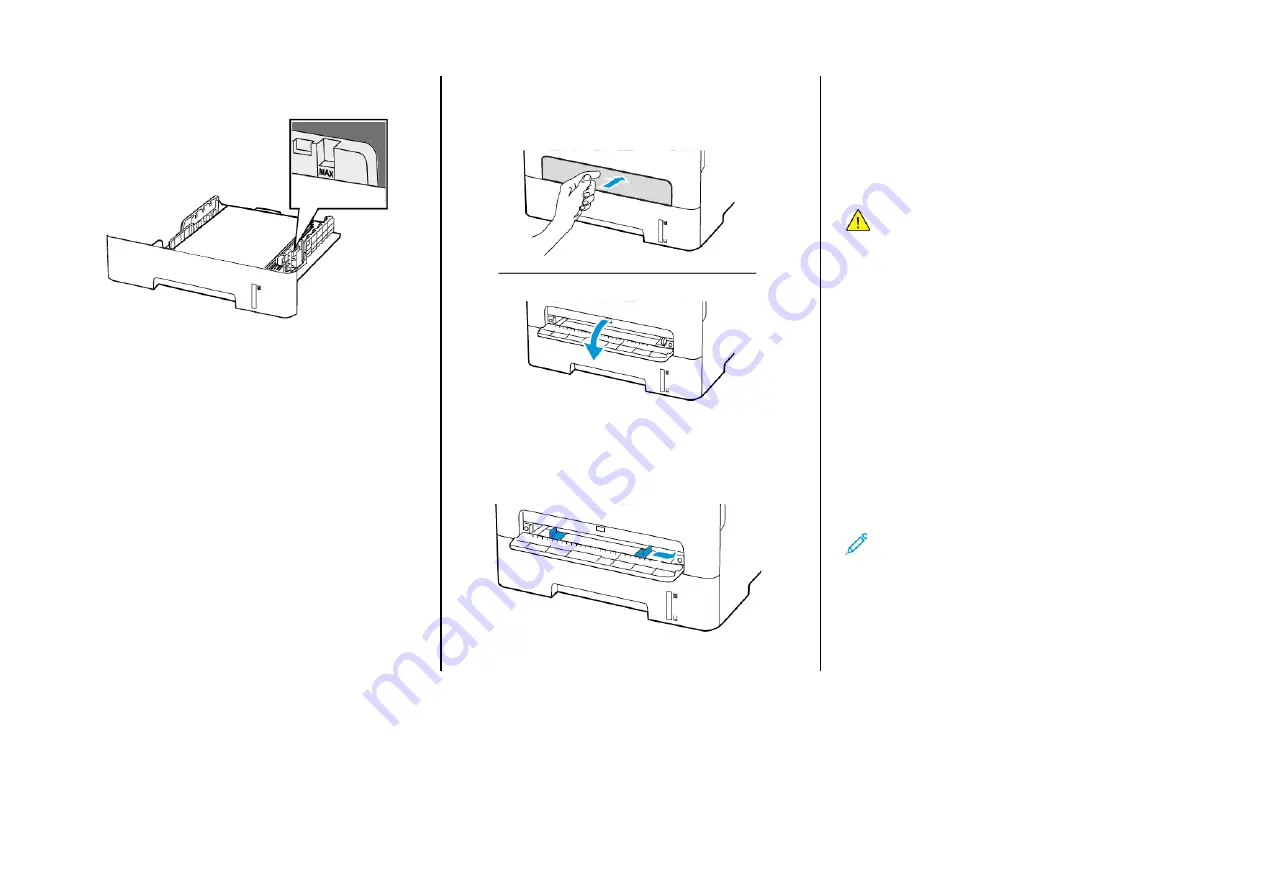
Load the paper stack with the printable side face-down, and then
make sure that the side guides fit snugly against the paper.
• Load letterhead face-down with the top edge of the sheet
toward the front of the tray for one-sided printing.
• Load letterhead face-up with the bottom edge of the sheet
toward the front of the tray for two-sided printing.
• Do not slide paper into the tray.
• To avoid paper jams, make sure that the stack height is below
the maximum paper fill indicator.
5.
Insert the tray.
If necessary, set the paper size and paper type from the control
panel to match the paper loaded.
LLooaaddiinngg tthhee M
Maannuuaall FFeeeeddeerr
1.
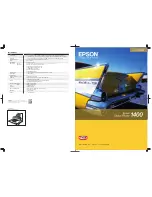
Open the manual feeder.
2.
Adjust the guide to match the size of the paper that you are
loading.
3.
Load a sheet of paper with the printable side face-up.
• Load letterhead with the printable side face-up and the top
edge entering the printer first for one-sided printing.
• Load letterhead with the printable side face-down and the top
edge entering the printer last for two-sided printing.
• Load envelope with the flap side down and against the left
side of the paper guide.
Warning:
To avoid paper jams, do not force paper into the
manual feeder.
SSeettttiinngg tthhee PPaappeerr SSiizzee aanndd TTyyppee
1.
From the control panel, navigate to
Tools > Paper > OK > Tray
Configuration > OK > Paper Size/Type > OK
.
2.
Select a paper source, and then configure the paper size and type.
• For two-sided printing on A4-size paper, make sure that the
paper size setting in the duplex unit is set to A4.
• For two-sided printing on letter-, legal-, Oficio-, or folio-size
paper, make sure that the paper size setting in the duplex unit
is set to Letter.
U
Uppddaattiinngg FFiirrm
mw
waarree
Some applications require a minimum printer firmware level to
operate correctly.
1.
Open a web browser, and then type the printer IP address in the
address field.
Note:
• View the printer IP address on the printer home screen.
The IP address appears as four sets of numbers separated
by periods, such as 123.123.123.123.
• If you are using a proxy server, then temporarily disable it
to load the web page correctly.
2.
Click
Settings > Device > Update Firmware
.
3


