2 Product Overview
50
P
roduc
t O
v
er
vie
w
2
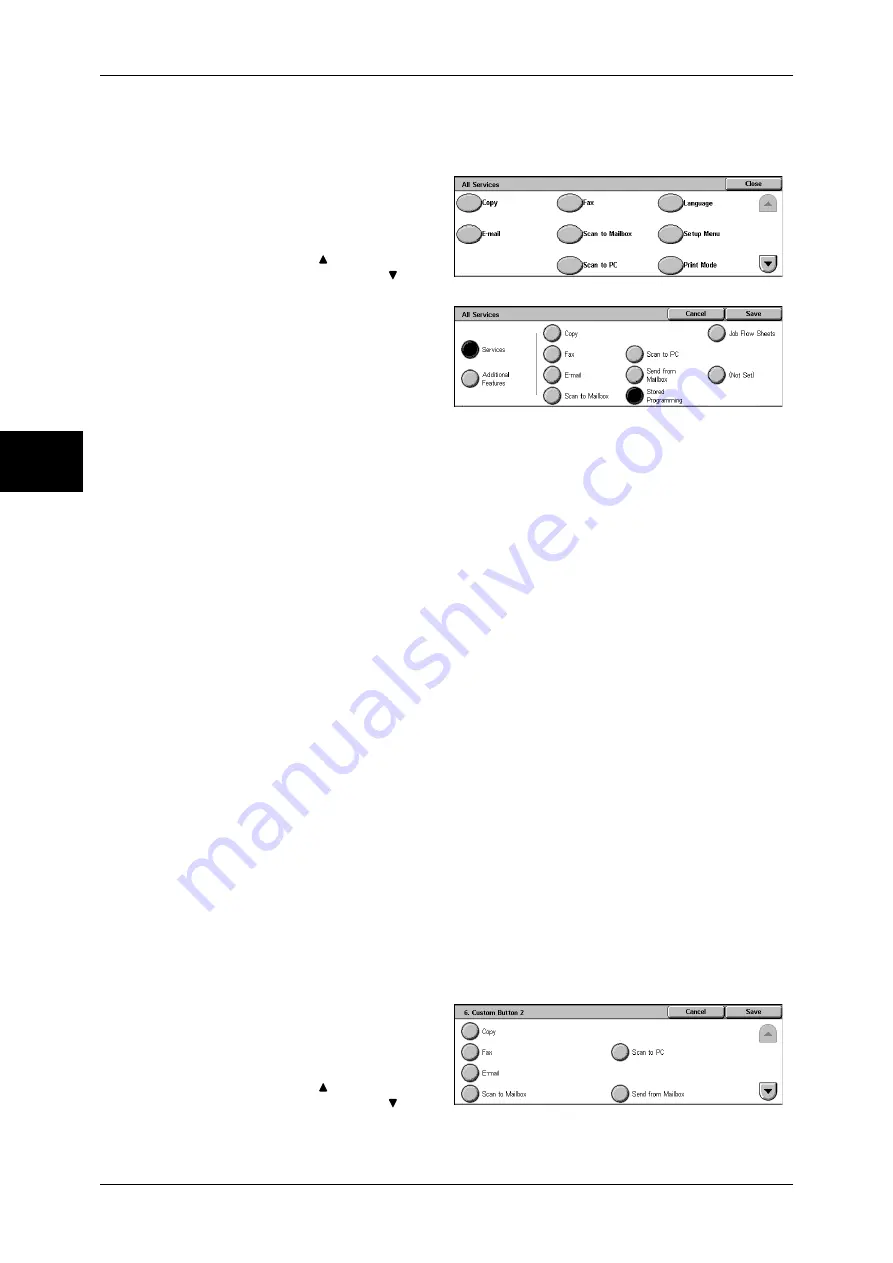
The following is the procedure to change the [Language] button displayed at the upper
right corner of the first page of the [All Services] screen to the [Stored Programming]
button, as an example.
1
Select [All Services], and select
[Change Settings].
2
Select [Language].
Note
•
Select [ ] to return to the
previous screen or [ ] to
move to the next screen.
3
Select [Services].
4
Select [Stored Programming].
Note
•
The layout of buttons in this
screen is corresponding to the
layout of those on the [All
Services] screen.
•
You cannot assign the same feature to more than one button.
Services
You can select a service button. Service buttons are the oval buttons in the [All
Services] screen.
If you select [Not Set], the selected button position will remain empty.
Additional Features
You can select an additional feature button. Additional features appear in the [All
Services] screen as rectangular buttons.
If you select [Not Set], the selected button position will remain empty.
Assigning Features to <Custom> Buttons
Assign features to the <Custom> buttons on the control panel: Custom 1 to Custom 3.
By assigning features to the <Custom> buttons, you can switch to the features without
returning to the [All Services] screen. If you do not want to assign any feature to a
button, select [Not Set].
By factory defaults, [Copy] is assigned to the <Copy> button and no feature is assigned
to the <Custom 2> or <Custom 3> button. The features to be assigned to the buttons
can be selected from the features displayed on the [All Services] screen and
[Language].
Attach the labels included in this product when you have changed the assignment. If
you have used a feature for which no label is provided, use a blank label and write down
the feature using a permanent marker, and then attach the label to the appropriate
button.
The following is the procedure to assign [Send from Mailbox] to the <Custom 2> button,
as an example. The same procedure can be applied to the <Custom 3> button.
1
Select [Custom Button 2], and
select [Change Settings].
2
Select [Send from Mailbox].
Note
•
Select [ ] to return to the
previous screen or [ ] to
move to the next screen.
Содержание ApeosPort-II 5010
Страница 1: ...ApeosPort II 5010 4000 3000 DocuCentre II 5010 4000 User Guide ...
Страница 14: ......
Страница 54: ......
Страница 139: ...Layout Adjustment 137 Fax 4 Off No stamp is added On A stamp is added ...
Страница 254: ......
Страница 350: ......
Страница 406: ......
Страница 538: ......
Страница 599: ...17 Glossary This chapter contains a list of terms used in this guide z Glossary 598 ...
Страница 618: ......


