


www.xerox.com/office/support
2
3.1
3.2
3.3
1
2
3
4
5
6
7
8
9
*
0
#
(
)
-
123
1
2
3
4
5
6
7
8
9
0
(
)
Abc
.com
@
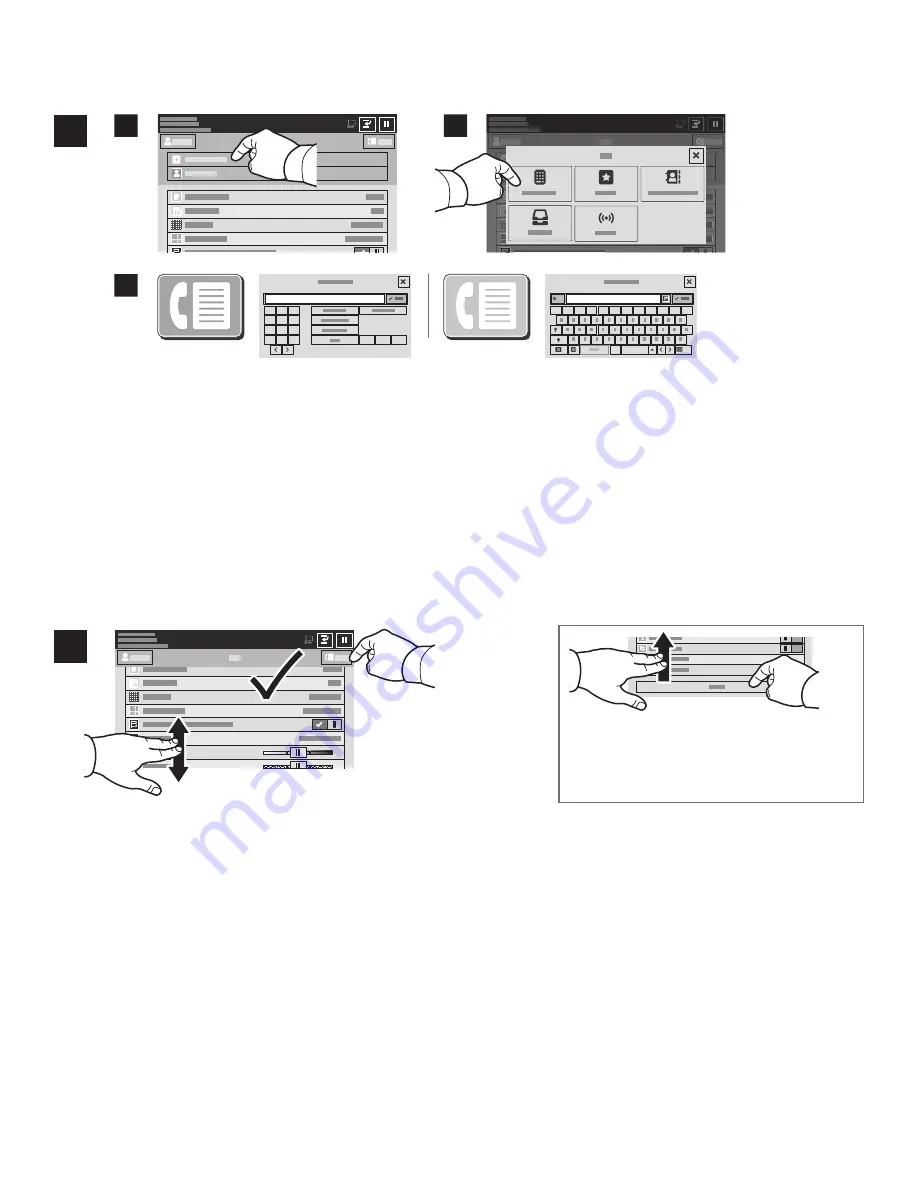
3
4
For fax numbers, touch
Manual Entry
, then enter the fax number using the touch screen alphanumeric keys
and special characters. Touch
Add
. To add more fax numbers to the list, touch
Add Recipient
.
For Internet Fax email addresses, touch
Manual Entry
, then enter the email address using the touch screen
keypad. Touch
Add
. To add more email addresses to the list, touch
Add Recipient
.
To select saved numbers, use the Device Address Book or Favorites. To select stored fax locations, use the
Mailbox or Polling.
Change the settings as needed, then touch
Send
.
Faxing
Note: Settings from previous users remain
onscreen for a short time. To restore the
default settings in an app, scroll to the
bottom of the feature list, then touch
Reset
.


