background image

<

cut top 2"

cut 1">

DIIIIIIIIHHHHHHHHIIIIIIIIIIIII

28

Quick Start

Connecting the Interface Cable 
and the Power Cord

Both serial and parallel interfaces are
standard on the printer.  You have selected the
Twinax or Coax interface card, which is
installed at the time of delivery by your Xerox
service representative.  Follow the
instructions below to connect the interface
cable(s) and power cord:

NOTE: You must provide the appropriate
interface cable for your environment.  Refer to
Appendix F, “Interface Support,” in your
Operator Guide, for additional information on
cables and interface connections.

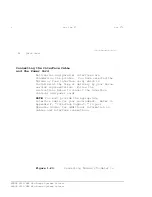
Figure 1-23.

Connecting Twinax (T-cable) to

XEROX 4219/MRP Mid Range Systems Printer

XEROX 4215/MRP Mid Range Systems Printer

Содержание 4215

Страница 1: ...Adobe Systems Incorporated AS 400 is a trademark of the IBM Corporation CS Triumvirate and CS Triumvirate Condensed are trademarks of Agfa Division of Miles Inc CS Century Schoolbook CS Courier CS Let...

Страница 2: ...tion F References to additional information UNPACKING AND PLACING THE PRINTER Use the following procedures to unpack the printer and verify the contents Step 1 Remove any plastic wrap and styrofoam pa...

Страница 3: ...sp the printer as shown in Figure 1 Figure 1 Grasping the Printer Step 3 Remove the printer from the carton and place it on a flat surface Step 4 Unpack the contents and verify the following XEROX 421...

Страница 4: ...Quick Start 3 Figure 2 Contents of the Shipping Carton 1 Printer 6 Paper Support Wire 2 Toner Cartridge Kit 7 Documen tation 3 Paper trays two with 4215 MRP 8 Power XEROX 4219 MRP Mid Range Systems P...

Страница 5: ...ing memory expansion options F 4 megabytes for a total of 8 megabytes F 8 megabytes for a total of 12 megabytes F 16 megabytes for a total of 20 megabytes You selected one of the following interface c...

Страница 6: ...w these steps to install the manual feed tray Step 1 Unpack the manual feed tray Step 2 With the manual feed tray in the closed position line up the tabs at the bottom of the Figure 3 Positioning the...

Страница 7: ...al feed tray have pins The tabs at the rear of the printer have corresponding holes where the tray pins are inserted to secure the tray under the manual feed slot Insert one of the tray pins into the...

Страница 8: ...the stacking of extra long paper e g Ledger or A3 paper Follow these steps to install the paper support wire Step 1 Unpack the paper support wire Figure 5 Installing the Paper Support Wire Installing...

Страница 9: ...p 2 Remove the contents of the box See Figure 6 Figure 6 Contents of the Toner Cartridge Kit 1 Toner cartridge 2 Corotron 3 Fuser cleaning felt 4 Toner cartridge Installation booklet XEROX 4219 MRP Mi...

Страница 10: ...ure 7 Opening the Top Cover Installing the Fuser Cleaning Felt Follow these steps to install the fuser cleaning felt Step 1 Unpack the fuser cleaning felt CAUTION Do not touch the felt area on the und...

Страница 11: ...3 Hold the fuser cleaning felt by the green tab and install it into the slot in the printer Figure 8 Installing the Fuser Cleaning Felt Step 4 Close the fuser cleaning felt housing cover XEROX 4219 MR...

Страница 12: ...ese steps to install the corotron Step 1 Unpack the corotron CAUTION Handle the corotron carefully Do not touch the wire G Step 2 Hold the corotron as shown in Figure 9 labeled with a 2 and a lightnin...

Страница 13: ...corotron into the left notch and then gently push down onto the two contacts on the right side Once the left connector is seated press the right connector into place Figure 9 Installing the Corotron X...

Страница 14: ...r cartridge Step 1 Remove the toner cartridge from its protective bag CAUTION Do not leave the toner cartridge sitting in direct sunlight as on a window sill for any length of time Prolonged exposure...

Страница 15: ...te the toner See Figure CAUTION Do not open the protective drum shutter on the underside of the cartridge If the green drum is exposed to direct sunlight for more G CAUTION Be careful not to get finge...

Страница 16: ...ill occur to the printer if toner seal is not removed G Step 4 Line up the toner cartridge with the cavity in the top cover and slide the cartridge into the Figure 12 Lining up the Toner Cartridge XER...

Страница 17: ...irmly close the top cover of the printer until it snaps shut See Figure 13 Figure 13 Closing the Top Cover Step 6 If you have purchased options install them now Refer to the instructions provided with...

Страница 18: ...he High Capacity Paper Tray is divided into two sections front and back You can load up to 250 sheets of 20 lb or 75 gsm paper into each section Up to 500 sheets of paper can be loaded at one time Pap...

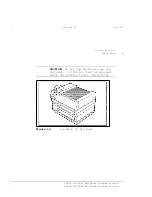
Страница 19: ...IIII Quick Start 19 CAUTION Do not lay anything over the air vent If the air vent is blocked while the printer is on the printer G Figure 14 Location of Air Vent XEROX 4219 MRP Mid Range Systems Print...

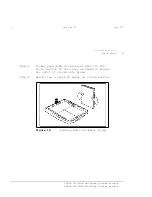
Страница 20: ...llowing are instructions to load paper Step 1 Remove any protective packaging from the High Capacity Paper Tray Step 2 Lift and remove the plastic High Capacity Paper Figure 15 Removing the High Capac...

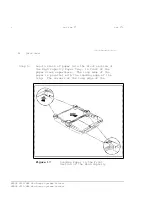
Страница 21: ...down on the metal plate in the front section of the tray as shown in Figure 16 until it clicks into place Step 4 Gently tap a stack of paper on a firm surface Figure 16 Pushing Down the Metal Plate X...

Страница 22: ...High Capacity Paper Tray in front of the paper stack separators The long edge of the paper is parallel with the leading edge of the tray The corners of the long edge of the Figure 17 Loading Paper in...

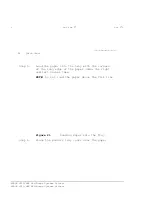
Страница 23: ...e paper into the back section of the High Capacity Paper Tray behind the paper stack separators See Figure 18 NOTE Do not load the paper above the Fill Figure 18 Loading Paper in the Back Section of t...

Страница 24: ...Capacity Paper Tray Installing the Letter or A4 Paper Tray The 4215 MRP includes one letter 8 5 by 11 inches or one A4 210 by 297 millimeters paper tray as standard equipment Each paper tray holds up...

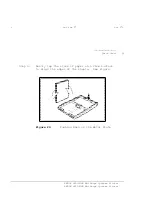
Страница 25: ...IIII Quick Start 25 Step 4 Gently tap the stack of paper on a firm surface to align the edges of the sheets See Figure Figure 20 Pushing Down on the Metal Plate XEROX 4219 MRP Mid Range Systems Printe...

Страница 26: ...ith the corners of the long edge of the paper under the right and left corner tabs NOTE Do not load the paper above the fill line Figure 21 Loading Paper into the Tray Step 6 Place the plastic tray co...

Страница 27: ...27 Step 7 Insert the filled paper tray all the way into the tray slot in the printer as shown in Figure 22 with the exposed paper to the front Figure 22 Inserting the Paper Tray XEROX 4219 MRP Mid Ran...

Страница 28: ...time of delivery by your Xerox service representative Follow the instructions below to connect the interface cable s and power cord NOTE You must provide the appropriate interface cable for your envi...

Страница 29: ...cut top 2 cut 1 DIIIIIIIIHHHHHHHHIIIIIIIIIIIII Quick Start 29 Figure 1 24 Connecting Coax to the Printer XEROX 4219 MRP Mid Range Systems Printer XEROX 4215 MRP Mid Range Systems Printer...
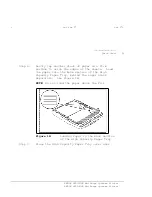
Страница 30: ...e Figure 25 and or your parallel computer interface cable Centronics see Figure 26 to the appropriate connector on your computer Attach the other end of the cable or Figure 25 Connecting Serial Interf...

Страница 31: ...ut 1 DIIIIIIIIHHHHHHHHIIIIIIIIIIIII Quick Start 31 Figure 26 Connecting Parallel Interface Cable from the Computer to the Printer XEROX 4219 MRP Mid Range Systems Printer XEROX 4215 MRP Mid Range Syst...
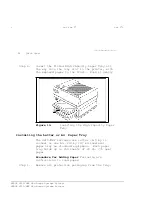
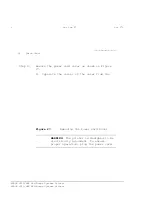
Страница 32: ...as shown in Figure 27 1 Separate the corner of the cover from the Figure 27 Removing the Power Cord Cover WARNING The printer is designed to be electrically grounded To ensure proper operation plug t...

Страница 33: ...n outlet that is easily accessible Reinstall the power cord cover to the side of the printer hiding the cord Step 6 Plug the power cord into the wall outlet The attachment plug receptacles in the vici...

Страница 34: ...cut top 2 cut 1 DIIIIIIIIHHHHHHHHIIIIIIIIIIIII 34 Quick Start Step 8 The following message displays at the control panel indicating the printer is performing an initial diagnostic test...

Страница 35: ...computer Send the document to be printed from your computer using either the PostScript or PCL 5 command interpreter The printer automatically senses which is being used When the printer receives you...

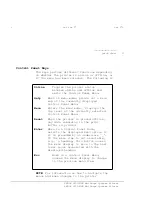
Страница 36: ...panel is located on the front of the printer in the upper left corner For access to the keys press and release the upper right corner of the closed keypad Figure 29 Figure 29 Control Panel Display and...

Страница 37: ...of the currently selected Control Panel Menu Reset When the printer is placed offline any data remaining in the print buffer is printed Enter When in a Control Panel Menu selects the displayed menu o...

Страница 38: ...rator Guide provides additional information on the following items Laser Printer Safety Information Setting up the printer Choosing an interface Sending a print job Changing the printer configuration...

Страница 39: ...icable the Xerox Intelligent Data Stream Reference for more detailed information on using these interface systems when printing on the 4215 MRP or 4219 MRP If you require further assistance after read...

Отзывы: