Page23
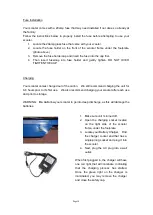
4) Plug in charger to wall socket and a green light should appear on charger.
5) Next plug charger into scooter, charger should turn red when connections are correct.
6) Reattach foot deck. Let unit charge for 8 hrs.
How To Check Charger Light Status & Understand Charge
Light Sequence
When you plug your charger into the wall the light should turn Green. Now plug your
charger into the scooter and it should turn to red for a good period of time.
*** This indicates that the charger sees the batteries and charge cycle started.
If no red light then charger is not making a connection to batteries to charge them. Check
for a loose wire on the back of the charge socket or bad fuse/fuse holder.
If the charger just turns Red for a minute or two, this may indicates a defective cell in one
of the batteries and batteries will need to be replaced.
*** A defective cell reacts like a fully charged battery and will bring other batteries down to its level.
If a flashing Red light appears on the charger, this may indicate the charger wires are
crossed and/or touching each other.
***In most cases if the scooter runs a shorter distance the batteries may be beyond their life cycle.
How To Replace/Install Fuse
1. To replace the scooter fuse locate the spare 20amp glass fuse that came with the
scooter.
2. Set scooter so that the rear wheel is not touching any surface.
2. Install the new fuse in the Fuse Holder which is located under the foot plate on the left
side of the scooter frame near the charger socket.
3. Confirm that it is securely installed.
Содержание X-140
Страница 8: ...Page8 Getting To Know Your X 140 Scooter Photo s may vary ...
Страница 28: ...Page28 Battery Wiring Diagram ...
Страница 29: ...Page29 ...

