background image

V i r t u a l   L i g h t   B o o t h  

38


Replacing the Lamps 

Replace burned out lamps immediately in order to maintain the overall performance standards of the 

device. We recommend replacing lamps in complete sets. 

Lamp Type


Replace After


Simulated Daylight (DL)


400 hours or after 

65,000 switching 

cycles.


1.


Turn the main power switch off and unplug the AC line cord before proceeding. 

2.


Release the front diffuser latch. Slowly lower the front of the diffuser until it stops. 

Allow time for the daylight filters to cool before handling them. Always use lens paper or 

equivalent when handling the lamps. Skin oils interfere with their performance. 


3.


Holding the filter pack, push the fastener button in and lower the daylight filter pack. Repeat the 

procedure for the other filter pack. 

4.


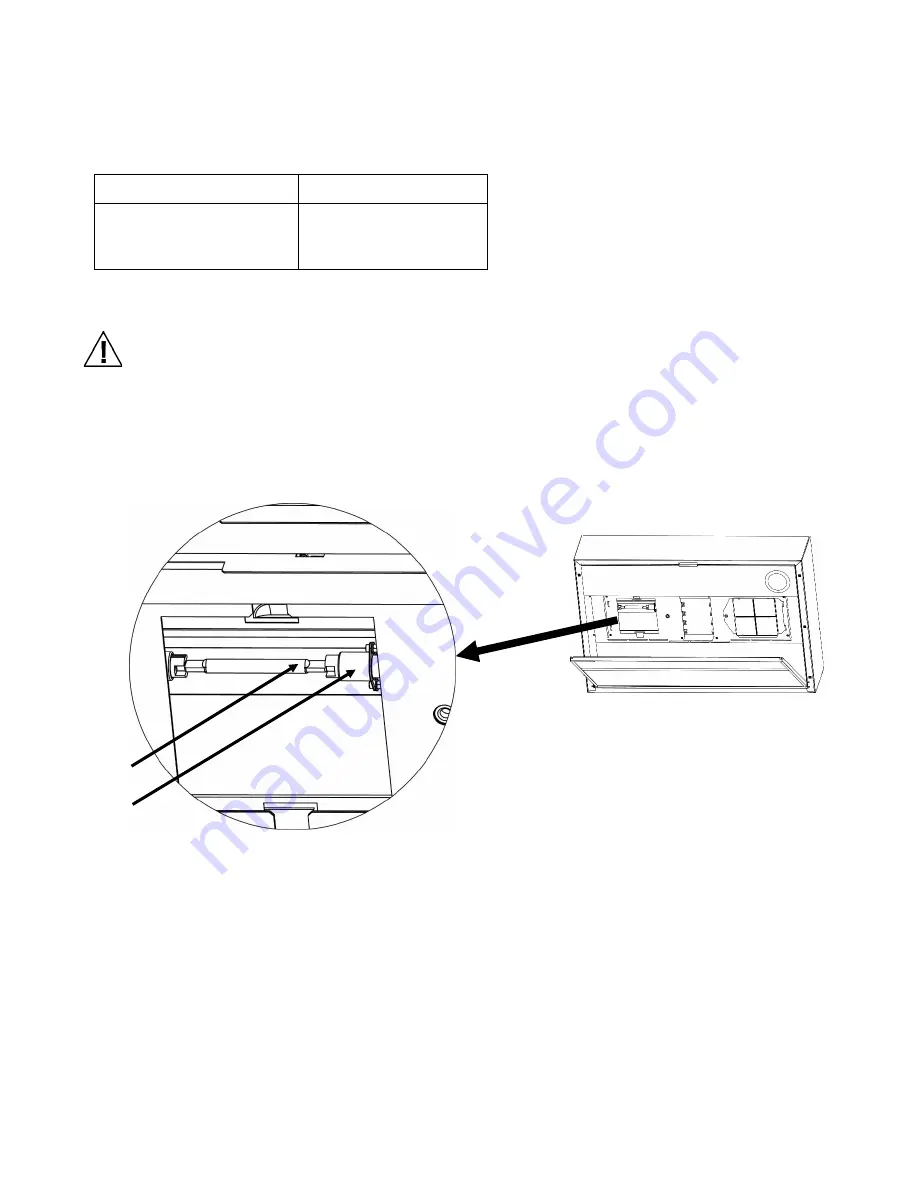
Push one end of the old lamp (1) into the spring loaded socket (2) with pressure to release the 

other end from its socket. 


5.


Lift the lamp clear of both sockets and discard in an appropriate receptacle. 

6.


Using a piece of lens paper (or equivalent) between your fingers and the lamp; push one end of 

the replacement lamp into the socket. Refer to the figure above. 

7.


Insert the other end of the lamp into the other socket and release the lamp. 

8.


Repeat step 3 through 7 for the other lamp. 

9.


Rotate the daylight filter pack back into position and push the fastener button in to secure. 

Repeat procedure for other daylight filter pack. 

10.


Rotate the diffuser to its closed position and secure it in place with the latch. 


(1) 

(2) 

Содержание Pantone Virtual Light Booth

Страница 1: ...Virtual Light Booth User Guide ...

Страница 2: ...armful interference to radio communications Operation of this equipment in a residential area is likely to cause harmful interference in which case the user will be required to correct the interference at his own expense Industry Canada Compliance Statement CAN ICES 3 A NMB 3 A Equipment Information Use of this equipment in a manner other than that specified by X Rite Incorporated may compromise d...

Страница 3: ...t and possible personal injury DO NOT BLOCK VENTS The luminaire s should be installed so that it is a minimum of 200 mm 8 in from each other or wall surface Refer to the installation Guidelines later in this manual Light sources contribute heat to the area of operation Blocking of the vent could result in overheating mechanical failure and a fire hazard if flammables or combustibles are present PR...

Страница 4: ...ons or failure to follow the maintenance procedures in X Rite s accompanying documentation or published specifications iii repair or service by anyone other than X Rite or its authorized representatives iv the failure of the warranted goods caused by use of any parts or consumables not manufactured distributed or approved by X Rite v any attachments or modifications to the warranted goods that are...

Страница 5: ...AN OFFICER OF X RITE IS AUTHORIZED TO MAKE ANY WARRANTY IN ADDITION TO THE FOREGOING IN NO EVENT WILL X RITE BE LIABLE FOR ANY OF BUYER S MANUFACTURING COSTS OVERHEAD LOST PROFITS GOODWILL OTHER EXPENSES OR ANY INDIRECT SPECIAL INCIDENTAL OR CONSEQUENTIAL DAMAGES BASED UPON BREACH OF ANY WARRANTY BREACH OF CONTRACT NEGLIGENCE STRICT TORT OR ANY OTHER LEGAL THEORY IN ANY EVENT OF LIABILITY X RITE S...

Страница 6: ...are a scene 11 Uploading scenes 13 Viewing material on the VLB 13 Control Bar 14 Scene List 15 Presenter 16 System Information 17 Settings 18 Light Calibration 19 Color accuracy test 25 Supported External Devices 27 The Approval workflow IN VLB and Pantora 28 1 Setting Up the Approval Workflow in Pantora 28 2 Using the Approval Workflow on VLB 28 3 Using JavaScript in the Approval Workflow 31 4 Vi...

Страница 7: ...V i r t u a l L i g h t B o o t h 5 Daylight Filters Cleaning 37 Replacing the Lamps 38 Troubleshooting 39 Technical Specifications 39 ...

Страница 8: ...y are being observed The system includes integrated camera based sensors spectrophotometers colorimeters and the synchronization of real time rendering based on X Rite s patent pending Full Immersion Technology This ensures the most accurate available material evaluation environment Packaging Information Please keep your shipping crate in case you need to return your device to the factory for serv...

Страница 9: ...at level surface capable of bearing the load of the device When choosing an installation location make sure not to block the cooling fan Use the leveling glides to account for imperfections in the floor surface Do not place any items on top of the device Ensure sufficient clearance to the ceiling and walls after installation is completed see below Above full height setting ...

Страница 10: ...port on your computer Plug the other end of the cable into the VLB 2 Connect the AC cord to the VLB and then an easily accessible outlet Make sure AC cord is connected to a Dedicated Line AC power source with a minimum 15 Amp power service Discontinue use if AC cord is damaged AC cord connection Ethernet cable connection ...

Страница 11: ...r Standby Button The power standby button is used to power on and power down the device into a low power state To power on the device press the Power button once To power down the device press the power button again To control the main power to the device see Powering the VLB above Up and Down Buttons The Up and Down buttons are used to adjust the VLB height to allow for the best viewing angle of ...

Страница 12: ...rovides functionality to Turn the device on and off Control the rotating stage Show scenes Select materials Control the illumination D65 Spot Off Perform service functions e g system calibration Refer to Viewing material on the VLB later in this section for additional information on using the touch pad ...

Страница 13: ...the IP address and click the Connect button Once connected the device info is displayed and materials and scenes are uploaded to the VLB Prepare a scene Select New from the Scene Editor menu to create a new scene The default environment is loaded You can add new objects if required ...

Страница 14: ...eholders for each object Placeholders are necessary to assigning materials on the VLB touch pad Click the Material Placeholders tab in the tray to create placeholders Open the menu list and select New The name and the color of the placeholders are preselected You can change both of them if required Save the scene in the Scene Editor menu You are asked if you want to upload the scene to the VLB Cli...

Страница 15: ... you should Darken the room doesn t need to be pitch black but the dimmer the better Position the upper edge of the VLB front opening at the height of your eyes you should not be able to look directly into the lamps Switch on Head Tracking and Perspective Rendering to have position based color correction for the display and correct perspective with respect to the sample Stand centered to the VLB i...

Страница 16: ... Presenter view Service button Used to access service functions Light Calibration refer to Light Calibration later in this manual Approval button Used to access the approval tab Approve or reject measured materials and add comments to them Connection Status This symbol appears when the VLB has a connection to the PANTORA Software No Display Tracking This symbol appears when the display tracking is...

Страница 17: ...he VLB system If the error is automatically resolved by the software this symbol will also disappear again Scene List The scene list shows the list of available scenes The currently loaded scene is indicated with a check mark You can scroll through the available scenes using the scroll bar Once you see the desired scene in the list tap it to load it Use the x button to close the list ...

Страница 18: ... size Illumination These buttons are used for switching between diffuse daylight D65 LED spot illumination and switching off illumination Rendering The eye button is used to switch the eye tracking feature on and off The gamut button is used to turn on the Out of Gamut warning Parts of the image which are out of gamut will flash red and white Rotation Stage These buttons are used for controlling t...

Страница 19: ...tate in the same direction o The sliders below the rotation stage buttons are used to adjust the rotation speed of the turn table and the virtual objects o The Object Alignment slider is used to align the virtual object on the turntable with the physical sample Use the and buttons to fine tune the alignment The sliders for texture scale and texture rotations are used to scale rotate the UV maps on...

Страница 20: ...d tracking o The one on the main screen switches the tracking on and off Once the head tracking is activated the user needs to raise his hand to become the currently tracked user This is not necessary if the user is alone in front of the VLB o The one on the settings screen controls the perspective based on the viewer position o When the tracking is on and the perspective is off the VLB still corr...

Страница 21: ... diffuse light switches to LED illumination and after the display will be turned off automatically 30 seconds before switching to the LED spot light a message appears with countdown time 30 seconds before switching off the display a message appears with countdown time Light Calibration The VLB lights are recalibrated using the i1Pro instrument that is stored in the front drawer Refer below for the...

Страница 22: ... the USB cable into the i1Pro 4 Plug the other end of the USB cable into the port on the front panel of the VLB 5 After the i1Pro is connected tap the Go to next step button on the screen 6 If attached remove the protective cover with ambient light measuring head from the i1Pro The arrow on the protective cover must point to the O unlock marking on the i1Pro before removing ...

Страница 23: ...bration 10 After white calibration is complete remove the i1Pro from the holder and close the slider in the holder over the white tile 11 Attach the ambient light measuring head on the limiting aperture of the i1Pro The arrow on the protective cover must point to the O unlock marking on the i1Pro 12 Rotate the protective cover with ambient light measuring head clockwise until the arrow points to t...

Страница 24: ...h t B o o t h 22 14 Align the i1Pro and the i1 stand in the center of the rotation stage see below 15 Locate the calibration curtain fold and secure the two corners together using the hook and loop fasteners in the curtain ...

Страница 25: ...V i r t u a l L i g h t B o o t h 23 16 Hang the calibration curtain on the VLB so that the entire front is covered ...

Страница 26: ...m a texture whitepoint adjustment 19 After the adjustment is completed a SUCCESS message will appear Tap the Return to Settings button on the screen 20 Tap the Exit Setting button on the Setting screen to return to the Home screen 21 Remove the calibration curtain from the front of the VLB 22 Remove the i1Pro from the rotation stage and unplug it from the front panel 23 Reattach the protective cov...

Страница 27: ...ibration Refer to the Light Calibration section for additional information 4 After the light calibration mount the i1Pro on the i1Pro calibration holder and place it in front of the monitor Make sure that it is centered and is 5 10 cm from the front of the monitor 5 Dim the room illumination for the usual viewing conditions Do not install the calibration curtain or mount the ambient light head on ...

Страница 28: ...V i r t u a l L i g h t B o o t h 26 9 You can download the color accuracy data using the VLB Diagnostics application for archiving or sending to X Rite VLB support ...

Страница 29: ...tton to release the 3D object from the turntable and navigate it inside the VLB scene o Use the left 3D mouse button again to reset the object back on the turntable o While using the 3D mouse other functions like rotating the object with the turntable are deactivated When connecting the 3D mouse the blue light turns on After it is connected the light turns off The blue light will turn on again whe...

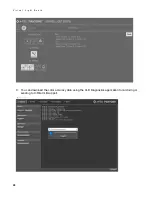
Страница 30: ...alMetaDataDefinitions xml file is provided that creates the following Approval UI and workflow You can edit the file and adapt it to your needs or create a new file and give it an appropriate name name xml All screen images that follow are created using the ExampleApprovalMetaDataDefinitions xml file You can also flag every other meta data field that you have defined in other XML files to get disp...

Страница 31: ...alMetaDataDefinition xml is loaded in Pantora you will see a screen similar to the one below A new unapproved material is shown as rejected and the defined properties have default values displayed Next select the material to approve and then tap the NOTE button to edit the metadata ...

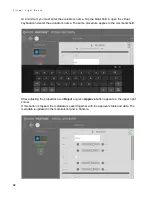
Страница 32: ...d and enter the evaluator s name The same procedure applies to the comments field After adjusting the properties a red Reject or green Approve button appears in the upper right corner If this button is tapped the metadata is saved together with the approval status and date The metadata is updated in the materials list and in Pantora ...

Страница 33: ...es between different fields e g if a certain box is checked another comment field has to be filled by the user If you return false here the VLB software will not let the user save the entered data The evaluateApproval needs to return a 3 tuple of values State should be an integer and can have three different values 0 not evaluated evaluation not possible e g the user has not entered sufficient dat...

Страница 34: ...V i r t u a l L i g h t B o o t h 32 4 Viewing and Handling of Approval Metadata If a material finished the approval process it gets an approved or rejected mini icon in the materials list ...

Страница 35: ... date If Pantora is connected to the VLB all materials and metadata is synchronized immediately This also allows you to see the metadata and mini icons in Pantora If you select the X Rite metadata definition the Approval VLB section contains status comments and date The data is write protected in Pantora The approval metadata definitions contain the remaining values ...

Страница 36: ...a l L i g h t B o o t h 34 If the approved material is loaded on the VLB but not available on the computer currently running the connected Pantora instance it cannot be updated and a warning message is displayed ...

Страница 37: ...ical Support detailing your problem and listing your contact information For the Americas email CASupport xrite com for Europe email EMEAtechsupport xrite com for Asia email TechSupportAsiaDist xrite com For sales questions or to order cables and accessories visit our web site www xrite com or contact your nearest X Rite dealer or service center Problems and questions can also be faxed or emailed ...

Страница 38: ... no objects in the way of the diffuser before opening 2 Hold the diffuser 1 and release the diffuser latch 2 located at the front of the unit 3 Slowly lower the front of the diffuser until it stops 4 Clean the interior of the diffuser glass with a lint free cloth 5 Rotate the diffuser to its closed position and secure it in place with the latch 1 2 ...

Страница 39: ... the fastener button 2 in and lower the daylight filter pack Repeat the procedure for the other filter pack 4 Remove dust from both sides of the filter pack with a clean dry lint free cloth 5 Remove dirt from the daylight lamp reflectors with a clean lint free cloth 6 Rotate the daylight filter pack 2 back into position and push the fastener button 1 in to secure Repeat procedure for other dayligh...

Страница 40: ...ding the filter pack push the fastener button in and lower the daylight filter pack Repeat the procedure for the other filter pack 4 Push one end of the old lamp 1 into the spring loaded socket 2 with pressure to release the other end from its socket 5 Lift the lamp clear of both sockets and discard in an appropriate receptacle 6 Using a piece of lens paper or equivalent between your fingers and t...

Страница 41: ...8 minutes to resume use VLB and PANTORA software not communicating Interface cable not connected Connect the interface cable between the computer and the VLB Close and restart the software application If this does not work reboot the computer Turn the VLB off then turn the VLB on and see if the condition is corrected Technical Specifications Dimensions Approx 1810 mm H x 1160 mm W x 750 mm D Weigh...

Страница 42: ...terials Product Safety Compliance UL 60950 1 2nd Edition 2014 10 14 Information Technology Equipment Safety Part 1 General Requirements CAN CSA C22 2 No 60950 1 07 2nd Edition 2014 10 Information Technology Equipment Safety Part 1 General Requirements EN 60950 1 2006 A11 2009 A1 2010 A12 2011 A2 2013 which includes all European national differences including those specified in this test report IEC...

Страница 43: ......

Страница 44: ...eadquarters X Rite Europe GmbH Althardstrasse 70 8105 Regensdorf Switzerland Phone 41 44 842 24 00 Fax 41 44 842 22 22 Asia Pacific Headquarters X Rite Asia Pacific Limited Suite 2801 28th Floor AXA Tower Landmark East 100 How Ming Street Kwun Tong Kowloon Hong Kong Phone 852 2568 6283 Fax 852 2885 8610 Please visit www xrite com for a local office near you P N VLBEN 500 Rev C ...

Отзывы: