x-pointer XP300 Скачать руководство пользователя страница 9

Specifications of the XP300

17

XP300 User Manual

16

Consult the dealer or an experienced radio/TV
technician for help. 

Caution 

: you are cautioned that any changes or

modifications to the equipment not expressly
approved by the party responsible for compliance
could void your authority to operate the equipment.”

Note 

: This unit was tested with shielded cables on

the peripheral devices. Shielded cables must be
used with the unit to ensure compliance.”

3. Manufacturer : Chois Technology Co., Ltd/ Made

in KOREA

If you have problems while using the XP300 or
if you have any suggestions, don’t hesitate to
contact us.

Tel : +82-32-246-3409, Fax : +82-32-246-3406

Homepage : www.choistec.com, 

E-mail : inquiry

@

choistec.com

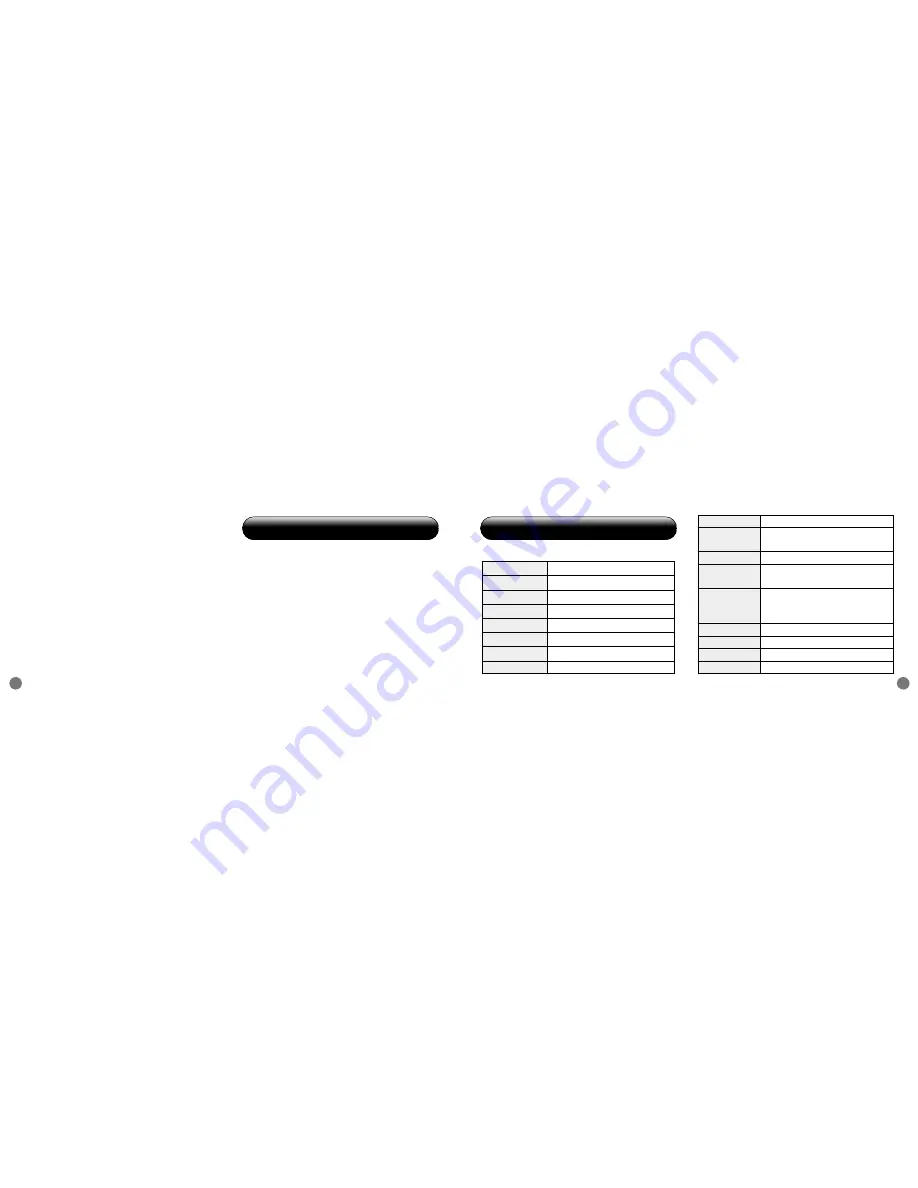
9. Specifications of the XP300

8. Support

1. Transmitter

Bandwidth

2.4GHz ISM (2,405~2,480MHz)

Channel

76

RF Range

30m (Open Field)

RF Power

<

3mW 

Modulation

GFSK 

RF Type

Half Duplex

RF Data Rate

2Mbps

ID Code

65,536

Mouse

800CPI

Operating
Temperature

-10~ 50°C

Laser

ClassII (

<

1mW) 

Laser 
Wavelength

650nm

8EA (Input button 4, Optical Touch 

Buttons

Sensor 1, Laser 1, Power ON/OFF 
switch 1, Mode Selecter 1)

Battery

DC 1.5V Type AAA x 2EA

Dimension

120 x 36.5 x 19mm

Weight

30g

Certificate

CE, FCC, TELEC, FDA, PSC

Содержание XP300

Страница 1: ...XP300 USER MANUAL www choistec com...

Страница 2: ...Package Contents 4 2 Features of the XP300 5 3 Setting up the XP300 6 4 Layout of the XP300 9 5 How to use the XP300 12 6 Cautions 13 7 Certifications 14 8 Support 16 9 Specifications of the XP300 17...

Страница 3: ...XP300 Model with optical touch sensor mouse controls offer greater functionality with finer mouse control and intuitive presentation controls Main functions Page Up Down Start or End Slide Show Switch...

Страница 4: ...ther pouch for protection from the elements scratches dirt and shocks 3 Setting up the XP300 1 Insert 2 x AAA batteries into XP300 Transmitter 2 Insert the Receiver into the USB port of the PC 3 The R...

Страница 5: ...to use In case of the failure in ID pairing Remove and reinsert the USB Receiver Please repeat above installation processes ID Pairing between Transmitter and Receiver 6 LED Indicator LED on the trans...

Страница 6: ...into the USB Port LED RESET ID Recognition or Status indicator No Button Function Task Switch Alt Tab Switching between open windows tasks LED Display the mode status Start or End Slide The Slide Sho...

Страница 7: ...ves the mouse pointer on the screen in the same direction Pushing once performs a left click pushing twice performs a double click Press the Optical Touch Sensor for 1 sec to activate Drag and push ag...

Страница 8: ...e reasonable protection against harmful interference in a residential installation This equipment generates uses and can radiate radio frequency energy and if not installed and used in accordance with...

Страница 9: ...n KOREA If you have problems while using the XP300 or if you have any suggestions don t hesitate to contact us Tel 82 32 246 3409 Fax 82 32 246 3406 Homepage www choistec com E mail inquiry choistec c...

Страница 10: ...User Manual 1 8 2 Receiver Input Power 5V USB Power Operating Temperature 10 50 C RF Power 2mW OS Windows 2000 XP Vista System IBM PC AT Laptop PC Interface USB1 1 2 0 Dimension 47 5 x 16 x 7 5mm Weig...

Страница 11: ......

Отзывы: