background image


3.5” USB2.0 HDD External Enclosure


Page |  4 


Plug and Play & Hot Swappable 


LED indicator   


1.3  System Requirement 


3.5” IDE or SATA compatible storage device 


USB enabled computer system with available USB port 


Microsoft® Windows® 2000/XP/Vista/7/8/8.1/10 (32/64-bit); MAC 9.x or above   


Chapter 2  Installation Guide 


WARNING:   

Hard Disk requires careful handling, especially when being transported.    If you are not 
careful with your hard disk, lost data may result.    Always handle your hard disk or 
storage device with caution. 


2.1


  Hardware Installation 

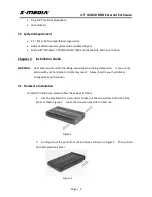
To Install the Enclosure, please follow these steps as follow: 

1.


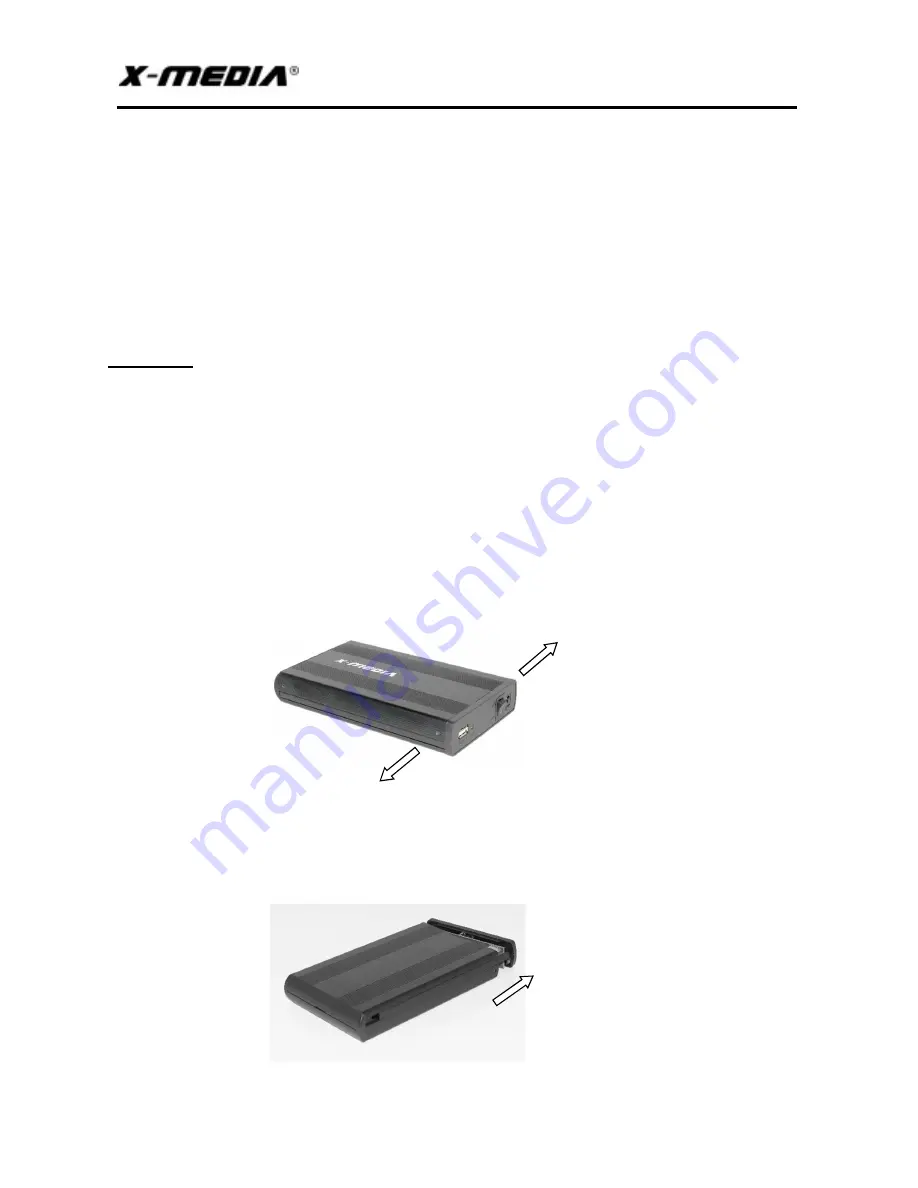
Use the provided mini screw driver to take out the screws from both side of the 

panel as shown Figure 1.    Leave the screws on the side for later use. 


                                              Figure 1 
 

2.


Gently pull out the panel from the Enclosure as shown on Figure 2.    Then pull out 

both side plastic rail cover.   


                                Figure 2 

Содержание XM-EN3200-BK

Страница 1: ...User Guide 3 5 USB HDD External Enclosure Model No XM EN3200 BK XM EN3400 BK For the most up to date information please visit www x mediausa com Version 1 1...

Страница 2: ...llation Guide 4 2 1 Hardware Installation 4 2 2 Driver Installation 6 2 3 Verifying Installation 6 2 4 Using the Enclosure 6 TRADEMARKS MS DOS Microsoft Windows 95 98 98SE NT 2000 ME XP 7 8 8 1 10 are...

Страница 3: ...cts XM EN3200 BK or XM EN3400 BK without any explanations All these devices are sharing this User Guide All product models listed just differ in appearance and figure in this User Guide Chapter 1 Prod...

Страница 4: ...handling especially when being transported If you are not careful with your hard disk lost data may result Always handle your hard disk or storage device with caution 2 1 Hardware Installation To Ins...

Страница 5: ...3400 BK Shown in Figure 4 1 Figure 4 Figure 4 1 5 After connecting the Hard disk slide in the installed hard disk with panel back into Enclosure and use 4 provided screws to tighten the Hard Disk Figu...

Страница 6: ...ent screen will appear Click Device Manager and then you will see various options on the right side Double click on the Disk Drive option A new disk drive should be listed under this category It will...

Страница 7: ...up then select New Partition Follow the instructions in the wizard to complete setting up the drive Once completed the Disk should show up as Healthy with a drive letter assigned i e G 3 If you are i...

Отзывы: