


Copyright © 2020 WyreStorm Technologies |
EXP-CON-H2-DD Quickstart Guide | 200408
UK: +44 (0) 1793 230 343 | ROW: 844.280.WYRE (9973)
2 of 4
Wiring and Connections
WyreStorm recommends that all wiring for the installation is run and terminated prior to making connections to the scaler. Read through this section in it’s
entirety before running or terminating the wires to ensure proper operation and to avoid damaging equipment.
IMPORTANT! Wiring Guidelines
• The use of patch panels, wall plates, cable extenders, kinks in cables, and electrical or environmental interference will have an adverse effect on signal
transmission which may limit performance. Steps should be taken to minimize or remove these factors completely during installation for best results.
• WyreStorm recommends using pre-terminated HDMI cables due to the complexity of these connector types. Using pre-terminated cables will ensure that
these connections are accurate and will not interfere with the performance of the product.
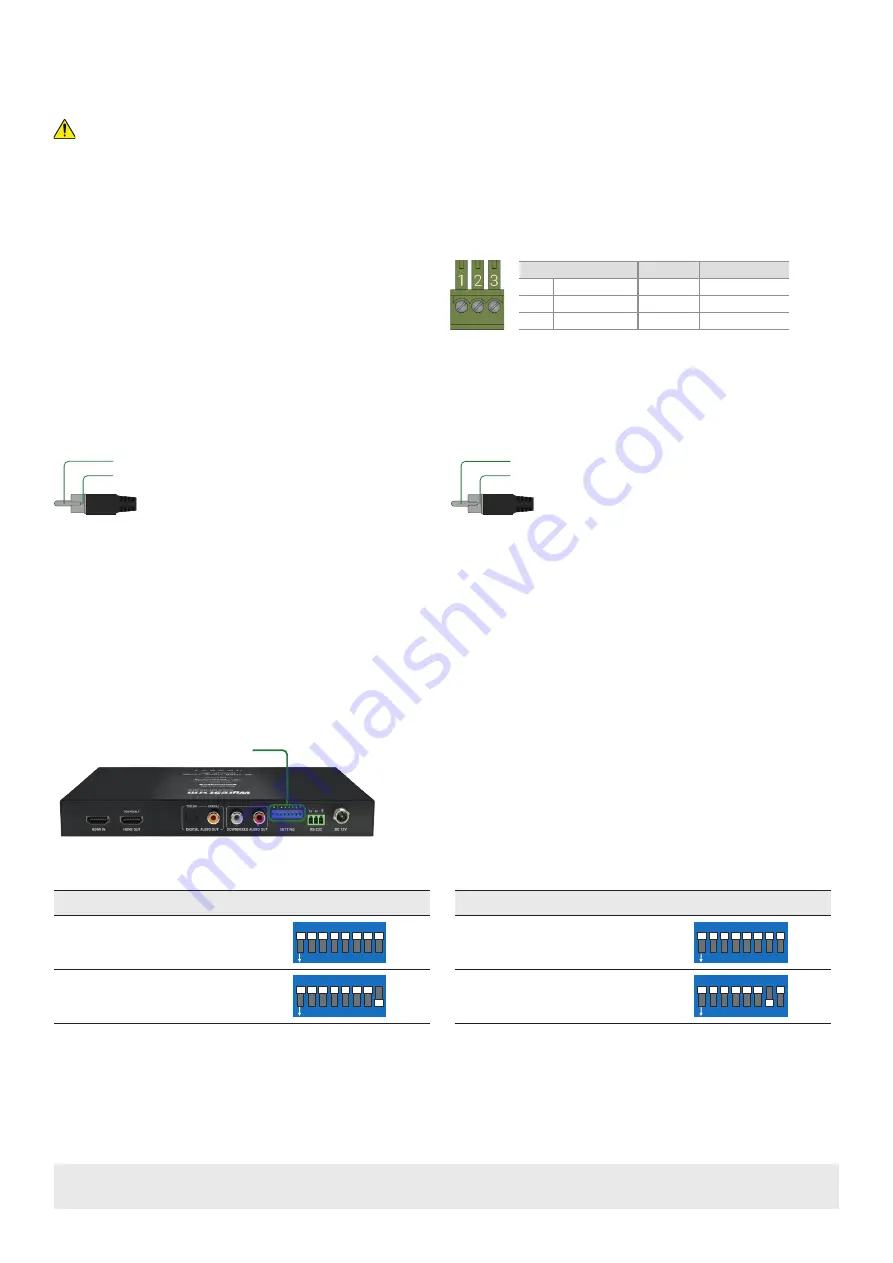
HDMI Output 1 Scaling
Force Downscale
8 7 6 5 4 3 2 1
ON
Auto Downscale
8 7 6 5 4 3 2 1
ON
HDMI Output 1 Audio
Bypass
8 7 6 5 4 3 2 1
ON
Downmix 2ch
8 7 6 5 4 3 2 1
ON
RS-232 Wiring
The EXP-CON-DAC-DD uses a 3-pin RS-232 with no hardware flow control.
Most control systems and computers are DTE where pin 2 is RX, this can vary
from device to device. Refer to the documentation for the connected device
for pin functionally to ensure that the correct connections can be made.
3rd Party Device
Pin 1 TX (Transmit) ---> To ---> RX (Receive)
Pin 2 RX (Receive)
---> To ---> TX (Transmit)
Pin 3 G (Ground)
---> To ---> G (Ground)
WyreStorm Connector
Audio Wiring
This scaler contains audio connections for Analog Audio as well as S/PDIF digital.
Analog Audio
Tip:
Signal
(+)
Shield:
Ground/Return
(-)
S/PDIF Digital Coax Audio
Tip:
Signal (+)
Shield: Ground/Return (-)
Setup and Configuration
EDID and Scaling
EDIDs can be configured to request the correct content from the source device. It is recommended that you set an EDID appropriate to the maximum capability
of the source device then configure the video & audio output settings to match the connected TV, projector or AVR.
•
When set to Auto-scale, the scaler will scan the EDID of the device connected to HDMI OUT, then dynamically adjust the output to the optimum resolution.
•
When EDID settings are changed, ensure the source device is connected but powered off, then power on once all DIP switches have been set.
•
Ensure that a display or AVR is connected and powered on before copying EDIDs or the copy will fail.
•
Power to the scaler must be cycled (Off/On) after changing dip switches in order for the setting to take effect.
EDID Switch Location
Setting EDIDs
1. Ensure the EXP-CON-H2-DD and connected source devices are powered OFF
2. Set the desired switch configuration according to the illustrations below or
the EDID table which is printed on the base of the unit.
3. Power ON the EXP-CON-H2-DD
4. Power ON the source device
5. Ensure the input status light is lit on the front of the EXP-CON-H2-DD


