


teamVEOS User Manual
Page 13
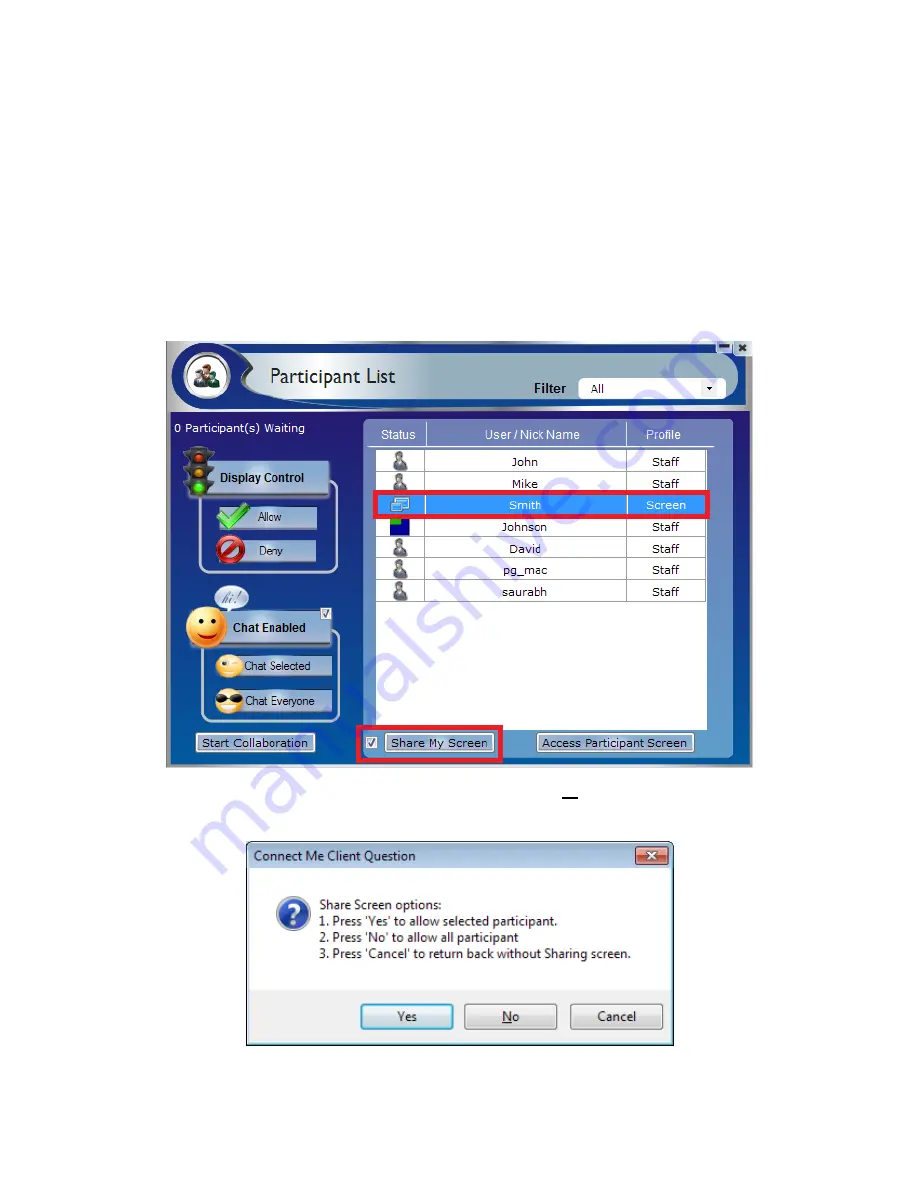
Share Screen
User can share his screen to show his desktop to multiple users.
To start screen sharing:
1.
Login to Connect Me
2.
Open Participant List
3.
Select Screen Profile user
4.
Click on
Share My Screen
5.
Click on
YES
to share screen with selected user
or
NO
to share screen with all
users.
Содержание teamVEOS
Страница 1: ...User Manual ...
Страница 3: ...teamVEOS User Manual Page 2 Welcome ...
Страница 7: ...teamVEOS User Manual Page 6 Start Collaboration ...
Страница 13: ...teamVEOS User Manual Page 12 File transfer will start at teamVEOS system and open after full transfer ...
Страница 15: ...teamVEOS User Manual Page 14 Presenting with teamVEOS ...
Страница 17: ...teamVEOS User Manual Page 16 Playing Music and Movies ...
Страница 20: ...teamVEOS User Manual Page 19 Logout from teamVEOS Click on Leave Room button to logout from VEOS Collaboration ...


