14
Cordless Lawn Mower
EN
OPERATION INSTRUCTION
NOTE: Read instruction handbook before
operation this machine.
INTENDED USE
This product is intended for domestic lawn mowing.
ASSEMBLY & OPERATION
ACTION
FIGURE
ASSEMBLY
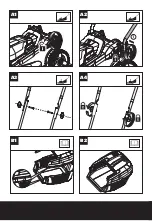
Assembling the handle bar
See Fig. A1-A4
Assembling the grass collection bag
See Fig. B1, B2
Fitting the grass collection bag to the
lawn mower
NOTE:
Depress the grass collection
bag slightly to ensure that it is
completely installed.
See Fig. C1, C2
Checking the battery charge
condition
NOTE:
Fig. D1 only applies for the
battery pack with battery indicator
light.
See Fig. D1
Charging the battery pack
More details can be found in charger’s
manual
.
See Fig. D2
Fitting / removing battery
Insert the safety key before
installing the battery pack.
See Fig. E1, E2
OPERATION
Starting & stopping
See Fig. F
Adjusting the cutting height
Remove the battery pack. Flip the
mower over. Grip one wheel and pull
or push it forward. Make sure to pull it
forward far enough that it is able to be
move up/down in the wheel bracket.
With the wheel in its most forward
position, slide it up or down into the
desired position. Repeat the above
steps to all four wheels. Make sure all
four wheels are in the same cutting
height.
WARNING!
Stop, release
Operating Bail and wait until the
motor stops before adjusting height.
The blades continue to rotate after
the machine is switched off, a rotating
blade can cause injury. Do not touch
rotating blades.
See Fig. G1,
G2
Grass bag filling indicator
Empty status: flap floats (a)
Fully status: flap falls down (b)
See Fig. H
Removing / emptying grass collection
bag
WARNING!
Always check the
safety flap close the discharge
outlet before using. Never lift the safety
flap when the lawn mower is being used
without fitted grass collection bag.
See Fig. I
Storage
See Fig. J1, J2
MOWING TIPS
NOTE:
ALWAYS INSPECT AREA WHERE MOWER IS
TO BE USED AND REMOVE ALL STONES, STICKS,
WIRE, METAL AND OTHER DEBRIS WHICH MIGHT BE
THROWN BY THE ROTATING BLADE.
1. Mow across the face of slopes, never up-and-down.
Exercise extreme caution when changing direction on
slopes. Do not mow excessively steep slopes. Always
maintain good footing.
2. Release bail handle to turn mower “OFF” when
crossing any graveled area (stones can be thrown by
the blade).
3. Set mower at highest cutting height when mowing
in rough ground or in tall weeds. Removing too much
grass at one time can cause circuit breaker to trip,
which stops mower.
4. If a grass bag is used during the fast growing season,
the grass may tend to clog up at the discharge
opening. Release bail handle to turn mower “OFF”
and remove the safety key. Remove the grass bag and
shake the grass down to the back end of the bag. Also
clean out any grass or debris which may be packed
around the discharge opening. Replace the grass
collection bag.
5. If mower should start to vibrate abnormally, release
bail handle to turn mower “OFF” and remove safety key.
Check immediately for cause. Vibration is a warning
of trouble. Do not operate mower until a service check
has been made.
6. ALWAYS RELEASE BAIL HANDLE TO TURN MOWER
“OFF” AND REMOVE SAFETY KEY WHEN LEAVING IT
UNATTENDED EVEN FOR A SHORT PERIOD OF TIME.
CUTTING AREA
The cutting area can be affected by several factors, such
as cutting height, lawn humidity, grass length and density.
Besides, starting and stopping the mower too many times
during operation will reduce the cutting area.
The table below gives the relationship between cutting
conditions and cutting area.
Содержание WG730E
Страница 3: ...1 3 4 5 6 7 8 10 11 12 9 2...
Страница 4: ...A1 A2 A3 A4 1 2 B1 B2...
Страница 5: ...13 14 100 0 E1 E2 D2 D1 1 2 C1 C2 1 2...
Страница 6: ...I H G2 a b 0 100 1 2 1 2 L F G1 3 2 1 70mm 50mm 30mm 2 1 L J1 1 2...
Страница 7: ...L 1 L 2 L 3 15 14 K 1 K 2 K 3 L K M1 L J2 O2 M2...
Страница 121: ...121 GR a b c d a b c a...
Страница 122: ...122 GR b c d e f g h i j k l m n o p...
Страница 123: ...123 GR q a b c d e f...
Страница 124: ...124 GR a b c d e f g h...
Страница 125: ...125 GR i j k l WorxNITRO m n o p q r s t...
Страница 126: ...126 GR 1 2 3 4 5 6 7 8 9 10 11 12 13 E1 14 E1 15 M1...
Страница 128: ...128 GR 100C O OO o o oo o o o o A1 A4 B1 B2 C1 C2 D1 D1 D2 E1 E2 F G1 G2 H I J1 J2 1 2 3...
Страница 129: ...129 GR 4 5 6 7 5 200 m 1 2 1 3 3 4 5 1 2 3 1 2 K 1 2 3 K 1 K 2 4 5 K 3 6 7 L L 1 L 2 L 3 M1 M2 50...
Страница 130: ...130 GR 2 16 J1 J2 1 A C 2 C D...

