background image

INSTALLING THE STOVE 
Remember to leave sufficient clearance in front of the stove for the fire door to open fully. 

Place 

stove

 on 

chosen level hearth and remove any packaging materials. The  shrink  polythene can be used as a cover for the 
stove whilst installation is in progress as fire cement will mark the stove paint surface if left. 
 
There is normally a piece of 

cardboard

 , for protection, behind the door glass.   All other pieces of board in the 

stove are  the 

fire boards

. Turn the handle and open the fire door  then carefully remove it by lifting up and off  its 

hinge  pins  (retaining these) and  place it safely out of  the way. From the front of the stove you can now   
remove 

the operating tool,  baffle, fire boards, the grate bars and ashpan

 if necessary. 

 
The 

ashpan

 can be used for holding the 

grate bars

 if you need to remove them,  which can  be done easily by  

rotating them fully open then lifting each one out of the

 grate link bar

, outwards and upwards. 

 
The flue spigot supplied with the Woodwarm is 127mm.  It is designed to be used for top or rear mounting and is 
interchangeable with the blanking plate if a different flue position is required at a later date. There is a rope seal 
on both the blanking plate and the flue spigot  to ensure an air tight seal. Locate the 

blanking plate

 and the

 flue 

spigot

 in their chosen apertures and then tighten the screws and nuts to secure them in place. 

Ensure seal is 

secure and airtight

.   

 
Fire cement and/or a length of  fireproof rope should be used to seal the join of the 

flue pipe

 and the flue spigot,   

the joint between two 

flue pipes

 and where the flue pipe joins your chosen 

register plate.

  Stainless Steel  

self-tapping screws or nuts and set screws should be used to reinforce the above joints where applicable. 
 
Carefully remove any excess fire cement immediately to ensure no marking of the stove finish.   
 
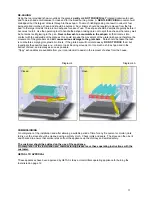
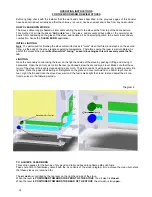
Replace the baffle, grate bars and log guard  followed by the ashpan and finally the fire door. (

For  fitting of  fire 

boards and baffle see diagram 3 )


BAFFLE 


The smoke baffle sits on the rear fire board and locates on the baffle support pins in the top of the stove (front 
pins on two pin models) . Fit baffle as shown in Diagram 3

Ensure baffle seats squarely on rear board.


INTERNAL FIRE BOARDS 


These stoves are for both  wood and solid fuel  and  the interior of the fire chamber of all of them is lined with 
30mm  Mica based  fire resistant  board . There are three pieces,  one at the rear under the baffle and flue outlet 
and one on either side of the stove. These fire boards are ready cut, to size and shape and may be packed loose 
to prevent damage. They are very fragile so

 handle with care

, especially when loading with fuel. They  have a 

relatively short life, especially  when burning coal, so do inspect them regularly and replace if they begin to dete-
riorate  by showing signs of breaking up or wearing thin.  The fire board is important for efficient combustion and 
is  not covered by any warranty as it  is considered a consumable product.  
 
The replacement sizes is provided under 

 Stove Fire boards

 on

 table 1 page 3.


Содержание Fox Fire

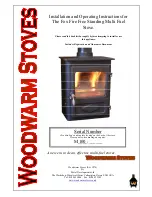
Страница 1: ...on and Guarantee Document A new era in clean effective multi fuel stoves Woodwarm Stoves Woodwarm Stoves Serial Number Also detailed on data plate located on the back of the stove Please quote when ma...

Страница 2: ...g Fuels for Burning on Fireview Stoves Daily Routine Maintenance and Servicing Operating Instructions for the Woodwarm Fireview Stoves How Clean Burn Works Initial Lighting Lighting To Achieve Cleanbu...

Страница 3: ...s wood 3 3 Mean Flue gas Temp o C wood 203 Efficiency ancit 82 1 Flue Gas mass flow g s ancit 2 2 Mean Flue gas Temp o C ancit 173 Weight Minimum Clearance From Inflammables without Woodwarm heat defl...

Страница 4: ...th when installing this appliance Health and Safety at Work It is the responsibility of the installer to comply with current Health and Safety Regulations and particular attention should be given to t...

Страница 5: ...t of your particular appliance Flues must be fitted in accordance with the manufacturers instructions and according to local Building Regulations If there is any doubt over the flue connec tion or the...

Страница 6: ...roof light dormer window or other opening Note 3 At least 1000mm above the top of the opening D within 2300mm of an adjoin ing or adjacent building whether or not beyond the boundary Note 3 at least...

Страница 7: ...7 Flue Outlet Configuration Register Plate Flexible Liner Rain Cap Tee With Removable Cap Woodwarm Rear Flue Adaptor Diagram 2 Minimum 4 5mtrs Flue Vent 600mm MAX of Single wall flue...

Страница 8: ...Fire cement and or a length of fireproof rope should be used to seal the join of the flue pipe and the flue spigot the joint between two flue pipes and where the flue pipe joins your chosen register p...

Страница 9: ...en contact with the stove body when the door is closed Your Fire Fox Stove has a door handle shown below in red to make it easier and safer to use your stove Use the heat resistant glove provided to o...

Страница 10: ...outer glass panel furthest from the fire is mounted on fibre glass ladder rope which should surround all the edges diagram 5 Caution is required when replacing this glass panel as the ladder rope has...

Страница 11: ...use serious damage to the grate bars Care should be taken that ash is cool before emptying into plastic bin liners If the grate bars will not rotate easily DO NOT FORCE them but investigate the possib...

Страница 12: ...et wood is pointless It produces far less heat maybe as little as 10 of that of dry wood Treat any bought in wood as wet unless its history is known Do not burn wet wood with solid fuel as a very aggr...

Страница 13: ...The paint used is a durable heat proof paint It is as a consequence porous and is not waterproof Before re lighting the stove after a long period out of use check that all flue ways are clear of obst...

Страница 14: ...t builds an Air Curtain over the glass and prevents all but a little of the normal tar de posits from condensing on the glass of the stove and causes all but a small proportion to be burnt in secondar...

Страница 15: ...f the stove to the rear drag any unburnt fuel to the front and add new fuel to the rear Try and keep the fuel at least 25mm from the door glass when the door is closed and repeat the procedure in B Fo...

Страница 16: ...stove to reach operating temperature before closing air controls FAULT FINDING A Stove smokes on lighting or when fire door is opened Flue ways blocked sweep chimney and flue Baffle incorrectly fitte...

Страница 17: ...se instructions or does not comply with current building regulations and any regional legislation in force at the time Metal Developments Ltd does not guarantee the onsite assembly installation or ope...

Страница 18: ...mber INSTALLERS DETAILS Name Address Phone Number HETAS Registration Number SPARE PARTS Use only Metal Developments Ltd approved replacement parts 14mm Main Fire Door Rope State model 14mm Ash Door Ro...

Страница 19: ...uk The National Association of Chimney Sweeps Unit 15 Emerald Way Stone Business Park Stone Staffordshire ST15 OSR Tel 01785 811732 www chimneyworks co uk The National Association Of Chimney Engineers...

Страница 20: ...20 30 09 09...
Отзывы: