Woods MOW'N MACHINE FZ22K Скачать руководство пользователя страница 7

   Safety 

7

MM F-Series (Rev. 8/1/2008)

(Safety Rules continued from previous page)

Installation of a grasscatcher assembly will

reduce the stability and maneuverability of the
Mow'n Machine when operating on sloping terrain.

Do not tow a trailer over 200 lbs. Do not tow a

trailer or add power unit ballast with a combined
weight over 200 lbs. Too much weight can cause
loss of traction or stability on a slope. It can also
reduce parking brake ability. Too much weight will
shorten the hydraulic system life. Never tow a
trailer with a grass collection system attached to
the power unit.

Watch for hidden hazards on the terrain during

operation.

Watch for traffic when operating near or cross-

ing roadways.

Uneven terrain could overturn the machine.

Do not try to stabilize the machine by putting

your foot on the ground.

Do not mow near drop-offs, ditches, or embank-

ments. The machine could suddenly roll over if a
wheel goes over the edge or if the edge caves in.

Stop power unit and equipment immediately

upon striking an obstruction. Turn off engine,
remove key, inspect, and repair any damage before
resuming operation.

Do not drive or operate mower in tilt-up posi-

tion. Power unit stability is not adequate and result-
ing loads can damage or cause failure of tilt-up
mechanism.

Never leave a running machine unattended.

Moving steering levers rapidly from forward to

reverse or reverse to forward could cause loss of
control.

Do not operate power unit with attachment

removed. Attachment is required for power unit
stability.

Before attempting to unplug vacuum hoses, dis-

engage PTO, stop power unit, and remove key.

MAINTENANCE

Before dismounting power unit, follow these

steps: lower attachment to ground, shut off PTO,
set parking brake, shut off engine, position steer-
ing levers to neutral swing-out position, and
remove key.

When using a sunshade and lifting hood for

maintenance, use caution around pinch points.

Before attempting to unplug vacuum hoses, dis-

engage PTO, stop power unit, and remove key.

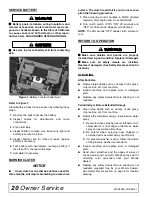
Before performing any service or maintenance,

lower attachment to ground, turn off power unit
engine, remove key, and disconnect battery ground
cable (negative -).

Before working underneath, read manual

instructions, securely block up, and check stability.
Secure blocking prevents equipment from drop-
ping due to hydraulic leak down, hydraulic system
failure, or mechanical component failure.

Do not modify or alter or permit anyone else to

modify or alter the equipment or any of its compo-
nents in any way.

Do not work on mower in tilt-up position unless

lock-up mechanism is in good condition. Replace if
damaged.

Always wear relatively tight and belted clothing

to avoid getting caught in moving parts. Wear
sturdy, rough-soled work shoes and protective
equipment for eyes, hair, hands, hearing, and head;
and respirator or filter mask where appropriate

.

Make sure attachment is properly secured,

adjusted, and in good operating condition.

Do not put Mow’n Machine into service unless

clutch is working properly. When the engine is at
full throttle, PTO-driven accessories must stop
within five seconds after the PTO switch is turned
t o   “ O FF. ”   S e e   y o ur  d e a l e r  f o r   r e p l a c e m e n t
clutches.

Keep all persons away from operator control

area while performing adjustments, service, or
maintenance.

Do not remove radiator cap while engine is hot.

Do not change engine governor settings or

overspeed engine.

Frequently check blades. They should be sharp,

free of nicks and cracks, and securely fastened.

Do not handle blades with bare hands. Careless

or improper handling may result in serious injury.

Your dealer can supply genuine replacement

blades. Substitute blades may not meet original
equipment specifications and may be dangerous.

(Safety Rules continued on next page)

SAFETY RULES

ATTENTION! BECOME ALERT! YOUR SAFETY IS INVOLVED!

Содержание MOW'N MACHINE FZ22K

Страница 1: ...OPERATOR S MANUAL MOW N MACHINE MAN0999 Rev 11 7 2013 FZ22K TM...

Страница 2: ...at www WoodsEquipment com or in the United States and Canada call 1 800 319 6637 The equipment you have purchased has been carefully engineered and manufactured to provide dependable and satisfactory...

Страница 3: ...IONS 44 INDEX 45 REPLACEMENT PARTS WARRANTY 47 PRODUCT WARRANTY BACK COVER This product contains chemicals including lead known to the State of California to cause cancer and birth defects or other re...

Страница 4: ...nd maintaining your Mow n Machine Read it carefully It furnishes information and instructions that will help you achieve years of dependable performance These instructions have been compiled from exte...

Страница 5: ...ed for your protection Do not disconnect disable over ride or execute any action that would cause this system to malfunction If malfunction occurs stop all operation and contact dealer for repair Remo...

Страница 6: ...rtificial light Keep hands feet hair and clothing away from equipment while engine is running Stay clear of all moving parts When improperly operated power unit can roll over or upset Use of rollover...

Страница 7: ...tion and remove key When using a sunshade and lifting hood for maintenance use caution around pinch points Before attempting to unplug vacuum hoses dis engage PTO stop power unit and remove key Before...

Страница 8: ...d related accessories contain lead and lead com pounds chemicals known to the State of California to cause cancer and birth defects or other repro ductive harm WASH HANDS AFTER HANDLING STORAGE Keep c...

Страница 9: ...ty 9 MAN0999 12 4 2012 3 SERIAL NUMBER PLATE 1 72407 Safety Decals continued on next page 2 72404 SAFETY INSTRUCTIONAL DECALS ATTENTION BECOME ALERT YOUR SAFETY IS INVOLVED Replace Immediately If Dama...

Страница 10: ...high pressure water can enter through very small scratches or under edges of decals causing them to peel or come off Replacement safety decals can be ordered free from your Woods dealer or in the Unit...

Страница 11: ...ght Power Tilt Adjustment Switch The deck height and Power Tilt switch is used with MXT Push the toggle switch forward to raise the deck and pull back to lower the deck to the desired cutting height F...

Страница 12: ...l for oil grade 2 Set throttle half way open 3 A warm battery has better starting capacity than a cold one 4 Use fresh fuel it is better for starting than leftover fuel STARTING MOWER OR ATTACHMENT Ma...

Страница 13: ...e further forward or rearward the steering handles are moved the faster the machine will move Steering Handle Positions NOTICE If you become confused during operation return both handles to the center...

Страница 14: ...nsfer system correct counterweight must be used to maintain stability The weight transfer is designed to place an additional load on the drive wheels providing additional traction 1 Attach mower to po...

Страница 15: ...nutes of oper ation ___ Check to be sure engine is free of dirt and debris Pay particular attention to the cooling fins gover nor parts and muffler ___ Do not allow riders ___ Inspect area and remove...

Страница 16: ...ck 4 Add oil as necessary See engine owner s manual for specifications Change Engine Oil NOTICE Use care to prevent hot oil from contacting bare skin 1 Run engine to allow oil to become hot This will...

Страница 17: ...th a good grade wheel bearing grease 6 Install wheel fork 10 bearing cones 6 and remaining hardware into assembly as shown 7 Set bearings by torquing nut to 26 lbs ft All bearing free play should be r...

Страница 18: ...astened to the trunnion arm of the transaxle 5 Inspect the bypass mechanism on the transaxle and the vehicle linkage to insure that both actuate and release fully Service and Maintenance Procedures So...

Страница 19: ...ll and torque the top port plugs to 180 in lbs 20 3 Nm 12 Continue to fill the transaxles through the expansion tank until the Full Cold line is reached on the Hydro Gear expansion tank An additional...

Страница 20: ...FF for 30 seconds Repeat cycle 20 times NOTE The 30 seconds OFF allows clutch surface to cool RETURN TO OPERATION Make sure shields and guards are properly installed and in good condition Replace if d...

Страница 21: ...p and fan blades are clean NOTE Overheating can cause loss of power or fluid leaks from excess fluid expansion 3 Make sure dump valves are tightened down No Positive Neutral Position If drive wheels t...

Страница 22: ...harness underneath the seat pan by the left hand steering pivot linkage if there is not a deck or a standard deck is attached Check the deck safety switch refer to Figure 10 and troubleshooting deck s...

Страница 23: ...s and nuts finger tight 3 Install small L bracket at the front and rear using long bolts through frame loosely 4 Install screws and nuts in the front and rear of the frame finger tight 5 With hydro po...

Страница 24: ...TO idler arm spring and remove belt 3 Disconnect electrical wire harness from clutch 1 4 Remove screw from end of crank shaft 5 Remove clutch from crank shaft Be sure to capture spacer between clutch...

Страница 25: ...engine oil level 30W 2 Check that oil levels 20W 50 in hydro expansion tank are at correct level NOTE See Owner Service section for engine transmission and lubrication information Fuel Fill fuel tank...

Страница 26: ...tate handles inward Align handles with one another Torque all hardware to 12 lbs ft Make sure handles stay in alignment Straight Line Travel 1 Check tire pressure tires must have equal air pressure 2...

Страница 27: ...ion including hydrostatic neutral and safety switch system page 11 ___ Check all fluid levels See Lubrication page 25 ___ Check tire pressure See Drive Tire Pressure page 25 DELIVERY CHECK LIST DEALER...

Страница 28: ...28 Dealer Check Lists MAN0999 12 4 2012 NOTES...

Страница 29: ...AT DRIVE SYSTEM 33 PTO CLUTCH PUMP ASSEMBLY 34 35 PTO GEARBOX 35 SEAT ASSEMBLY 36 STEERING ASSEMBLY 37 WIRING DIAGRAM FZ22K Wiring Diagram 38 39 TAILWHEEL ASSEMBLY Single Tailwheel Assembly 40 Wide St...

Страница 30: ...30 Parts MAN0999 12 4 2012 FZ22K FRAME ASSEMBLY Rev 2 18 2013...

Страница 31: ...uel tank RH 27 78331 1 Fuel tank LH REF PART QTY DESCRIPTION 28 78333 1 Gas cap 29 78334 1 Grommet 30 78335 1 Remote vent 31 1 Battery 340 CCA 32 78541 1 Front cover 33 78546 1 Skid plate 34 78606 1 C...

Страница 32: ...78536 1 Exhaust 7 71812 1 Fuel filter 8 78722 1 Oil filter 9 78723 1 Air filter 10 78724 1 Air pre filter 11 78725 1 Engine tune up kit 12 21536100 2 Spark plug 13 78738 4 Nut Whiz M8 x 1 25P Flange S...

Страница 33: ...r pin 2 12 35155 4 5 16 SAE Flat washer ZP 13 62155 4 5 16 NC x 2 3 4 Cap screw GR5 14 70065 2 1 4 NC Whiz nut 15 71206 2 1 4 20 Flanged hex screw 16 71851 8 5 16 NC x 3 4 Flanged cap screw 17 73163 1...

Страница 34: ...34 Parts MAN0999 12 4 2012 PTO CLUTCH PUMP ASSEMBLY Rev 2 18 2013...

Страница 35: ...033958 2 3 8NC x 1 1 4 Flanged screw 20 14350 2 3 8 NC Flanged lock nut 21 19025 2 5 8 NC Flanged lock nut 22 2864 3 3 4 SAE Hardened flat washer 23 2978 2 1 4 NC x 3 4 Socket Head Cap Screw 24 57817...

Страница 36: ...1 Weight adjust knob 13M 18 78494 1 Arm rest assembly RH 13M REF PART QTY DESCRIPTION 19 78496 2 Arm rest pad 13M 20 78495 1 Arm rest assembly LH 13M 21 78497 1 2IN Retractable seat belt 13M 22 78503...

Страница 37: ...mpression spring 18 70284 4 6 32 x 1 Bolt 19 70423 2 5 x 88 x 065 Nylon washer 20 71313 1 Mount STRG SW RT 21 71314 1 Mount STRG SW LT 22 71323 8 5 Nylon bearing REF PART QTY DESCRIPTION 23 71632 4 31...

Страница 38: ...38 Parts MAN0999 12 4 2012 FZ22K WIRING DIAGRAM...

Страница 39: ...fety switch 8 75502 1 Seat switch 9 73902 1 Hour meter 10 71475 1 Bosch style relay 12 71385 1 Fuse 30 amp auto 13 71387 1 Fuse 7 5 amp auto 14 78043 1 Positive battery cable w terminal boot 15 78042...

Страница 40: ...sing 16 73818 1 Caster fork 17 78704 1 Spacer Standard Hardware Obtain Locally REF PART QTY DESCRIPTION 3 3585 4 Bearing cup 4 3586 4 Bearing cone 5 70328 2 Seal 1 5 x 2 x 187 6 70086 2 Spacer 1 013 x...

Страница 41: ...73938 Headlight kit 1 73937 1 Light bracket left 2 73936 1 Light bracket right 3 73935 2 Rect work light with switch 4 07516000 4 Button bumper 5 6096 4 5 16 NC x 3 4 HHCS 6 2472 4 5 16 Lock washer RE...

Страница 42: ...42 Parts MAN0999 12 4 2012 78727 COUNTERWEIGHT MOUNT KIT OPTIONAL REF PART QTY DESCRIPTION 1 6 Weight 14 8 lb 2 78728 1 3 8 NC x 8 Carriage bolt GR5 ZP Standard hardware obtain locally Rev 11 7 2013...

Страница 43: ...1 2 467 634 722 979 1020 1383 Diameter Thread Pitch Millimeters Wrench Size Coarse Thread Fine Thread Diameter Thread Pitch Millimeters Marking on Head Marking on Head Metric 8 8 Metric 10 9 Metric 8...

Страница 44: ...HHCS Hex Head Cap Screw HT Heat Treated JIC Joint Industry Council 37 Degree Flare LH Left Hand LT Left m Meter mm Millimeter M Male MPa Mega Pascal N Newton NC National Coarse NF National Fine NPSM...

Страница 45: ...emperature Lights 11 Controls and Switches 11 Moving Disabled Power Unit 14 Owner Pre Operation Checklist Owner s Responsibility 15 Practice Operation 12 Uneven Terrain Operation 12 Safety Switch Syst...

Страница 46: ...tems or any damage failure or loss caused by improper operation improper maintenance misuse or an accident WOODS obligation under this Warranty is limited to at WOODS option the repair or replacement...

Страница 47: ...Repairs made with parts other than those obtained through WOODS WOODS makes no warranty express or implied with respect to engines batteries tires or other parts or accessories with respect to which...

Страница 48: ...or service marks not owned by Woods Equipment Company that appear in this manual are the property of their respec tive companies or mark holders Specifications subject to change without notice Woods...

Отзывы: