12
W O L F G A S R A N G E T O P
O P E R AT I O N
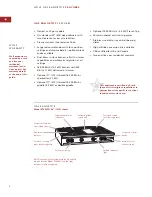
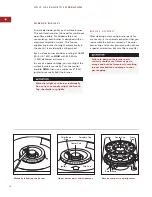
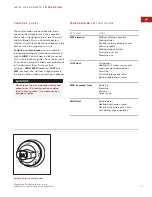
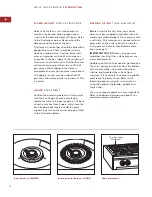
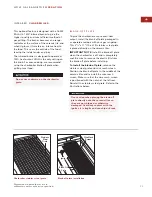
Grate placement
Inner and outer burners at HIGH
Inner burner at SIMMER
B E F O R E U S I N G
Y O U R R A N G E T O P
Before using for the first time, you should
clean your gas rangetop thoroughly with hot
water and a mild detergent. Rinse and dry with
a soft cloth. This removes any residual oil and
grease left on the surface from the manufac-
turing process. Refer to Care Recommenda-
tions on page 21.
IMPORTANT NOTE: Before using your gas
rangetop, check that the surface burners are
assembled correctly.
Griddles and French Tops need to go through a
”burn in” period to clean oils from the bottom
of these assemblies. To prevent food from
sticking and to protect the surface from
moisture, it is necessary to season the griddle
and French Top prior to use. Refer to the
following pages for specific instructions on
using the optional charbroiler, griddle and
French Top.
The use of proper cookware is very important.
Refer to Cookware Selection on page 20 for
cookware recommendations.
F L A M E H E I G H T
A N D A P P E A R A N C E
Select a flame that is just high enough to
maintain the desired cooking speed and is
sized to fit the base diameter of the pan. Refer
to the illustrations below. Never extend the
flame beyond the base of the pan.
The flame on natural gas should be blue with a
deeper blue core. There should be minimal
trace of a yellow flame. A yellow flame indi-
cates an improper mixture of air and gas or
impurities in the gas supply to the rangetop. If
this occurs consistently, call a Wolf authorized
service center to adjust the mixture. With LP
gas, some yellow tipping to the flame is
acceptable and may not require an adjustment.
A ”popping” sound may be noticed with LP
gas when the surface burner is turned off. This
is normal.
G R AT E
P L A C E M E N T
Position the porcelain-coated, cast iron grates
with the five fingers of each grate facing
toward the front of the gas rangetop. The back
of each grate has three fingers, which face the
back. Rubber pads located under the grate
support legs rest on the burner drip pan. Refer
to the illustration below.
Cast Iron Grate
Placement


