Page 31
MW24-1100 MICROWAVE OVEN
Component Removal
4-4
#814888 - Revision A - May, 2009
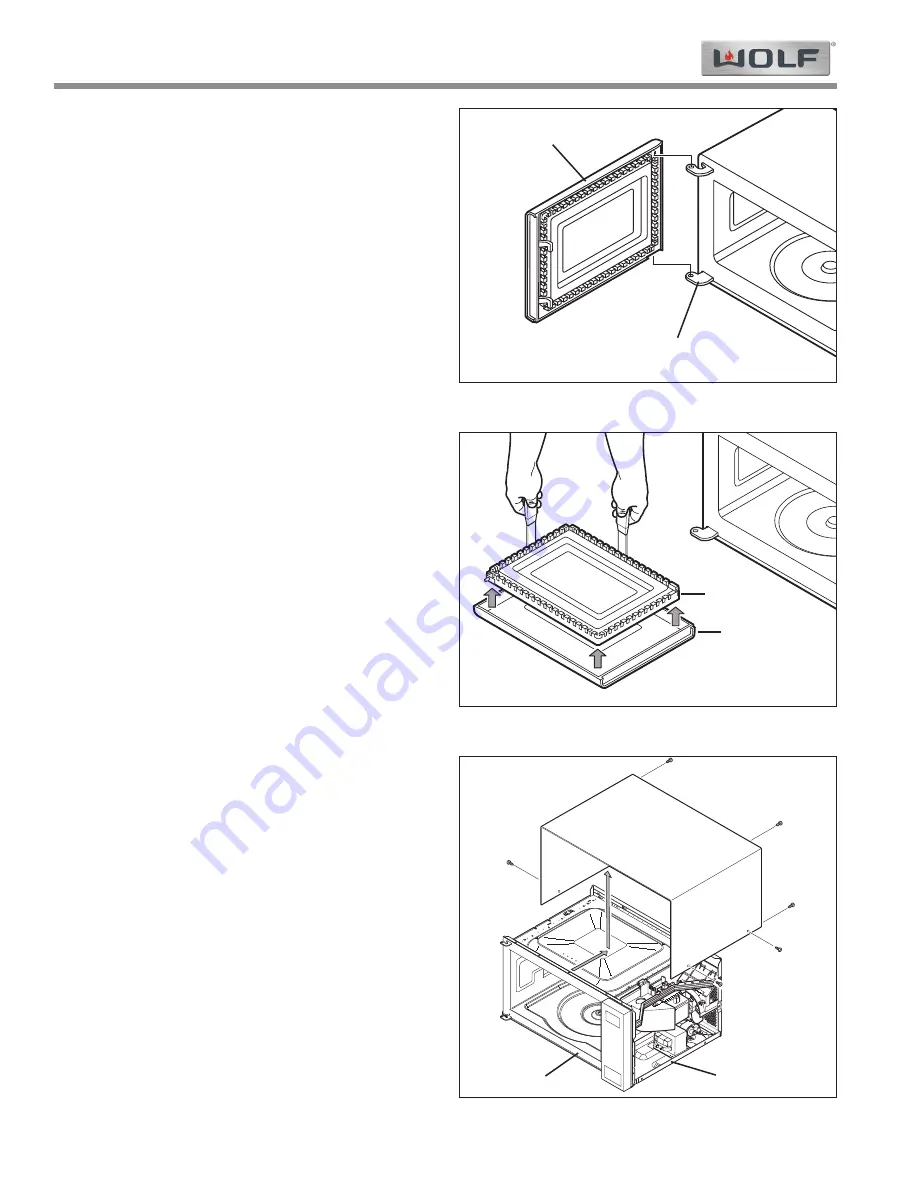
Door Assembly (with Door Panel and Latch Head)
The door hinge pins, which are part of the door frame,
fit down into holes in the oven hinges.
To remove the door assembly, the choke cover will first
need to be removed. With the choke cover removed,
lift the door assembly straight up until the hinge pins
clear the holes in the oven hinges, then pull the door
assembly away from the unit.
Door Panel and Door Frame
Part of the door panel is the slit choke. The slit choke
is a series of J-shaped metal flanges around the
perimeter of the door panel. Plastic tabs on the back-
side of the door frame fit into spaces between the J-
shaped metal flanges of the slit choke to secure the
door panel to the door frame.
To separate the door panel from the door frame, the
choke cover will first need to be removed. Then,
remove the door assembly from the oven and place the
door assembly face down on a solid surface. Now,
insert a putty knife between the door panel and the tabs
of the door frame while prying the door panel from the
frame.
NOTE:
It may be necessary to wedge several putty
knives between the door panel and the tabs of the door
frame in order to release the panel from the frame.
Cabinet Case
A channel under the front top and front sides of the cab-
inet case fits over the front flange of the oven cavity
frame. Tamperproof Torx-head screws and phillips-
head screws secure the cabinet case to the base plate
at the bottom of each side and to the oven cavity along
the top and sides at the rear.
Begin removing the cabinet case be extracting the
screws from the bottom of each side and along the top
and sides at the rear. Then, lift the back of the cabinet
case up slightly while sliding it toward the rear until the
front flange of the oven cavity frame disengages from
the channel in the cabinet case. Now, lift the cabinet
case straight up.
NOTE:
When replacing the cabinet case, the two
Tamperproof Torx-head screws must be reinstalled in
the same place they were extracted from.
Figure 4-4. Door Assembly Removal
Oven Hinge
Door Assy.
Figure 4-5. Door Panel & Frame Removal
Figure 4-6. Cabinet Case Removal
Door Panel
Door Frame
Cabinet Case
Base Plate
Oven Cavity


