
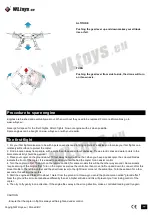

Steps to install the FPV set on your copter:
1. screw the antenna (1) on the FPV monitor (2)
2. Install the sun block cover (3) on the FPV monitor for better
visibility during sharp sunlight.
3. Mount the FPV monitor (2) on remote (5) by using the FPV
mount bracket (4) and screw set.
4. Turn the monitor on on the right side and then the camera
which is mounted to the copter. Make sure the Antenna of the
camera is extended and connect the camera to the FPV socket
of the copter.
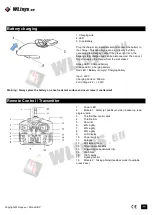
9. Elevator/aileron
10. Rudder trim
11. Aileron trim
12. Elevator trim
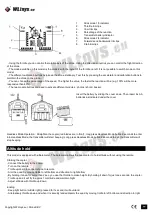
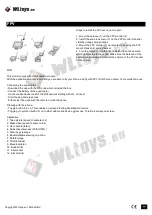
3. Go to media library
4. Adjust assertiveness (30/60/100%)
5. Steer by gyroscope
6. Eneble/disable steering on phone
7. Rotate image
WIFI
This model comes with a Wifi camera module.
Connecting the quadcopter:
- Download the app with the QR code which is inside the box
- Connect the battery of the quadcopter
- Start the app and press play
Steering with the phone:
- Toggle gyro symbol (button 5) on to steer with mobile device gyroscope. Throttle is always on screen
1. Take picture (saved to camera roll)
2. Make video (saved to camera roll)
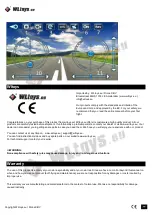
FPV
Application
- Either steer the quad with the remote or with the phone
8. Throttle/rudder
- Toggle button 6 to on. This enables on screen steering like standard remote
- On the mobile device look for the Wifi network starting with LG. Connect
With the aplication on android and iOS you are able to fly your drone, and fly with FPV (First Person View). Your smartphone can
Copyright WLtoys.eu | DroneX BV


