background image

5

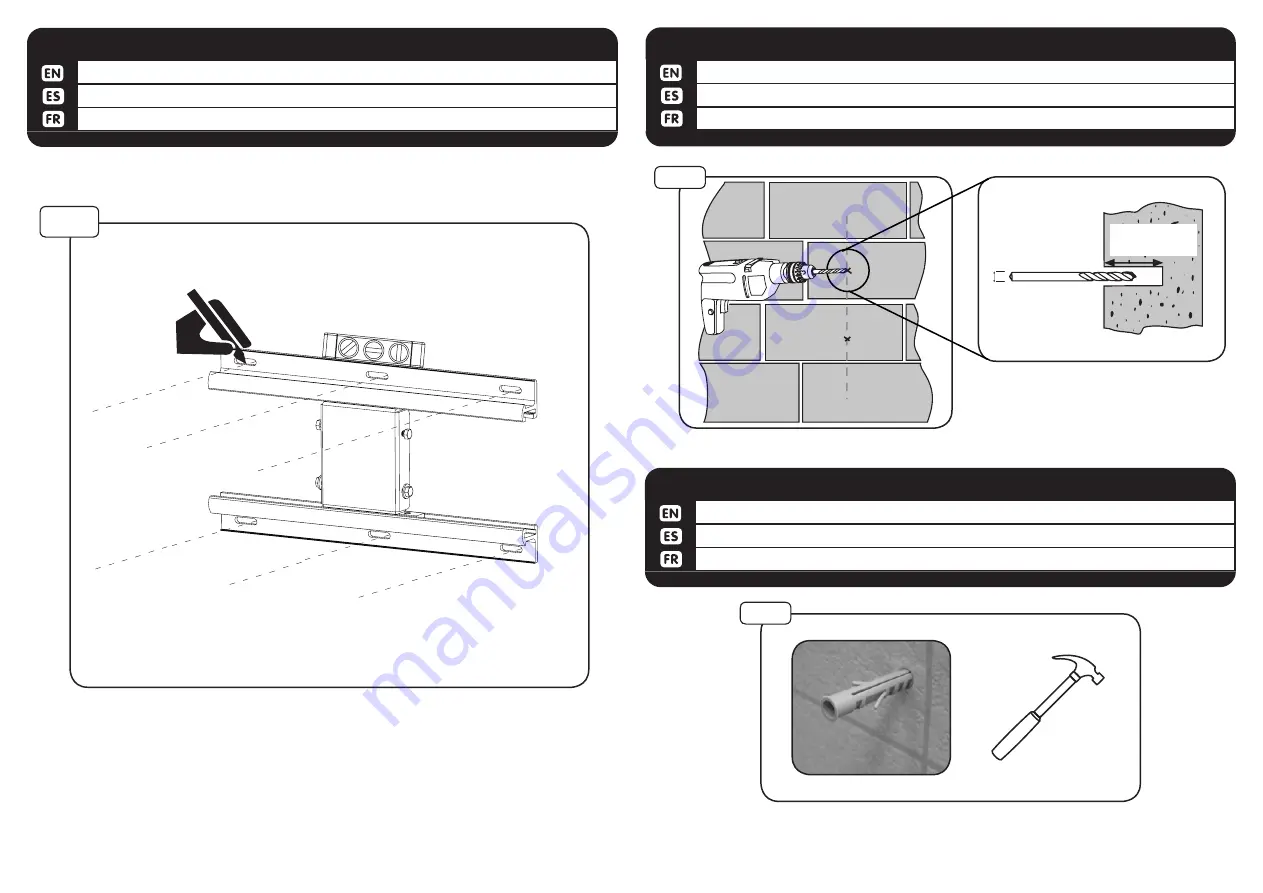
1b-2

drill depth

65mm / 2.5”

drill diameter

12mm

15/32”

1b-3

Insert (F) into both holes.  Use a hammer to tap in if necessary.

Insertar (F) en los agujeros. Utilice un martillo para golpear en caso de necesidad.

Insérer (F) dans les deux trous. Utilisez un marteau pour enfoncer dans le cas échéant.

1b-3

MASONRY BLOCK & CONCRETE INSTALLATION

F

Use 11 mm-7/16“ drill bit to drill 65mm - 2.5” holes on marks.

Utilice un 

11 mm-7/16“

 para perforar la madera poco 65mm - 2.5” agujeros.

Utilisez un 

11 mm-7/16“

 bits de forage pour percer 65mm - 2.5” po.

1b-2

MASONRY BLOCK & CONCRETE INSTALLATION

Level wall plate, then mark 6 hole locations.

Nivele la placa de pared, marque 6 agujeros.

Niveau de la plaque murale, puis marquez 6 trous.

MASONRY BLOCK & CONCRETE INSTALLATION

1b-1

1b-1

S

TP-

30S-55S-0002

Содержание STP-30S

Страница 1: ...and these directions or have doubts about the safety of the installation contact Wize Customer Service or call a qualified contractor Wize is not liable for damage or injury caused by incorrect mounti...

Страница 2: ...Herramientas necesarias Outils n cessaires C 1 Wood bit 6mm 7 32 Masonary bit 11mm 7 16 Socket wrench 13mm Hammer if necessary Madera poco 6mm 7 32 poco mamposter a 11 mm 7 16 Toma llave de 13 mm Ham...

Страница 3: ...n 1a 1 1a 2 Using level draw a vertical line at stud center Con un nivel trace una l nea vertical en el centro de postes de madera Utilisez un niveau et tracez une ligne verticale au centre du montant...

Страница 4: ...se la placa de pared C para marcar la ubicaci n de los agujeros en la l nea cen tral Utilisez la plaque murale C pour marquer l emplacement des trous dans la ligne m diane WOOD STUD INSTALLATION 1a 3...

Страница 5: ...ch ant 1b 3 MASONRY BLOCK CONCRETE INSTALLATION F Use 11 mm 7 16 drill bit to drill 65mm 2 5 holes on marks Utilice un 11 mm 7 16 para perforar la madera poco 65mm 2 5 agujeros Utilisez un 11 mm 7 16...

Страница 6: ...arandela U Fixer la plaque murale au mur avec la vis A et la rondelle U MASONRY INSTALL WALL PLATE 1b 4 Align part D to top and bottom wall plate and slide on Align parts X Y to ends of wall bracket...

Страница 7: ...xer en place Thread the projector plate on to threaded pipe Atornille el soporte a la tuber a Enrosque el soporte de fijaci n al tubo roscado 4 1 PROJECTOR PLATE INSTALLATION Allign arrow and tighten...

Страница 8: ...d seg n sea necesario para ajustar el adaptador para encajar el patr n de agujeros del proyector Desserrer les vis de s curit que n cessaire pour r gler adaptateur pour s adapter la con figuration de...

Страница 9: ...e ninguna otra garant a expresa o impl cita incluso las garant as de aptitud para un fin determinado o de comercializaci n Wize no se hace responsable de ning n tipo de da os causados por el uso de lo...

Отзывы: