page
1
5
IMPORTANT:
Check light function! Check all fixtures and bolts!
bike to bike clamp arm
L
10.
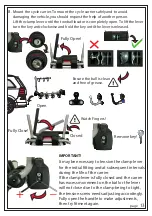
Positioning and fixing the cycles on the carrier.
As an extra safety precaution the cycle carrier is fitted with a belt
Q
P
Cycle 1:
Place the biggest/
heaviest
cycle on the carrier first, closest to the vehicle.
Position the wheels into the wheel locators with the fixing arm
attached at
one end to the cycle support frame and to the cycle frame at the other.
.
attached at one end
Secure the wheels in the wheel locators using the ratchet straps
Cycle 2:
Fits in the 2nd set of wheel locators with the fixing arm
S
to the cycle support frame and to the cycle frame at the other.
Secure the wheels in the wheel locators using the ratchet straps .
T
attached at one end
to the cycle support frame and to the cycle frame at the other.
Secure the wheels in the wheel locators using the ratchet straps .
T
Cycle 4:
Fits in the outer locators (this should be the smallest/lightest bike) using the
attached to the bike frame from the previous
T
.
bike frame.
Secure the wheels in the wheel locators using the ratchet straps
CHECK ALL FIXING ARMS ARE SECURE!
IMPORTANT:
for
anchoring all the cycles to the cycle support frame.
Ensure
this belt is used
and check it is mounted correctly by pulling on it.
Cycle 3:
Fits in the 3rd set of wheel locators with the fixing arm
R
T
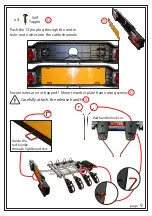
9. Attach the plug to the vehicle using the appropriate 7 or 13 pin electrical
connection. Ensure the plug is fully inserted and that the cable cannot touch
the floor. Fit the protective cap to the end not being used.
Please Note: If using the 7 pin connection
the reversing light will not function.
or


