3
5
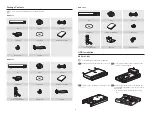
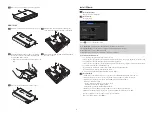
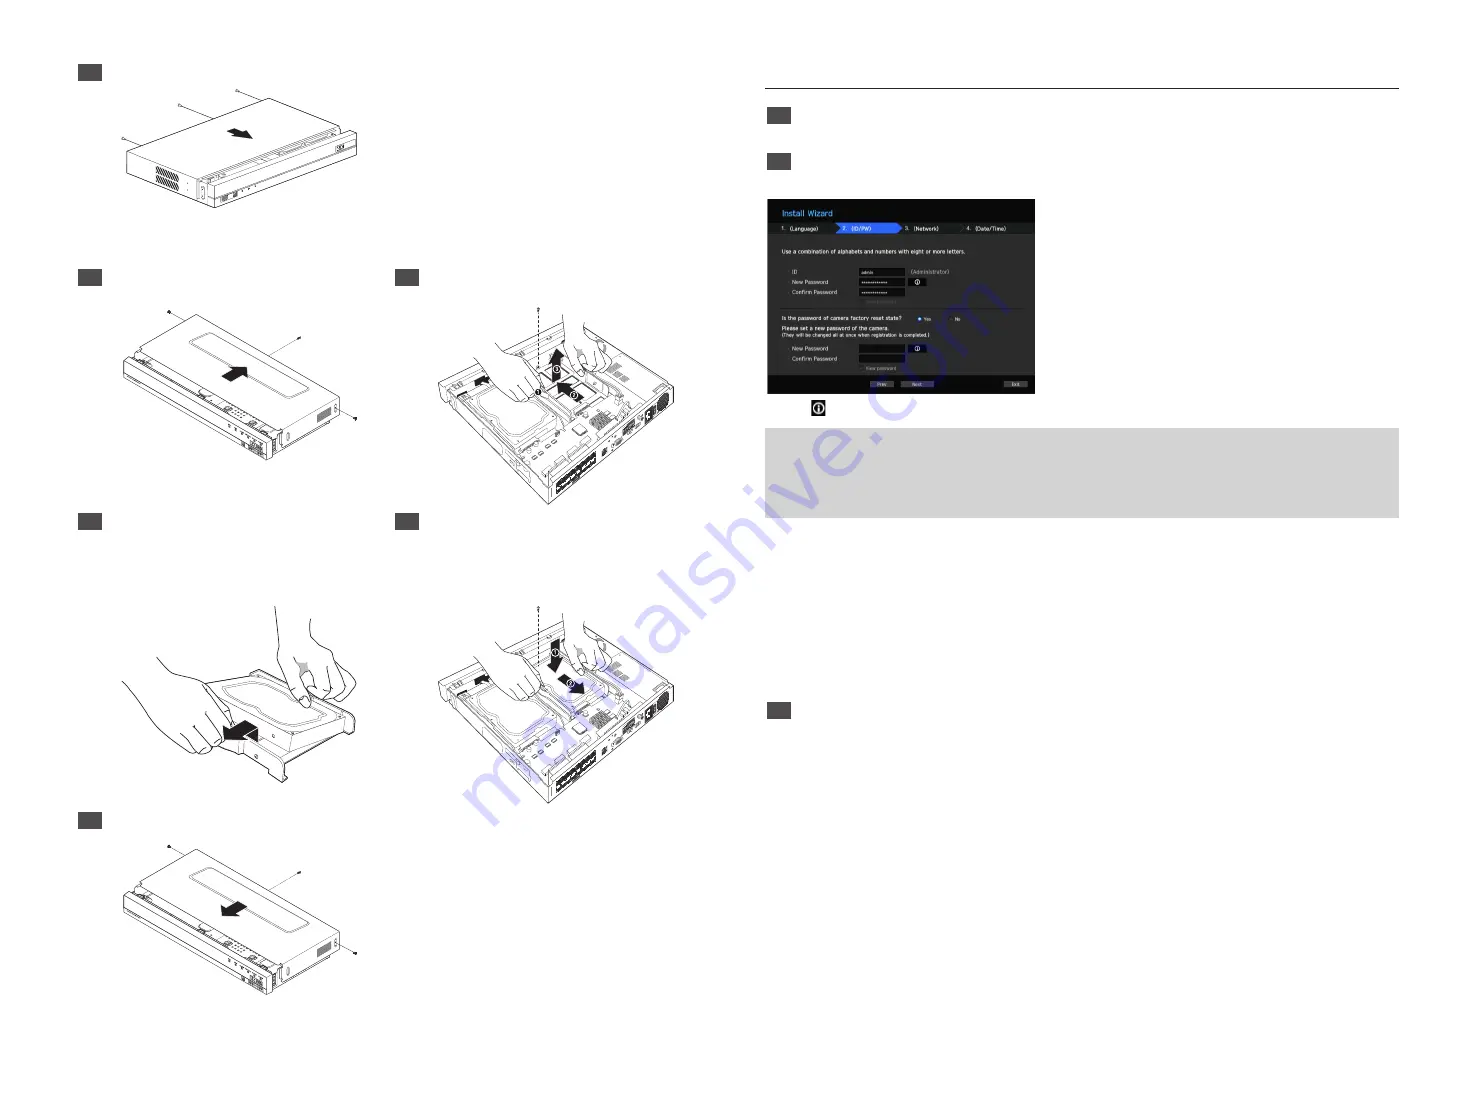
Close the cover, and tighten a setscrew in the back.
USB
REC
LAN
POWER
UHD
QRN-1610S
1
After unscrewing, push back and remove the cover.
2
Separate them by unscrewing the fixed bracket
screw and push it towards the arrow on the board.
AC 100
240~IN
VGA
O
UT
AUDIO
O
UT
HDMI
VIE
WE
R
USB
1
2
3
1
2
4
NC
NO
NO
CO
M
CO
M
ALARM
IN
G
G
G
ALARM
OUT
1
3
5
7
2
4
6
8
9
11
13
15
10
12
14
16
PoE CAME
RA
3
After aligning and inserting one side of the HDD to
the bracket, open the other side bracket wide and
insert the HDD between them.
`
Align a hole in the bracket with a screw hole in the HDD to fix
them.
4
Push the bracket with the HDD installed and tighten
the screws to fix it.
AC 100
240~IN
VGA
O
UT
AUDIO
O
UT
HDMI
VIE
WE
R
USB
1
2
3
1
2
4
NC
NO
NO
CO
M
CO
M
ALARM
IN
G
G
G
ALARM
OUT
1
3
5
7
2
4
6
8
9
11
13
15
10
12
14
16
PoE CAMER
A
5
Close the cover and tighten the screws to fix it.
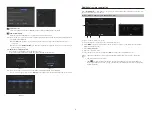
Install Wizard
1
Select the language
Select your preferred language.
2
Set Password
Set a password.
※
Click icon to see the password rule
8 ~ 9 characters
: All combination of English character, Digit, Special character
10 ~ 15 characters
: Two combination of English character, Digit, Special character
※
Not allowed to use same characters with ID
※
Not allowed to use 4 or more continuative or repeated characters
2-1. Setting Camera Password
You can change the password of the camera one step.
If the password of the camera is the default password set in the factory, enter a new password to change it. The
password will be changed, and the new password will be registered.
If the password of the camera is not the default password set in the factory, enter the current camera password.
The current camera password will be registered.
- New Password : Input a new password according to the password setting rules.
- Confirm Password : Input the new password again.
`
A camera password registered with ONVIF and RTSP cannot be changed.
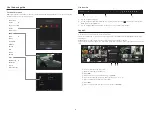
3
Set up Network
• DHCP server : If the DHCP server is set to enable, an IP is automatically assigned to the camera.
• Network 1 (Camera) : Connects to the camera and receives the video feed from the camera.
• Network 2 (All) : N etwork for a remote viewer (SSM, Smart Viewer, Webviewer)
• Network 1 / Network 2 Setup
- IP Type : Choose the network connection method.
- IP Address, Subnet Mask, Gateway, DNS
• Switch Mode : PnP Mode and Manual Setup Mode
If PnP Mode is selected, NVR will assign IP address to the IP cameras automatically.
If Manual Setup Mode is selected, you need to search and add the IP cameras to the NVR.
※
For more details on network settings, refer to the User manual.
► To use a simple intranet, click <
Next
>.


