


Digital Zoom
When in the Preview to view a full size picture, press the UP key to Zoom In and the DOWN key to Zoom Out
for enlarge a part of image to see more details when enjoying an image.
PAN on an Image
Once you have zoomed in an image, you can pan the lens to view everywhere in an enlarged picture by
pressing LEFT or RIGHT keys.
Deleting Photos
Press MENU key under the preview mode, then highlight Delete for Single or all photos to erase the target.
Press MENU key to confirm YES / NO deletion and repeatedly for deleting more.
Protect an Image or Video
During viewing an image or video which you would like to retain in the memory without wash-out by delete
processing, press MENU and highlight the LOCK option once. Then an icon with small lock on the left top
corner of this image to show it is protected. Repeat the same processing to unlock it. All of protected items will
not be deleted except you try to format the memory media.
Using a SD card
This unit does support upto 32G SDHC SD card to get a large storage capacity that allow more than ten
thousands of pictures to be saved. It will not works w/o a SD installed.
Note: Be sure the Main PW Switch is OFF before replacing a SD card in order to minimize a risk to
damage your SD card or loss data partially.
Important: If a SD card can not be inserted smoothly, you must retract it and check if the
direction of card is correct or not. Never force to push hardly with the card. Most of case with a
problem with card usage is found that caused by an improper insertion.
Warning:
Before using a blank new SD card, or ever been used in other cameras, it is suggested to format it
before usage. So, you need to download all of existing files to PC before using it in this camera. Otherwise,
camera will not save picture and video in the default directory properly.
Installing Driver for Upgrade FW in your camera
For some cases, you will be recommended to upgrade the Firmware for your camera to remain a good
performance future, so, a driver is required that you will be advised to install the driver once you enter to
upgrade mode. The driver will be available downloading from the dealer
’
s web-page or FTP-site firstly. After
installed the driver on your PC properly, connect an USB cable between PC and camera, and switch ON the
main PW. Then, press the PIC/Video and OK key at a time firstly, touch the CAM_PW to turn ON the camera.
Now you can see the camera small status light will be steady ON. You are ready to upgrade the new FW now.
Please refer the further instruction processing which will be provided from your dealer.
Downloading photos/ Movies to your computer
Press CAM-PW to turn the camera ON manually. Connect your computer and the camera with an USB cable.
-
A pop up to show the mobile hard disk which is assigned for the camera device. For example:
x:\DCIM\100MEDIA
-
Click into the proper directory to see all files inside.
Mounting Device
Before starting to put this camera in the field for scouting game, the
camera must be mounted in a certain place properly or on a tree
whose diameter will not be less than 6 inch (15cm) and located not
higher than 1M with your desired mounting method that following the
installation method as shown as below. The design is reserved to fit for
two ways of mounting.
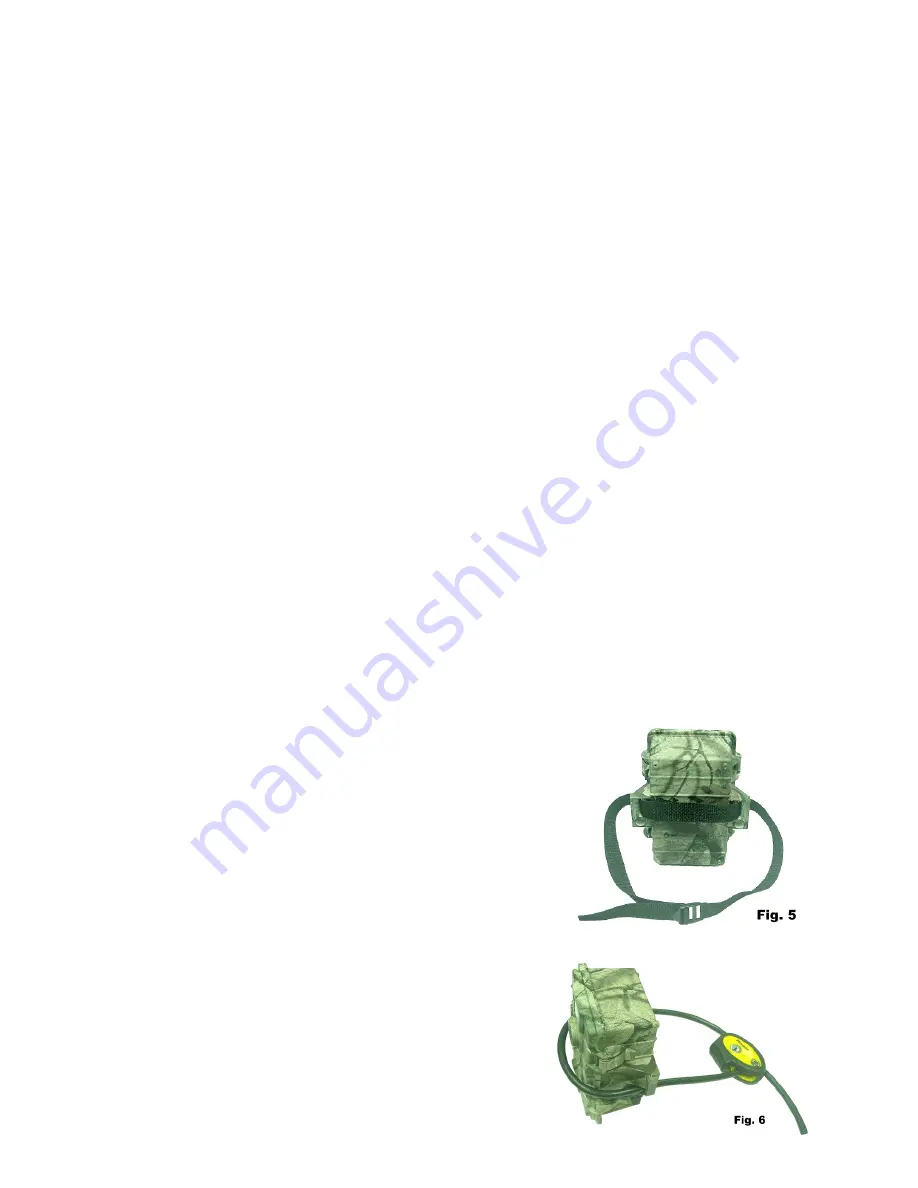
A Belt Mount
: This belt is attached in the packing. See the Fig.5
B Python Adjustable Locking Cable (Not including in this
packing):
See the Fig. 6
You can able to use a Python adjustable locking cable to provide
higher security level to your camera. The
“
Master Lock
”
brand is a good choice.
Metal Bracket and U Bar:
With more optional choices, a steel mounting bracket and U type
security bar kit can be choosed to provide much stronger security
ability. You can buy this accessory kit from your local dealer.
Solar Power Pack Connection:
If You have bought a Solar Power Pack (Example Model: SO6-
3W). Plug the Solar pack controller cable to the Solar PW port on
the camera unit. Touch the PW button on the controller to supply
Содержание AC-833S
Страница 11: ......


