


WiebeTech LLC
R T X - I R U s e r ’ s M a n u a l
- 29 -
NOTE: If the total capacity of your volume exceeds
2TB, it is likely you will encounter problems using that
volume on most current operating systems. If that is the
case, you will most likely wish to divide the capacity into
two or more volumes of less than 2TB each. Please
see the section labeled, "Working with volumes > 2TB."
The upgrade function allows you to upgrade the firmware of the RTX-IR. DO NOT USE THIS FUNCTION
WITHOUT SPECIFIC INSTRUCTION FROM WIEBETECH TECHNICAL SUPPORT. Doing so could
result in malfunction of your RTX-IR.
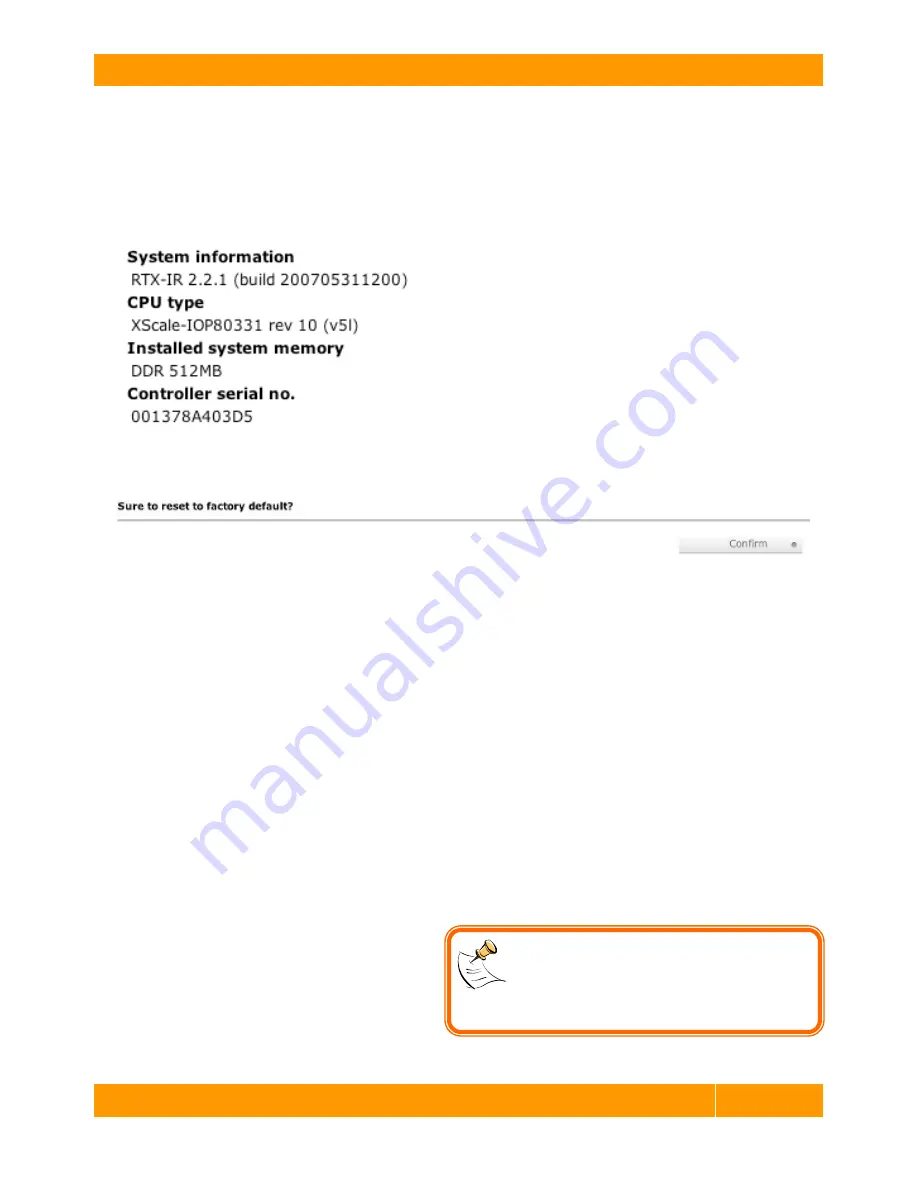
6.8.2 Info
Click on Info to display system information:
6.8.3 Reset to default
The Reset to Default option allows you to restore settings to the factory defaults. After clicking Reset to
Default, you will need to click Confirm to verify.
6.8.4 Config Import & Export
The config import & export function allows you to import or export a firmware config file. DO NOT USE
THIS FUNCTION WITHOUT SPECIFIC INSTRUCTION FROM WIEBETECH TECHNICAL SUPPORT.
6.8.5 Shutdown
The Shutdown feature allows you to shutdown or reboot the RTX-IR’s RAID controller and LCD controller.
Note: Choosing Shutdown will not shut down the physical components of the RTX-IR (fans, drives, power
supply). However, it will flush data from the cache to the physical drives, which is recommended before
physically shutting down using the power switch on the unit to prevent data corruption.
6.9 Quick Set-up of RAID
Follow these instructions to quickly create a RAID set using the GUI:
a.
Click on
Volume Config
, then
Volume Group
.
b.
Choose
Create
. Select the RAID level you would like to use (usually
RAID 5
). If there is an error
saying "Disk is not enough" you'll need to go to
Physical Disk
, select all of the disks you wish to include
in the Volume Group, and press the
Free Disk
button.
c.
Click on
Select PD
. Select all the hard drives
you wish to put into the new RAID.* Click
Next
to confirm your choice.
d.
Next, go to
User Data Volume
(UDV) and
choose
Create
. Select the capacity you want
for this UDV. (See note at right.)
e.
The rest of the details can be left at the
default setting. You’ll need to confirm several times.


