1
2
3
4
5
10
9
6
8
7
A
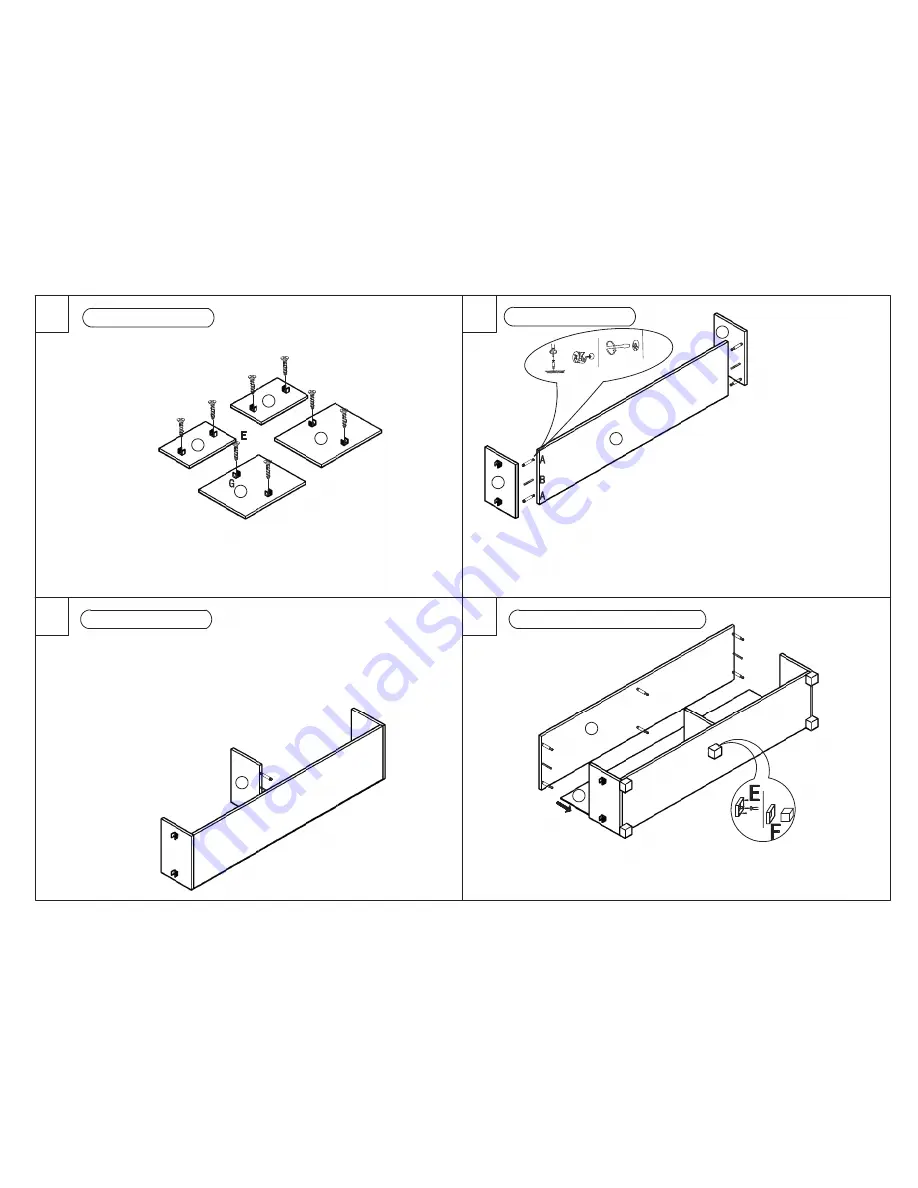
8x (E) 8x (G)
4x (A) 2x (B)
2x (A) 1x (B)
6x (A) 2x (B) 20x (E) 5x (F)
Страница 1: ...enough space around to allow assembly Assemble this ar cle on at and stable surface if possible choose carpet oor to avoid damages to property or unit alterna vely cover the hard surface oor with so...
Страница 2: ...1 2 3 4 4 5 10 9 4 5 3 6 8 7 A 8x E 8x G 4x A 2x B 2x A 1x B 6x A 2x B 20x E 5x F...
Страница 3: ...5 6 7 8 14 13 12 9 10 11 C1 E 1 2 A B A Front 4x A 2x B 2x C1 8x E 4x A 4x A 2x B 4x A 2x B...
Страница 4: ...9 10 11 12 15 18 19 16 E I I 17 C2 9x A x2 4x A 4x D 2x C2 4x E 1x H...
Страница 5: ...move the insulating strip from the battery compartment of the remote 1 2 3 4 5 6 LIGHT SET INSTALLATION Switch on the light stip using ON OFF buttons on the remote The off button on the remote control...
Страница 6: ...expose the product to high temperatures or moisture otherwise the product may be damaged Protect the product from sharp edges mechanical loads and hot surfaces Take care not to damage the cable or fit...