Whittier Wood 3506AFGACa Скачать руководство пользователя страница 2

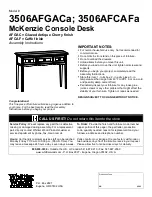
3506AFGACa; 3506AFCAFa McKenzie Console Desk 

Parts List


3506AFGACa_3506AFCAFa 

— Page 2 — 05/13 

Please identify the parts and check that quantities received match those on this list. 

If you need to replace a part, refer to the following letter and part name. 


Part 

Description 

Quantity 


Lift Top Assembly (attached) 


Fixed Top (attached) 


Case Assembly 


Left Side Assembly 


Right Side Assembly 


Door Assembly (attached) 


Hutch Drawer (inserted) 


Large Knob (attached) 


#8 x 1" Machine Screw (installed) 


Small Knob (attached) 


4x25mm Machine Screw (installed) 


Cam Housing (inserted) 


Cam Connector (inserted) 


Oval Hinge (attached) 


#8 x 5/8" Flat Head Screw (inserted) 


18 


Cut Away Hinge (attached) 


#8 x 1-3/16" Flat Head Screw (inserted) 


16 


Lid Support (attached) 


#5 x 5/8" Flat Head Screw (inserted) 


#6 x 5/8" Philtruss Screw 


12 

(6 inserted) 

#8 x 1" Pan Head Screw (inserted) 


#8 x 1-1/4" Pan Head Screw (inserted) 


(6 inserted) 

Содержание 3506AFGACa

Страница 1: ...ose glue joints screws or any other problem that might affect the stability of your furniture Tighten or repair as needed DESIGN SUBJECT TO CHANGE WITHOUT NOTICE CALL US FIRST Do not return this item to the store Service Policy We will replace any part that is defective missing or damaged during assembly For a replacement part directly contact Whittier Wood Products customer service department by ...

Страница 2: ...bly 1 E Right Side Assembly 1 G Door Assembly attached 1 H Hutch Drawer inserted 2 I Large Knob attached 3 J 8 x 1 Machine Screw installed 3 K Small Knob attached 2 L 4x25mm Machine Screw installed 2 M Cam Housing inserted 2 N Cam Connector inserted 2 O Oval Hinge attached 3 P 8 x 5 8 Flat Head Screw inserted 18 Q Cut Away Hinge attached 4 R 8 x 1 3 16 Flat Head Screw inserted 16 S Lid Support att...

Страница 3: ...ed 4 ZB 1 4 x 20mm Insert Nut inserted 4 ZC Small Adjustable Glide installed 4 ZD 1 4 x 13 5mm Insert Nut inserted 6 ZE 1 4 x 40mm Bolt 6 ZF Wood Dowel inserted 2 ZG Velvet Pad attached 4 ZH Hex Wrench 1 ZI Short Velvet Pad attached 2 ZJ 8 Washer inserted 2 ZK Tuscan Magnetic Lock Plate pre installed sets 2 ZL 6 x 5 8 Undercut Screw AB inserted 4 ...

Страница 4: ...Side Assembly D to the case assembly with two 1 4 x 40mm Bolts ZE Fasten securely Make sure the dowel is fully seated in place by tapping the Left Side Assembly D with a rubber mallet See Figure 1 2 Using the Hex Wrench ZH attach the Right Side Assembly E to the case assembly with two 1 4 x 40mm Bolts ZE Fasten securely Make sure the dowel is fully seated in place by tapping the Right Side Assembl...

Страница 5: ... front legs of the Left Side Assembly and the Right Side Assembly to the case assembly with two 8 x 1 1 4 Pan Head Screw Y See Figures 3 and 3a 4 Turn the table upright Open the Lift Top A and Door G Insert the remaining 1 4 x 40mm Bolts ZE into the Left and Right Side Assemblies See Figures 4 and 4a Fig 3 Y Y Fig 3a Y Y x 2 Fig 4 ZE x 2 Fig 4a A ZE A G ...

Страница 6: ...cure Back Panel to back legs of the Left Side Assembly and the Right Side Assembly with six 6x5 8 Philtruss Screws W See Figure 5 6 Insert the Hutch Drawers H Place the console at its final destination Rotate the Adjustable Glides ZC found at the bottom of each leg until the unit is level See Figure 6 Fig 6 ZC ZC Fig 5 W x 6 W ...

Отзывы: