background image

Содержание YMH1141XM

Страница 1: ...or visit our website at www whirlpool com ca nada ENSEMBLE FOUR A MICRO ONDES HOTTE Au Canada pour assistance composez le 1 800 461 5681 pour installation ou service le 1 800 807 6777 ou visitez notre site web h www whirlpool com ca nada Table of Contents Table des mati_res 2 Model ModUle YMH1141XM 8205955 4619 652 62342 ...

Страница 2: ...S 17 Specifications _lectriques 19 PII_CES ET CARACTI_RISTIOUES 20 Plateau rotatif 20 TABLEAU DE COMMANDE DU FOUR A MICRO ONDES 20 Affichage 20 Codes numeriques 21 Mise en marche 21 Annulation Arr_t 21 Ajouter une minute 21 Horloge 21 Signaux sonores 21 Minuterie 21 Verrouillage pour enfants 22 Ventilateur d evacuation 22 Lampe de la table de cuisson 22 Mode de demonstration 22 UTILISATION DU FOUR...

Страница 3: ...ction and in the pro vided Installation Instructions Install or locate the microwave oven only in accordance with the provided Installation Instructions Some products such as whole eggs in the shell and sealed containers for example closed glass jars are able to explode and should not be heated in the microwave oven Use the microwave oven only for its intended use as described in this manual Do no...

Страница 4: ...ther than manufacturer s recommended accessories in this oven when not in use Do not store anything directly on top of the microwave oven when the microwave oven is in operation When flaming foods under the hood turn the fan on Use care when cleaning the vent hood filter Corrosive cleaning agents such as lye based oven cleaners may damage the filter Do not cover or block any openings on the micro ...

Страница 5: ...ll an outlet near the microwave oven For a permanently connected appliance This appliance must be connected to a grounded metallic permanent wiring system or an equipment grounding conductor should be run with the circuit conductors and connected to the equipment grounding terminal or lead on the appliance SAVE THESE iNSTRUCTiONS I This device complies with Part 18 of the FCC Rules I PARTSANDFEATU...

Страница 6: ...ed in 1 minute increments up to 99 minutes by touching ADD MINUTE Touching ADD MINUTE during a cook cycle will add 1 minute of cook time at the current cook power Touching ADD MINUTE when the microwave oven is not in use or after a cook cycle has ended will start the microwave oven for 1 minute of cook time at 100 cook power When power is first supplied to the microwave oven a will blink on the di...

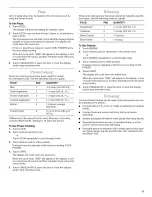
Страница 7: ...OFF pad once for HIGH twice for LOW or 3 times for OFR C OO_O t _o _ The cooktop light has 3 settings on night and off To Turn On Night Off Touch LIGHT ONoNIGHT OFF repeatedly to cycle through settings The Timer can be set in minutes and seconds up to 99 minutes 99 seconds and counts down the set time The Timer does not start or stop the microwave oven When the Timer is in use the microwave oven c...

Страница 8: ... supplied with cookware If a lid is not available wax paper paper towels or plastic wrap approved for microwave ovens may be used Plastic wrap should be turned back at one corner to provide an opening to vent steam Stirring and Turning Stirring and turning redistributes heat evenly to avoid overcooking the outer edges of food Stir from outside to center If possible turn food over from bottom to to...

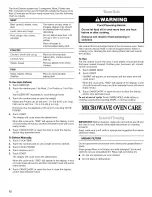
Страница 9: ...etal cookware and bakeware gold silver pewter non approved meat thermometers skewers twist ties foil liners such as sandwich wrappers staples and objects with gold or silver trim or a metallic glaze should not be used in the oven Many recipes for microwave cooking specify which cooking power to use by percent name or number For example 70 7 Medium High Use the following chart as a general guide fo...

Страница 10: ...conds Enter thenew cook time and touch START orwaitafewseconds forthecountdown toresume ToChange Cook Power Touch COOK POWER repeatedly to scroll through thecookpower levels Touch START Donotuseregular paper bags orglassware Poponly onepackage ofpopcorn atatime Follow manufacturer s instructions when using amicrowave popcorn popper Listen forpopping toslow to1popevery 1or2seconds then stop thecycl...

Страница 11: ...ing COOK POWER 4 Touch START The display will count down the cook time When the cycle ends END will appear in the display 4 end of cycle tones will sound and then reminder tones will sound every minute 5 Touch CANCELoOFF or open the door to clear the display and or stop reminder tones Times and cooking power have been preset for reheating specific food types Use the following chart as a guide FOOD...

Страница 12: ...d 3 5 Touch START The display will count down the defrost time When the cycle ends END will appear in the display 4 end of cycle tones will sound and then reminder tones will sound every minute 6 Touch CANCEL OFF or open the door to clear the display and or stop reminder tones Food Poisoning Hazard Do not let food sit in oven more than one hour before or after cooking Doing so can result in food p...

Страница 13: ...st fan without the grease filters in place The charcoal filters cannot be washed and should be replaced every 6 to 12 months See General Cleaning for cleaning instructions See Assistance or Service to reorder filters To Remove and Replace Grease Filters 1 Unplug microwave oven or disconnect power 2 Remove each grease filter by sliding filter to the end Pull tab down until the filter drops out To R...

Страница 14: ...nside of the door Remove spacer then firmly close door is the electronic oven control set correctly See Microwave Oven Control section On some models is the Child Lock set See Child Lock section Is the magnetron working properly Try to heat 1 cup 250 mL of cold water for 2 minutes at 100 cooking power If water does not heat call for service See Assistance or Service section Oven makes humming nois...

Страница 15: ...check Troubleshooting It may save you the cost of a service call If you still need help follow the instructions below When calling please know the purchase date and the complete model and serial number of your appliance This information will help us to better respond to your request If you need replacement parts If you need to order replacement parts we recommend that you only use FSP replacement ...

Страница 16: ...alled in an inaccessible location or is not installed in accordance with published installation instructions DISCLAIMER OF IMPLIED WARRANTIES LIMITATION OF REMEDIES CUSTOMER S SOLE AND EXCLUSIVE REMEDY UNDER THIS LIMITED WARRANTY SHALL BE PRODUCT REPAIR AS PROVIDED HEREIN IMPLIED WARRANTIES INCLUDING WARRANTIES OF MERCHANTABILITY OR FITNESS FOR A PARTICULAR PURPOSE ARE LIMITED TO ONE YEAR OR THE S...

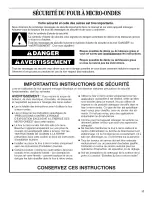
Страница 17: ...ES MICRO ONDES dans cette section Le four b micro ondes dolt 6tre relie b la terre Brancher I appareil uniquement sur une prise de courant convenablement reli6e b la terre Voir les INSTRUCTIONS DE LIAISON _ LA TERRE present6es dans cette section et dans les instructions d installation fournies Installer ou placer le four A micro ondes uniquement selon les instructions d installation fournies Certa...

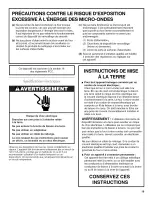
Страница 18: ...ques Destin6 b I utilisation au dessus des cuisinieres avec une largeur maximale de 36 po 91 44 cm Nettoyer souvent les hottes de ventilation II ne faut pas laisser la graisse s accumuler sur la hotte ou le filtre CONSERVEZ Les aliments trop volumineux ou des ustensiles en m6tal de grande taille ne doivent pas 6tre ins6r6s dans le four b micro ondes car ils peuvent creer un incendie ou un risque d...

Страница 19: ...uement par un circuit de 120 V CA 60 Hz prot_g6 par un fusible de 15 ou 20 A on recommande I utilisation d un fusible temporise ou un disjoncteur On recommande que cet appareil soit alimente par un circuit independant INSTRUCTIONS DE MISE LA TERRE Pour tout appareil m_nager connect_ par un cordon de courant _lectrique II faut que le four A micro ondes soit relie A la terre En cas de court circuit ...

Страница 20: ... pieces Installation 1 Oter le ruban adhesif de I axe 2 Placer le support sur le fond de la cavite du four 3 Placer le plateau rotatif sur le support Ins er les protuberances arrondies au centre du dessous du plateau rotatif entre les trois rayons de I axe Les roulettes sur le support devraient se Ioger a I interieur du pourtour crante du dessous du plateau rotatif TABLEAU DECOlVIMANDE DU FOURAMIC...

Страница 21: ...aux sonores indiquent ce qui suit Un signal sonora Entree valide signal sonore court Fin du compte rebours de la minuterie long signal sonore sur certains modeles Deux signaux sonores Fin de I etape pour la cuisson par etapes Signaux de rappel emis a intervalles de 1 minute apres le signal sonore de fin de programme Verrouillage pour enfants active Entree ou sortie d une caracteristique dissimulee...

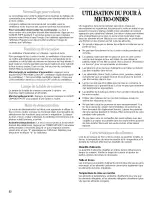
Страница 22: ...et les ustensiles de cuisson appropries pour atteindre I aliment Les micro ondes sont attirees vers et absorbees par le gras le sucre et les molecules d eau dans les aliments et font deplacer ces molecules en produisant une friction et une chaleur qui fait cuire les aliments Ne jamais s appuyer ou laisser les enfants se balancer sur la porte du four Ne pas faire fonctionner le four a micro ondes p...

Страница 23: ...oulet et les queues de poisson Voir en premier Papier d aluminium et metal Temps de repos Les aliments continueront a cuire par la conduction naturelle de la chaleur m_me Iorsque le programme de micro ondes se termine La dur_e de repos depend du volume et de la densite de I aliment Les ustensiles de cuisson et la vaisselle doivent pouvoir tenir sur le plateau rotatif Toujours utiliser des mitaines...

Страница 24: ...four a micro ondes precisent quelle puissance de chauffage dolt re utilisee en indiquant le p ourcentage le nom ou le chiffre Par exemple 70 7 Moyen Elev Utiliser le tableau suivant comme guide gen al pour la puissance de chauffage sugg ee pour des aliments specifiques POURCEN CHIFFRE UTILISATION TAGE NOM 100 Eleve 10 Chauffage rapide d aliments sans reglage minute et aliments avec haute teneur en...

Страница 25: ...s eclate la premiere fois Utiliser des sacs de malts a eclater frais pour des resultats optimaux Les resultats de cuisson peuvent varier en fonction de la marque et de la teneur en matieres grasses La duree d eclatement a ete prereglee en fonction des emballages commerciaux de md_s a eclater pour micro ondes Utilisation de la fonction POPCORN mai s _clat_ 1 Appuyer sur POPCORN L affichage indiquer...

Страница 26: ...afficheur procede a un compte a rebours de la duree de cuisson A la fin du programme END fin apparait sur I afficheur 4 signaux de fin de programme sont emis suivis de signaux de rappel a intervalles de 1 minute Appuyer sur CANCEL OFF annulation arr_t ou ouvrir la porte pour effacer I affichage et ou arr_ter les signaux de rappel Les durees et puissances de cuisson ont ete pr_reglees pour le recha...

Страница 27: ... ou ouvrir la porte pour effacer I affichage et ou arr_ter les signaux de rappel D6cong_lation manuelle 1 Appuyer sur COOK TIME duree de cuisson 2 Appuyer sur les touches numeriques pour r_gler une duree de decongelation 3 Appuyer sur COOK POWER puissance de cuisson 4 Appuyer sur la touche numerique 3 5 Appuyer sur START mise en marche L afficheur procede a un compte a rebours de la duree de decon...

Страница 28: ...vinaigre Faire chauffer une tasse 250 mL d eau avec une cuilleree soupe 15 mL de jus de citron ou de vinaigre pendant 2 a 5 minutes dans le four EXTERIEUR DE LA PORTE DU FOUR Un nettoyant h vitre et des essuie tout ou des tampons recurer en plastique non abrasifs Appliquer le nettoyant a vitre sur un linge doux ou une eponge et non pas directement sur le tableau PLATEAU ROTATIF Remettre le plateau...

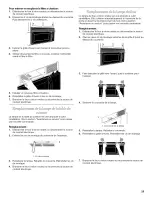
Страница 29: ...nt et tirer le filtre 3 Faire basculer la grille vers I avant puis la soulever pour I enlever 5 Installer un nouveau filtre a charbon 6 Reinstaller la grille d event et les vis de montage 7 Brancher le four a micro ondes ou reconnecter la source de courant electrique La lampe de la table de cuisson est une ampoule a culot candelabre Voir la section Assistance ou service pour passer une nouvelle co...

Страница 30: ... est normal et depend de la rotation du moteur au debut du programme Uaffichage indique des messages L affichage indique t il II y a eu une panne de courant ou I horloge a ete eteinte Voir la section Affichage pour effacer I affichage Voir la section Horloge pour regler de nouveau I horloge ou la mettre en marche L affichage indique t il une lettre suivie d un chiffre Voir la section Affichage pou...

Страница 31: ...nteraction avec la clientele de Whirlpool Canada Inc au 1 800 461 5681 Lundi a vendredi 8 h 18 h HNE Samedi 8 h 30 16 h 30 HNE Nos consultants vous renseigneront sur les sujets suivants Caracteristiques et specifications sur toute notre gamme d appareils _lectromenagers Rd_rences aux marchands Iocaux Pour pi_ces accessoires et service au Canada Composer le 1 800 807 6777 Les techniciens de service...

Страница 32: ...GARANTIE LIMITg E CONSISTE EN LA REPARATION PREVUE CI DESSUS LES GARANTIES IMPLICITES Y COMPRIS LES GARANTIES APPLICABLES DE QUALITE MARCHANDE ET D APTITUDE _ UN USAGE PARTICULIER SONT LIMITC ES A UN AN OU A LA PLUS COURTE PC RIODE AUTORISC E PAR LA LOI WHIRLPOOL N ASSUME AUCUNE RESPONSABILITE POUR LES DOMMAGES FORTUITS OU INDIRECTS CERTAINES JURIDICTIONS NE PERMETTENT PAS L EXCLUSION OU LA LIMITA...

Отзывы: